rConfig - Devices Documentation
There are 5 ways to add/edit a device in rConfig.
- Manually via the devices add button on the devices page.
- Using the Clone button to clone an existing device on the devices page.
- Using the REST API to add a new device. more on this in the API section.
- Using the import feature to import devices from a CSV file. More on this in the import section.
- Using an integration to add devices from a third party system. More on this in the integrations section.
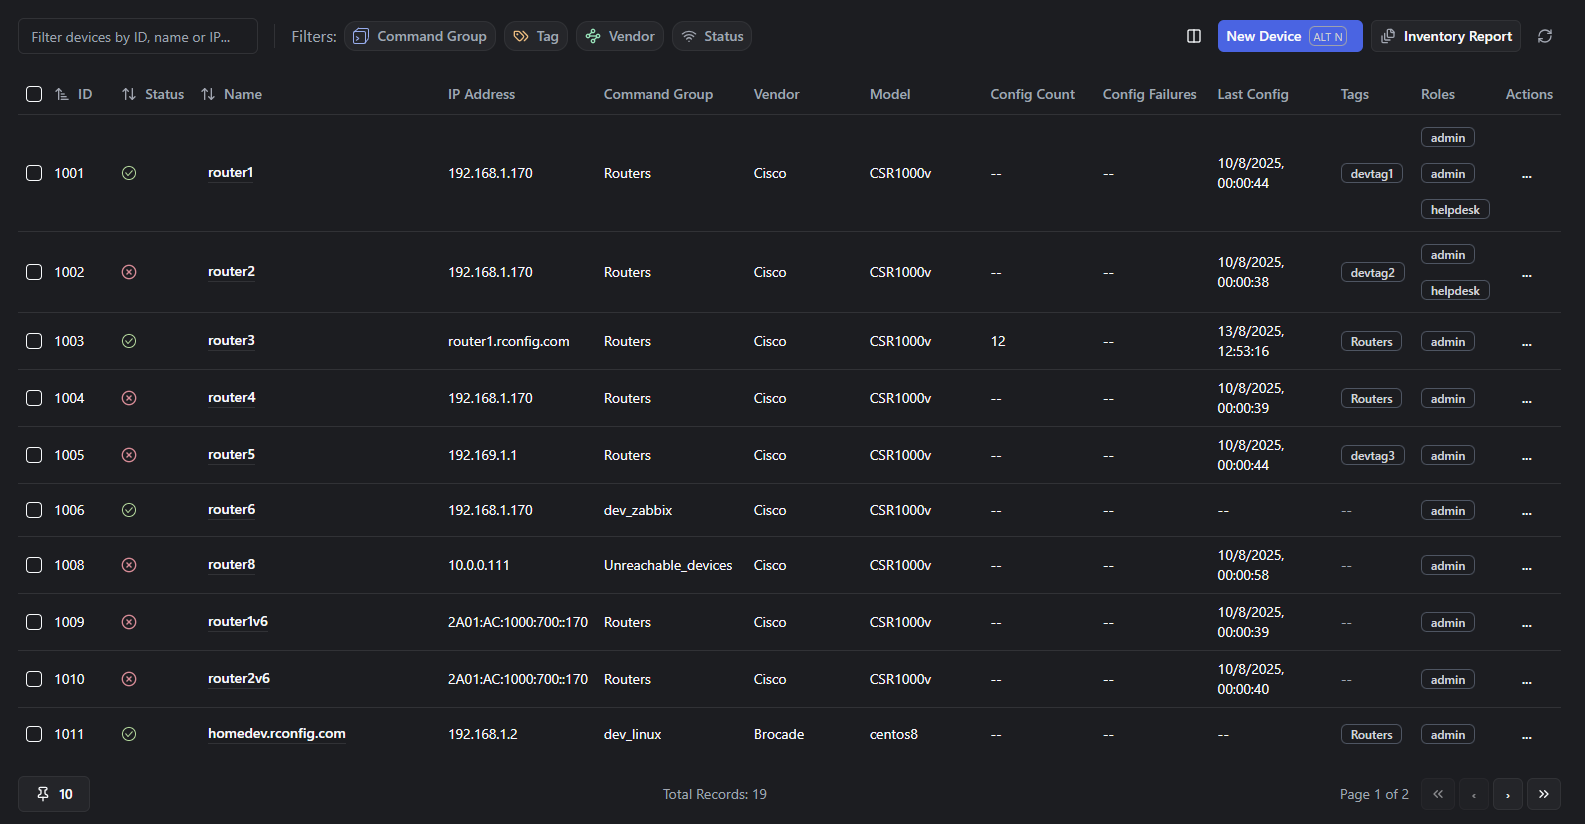
On the devices table, there are a number of functions immediately available. From the dropdown menu on the right of each device row, you can perform the following actions:
 Device Table
- Roles - Manage role-based access to devices - see section below.
- Edit - Opens modal with all device settings for editing
- Clone - Launches a new modal with details pre-populated similar to selected device excluding IP and Name
- Disable - This will disable the device from being used in any scheduled tasks or manual downloads
- Delete - Obviously be careful with this, but you are prompted to confirm deletion before the device is removed
Device Prerequisites
Section titled “Device Prerequisites”Before adding a device, you should have the following items designed and setup in rConfig.
- Command Groups - Command Groups are used to group devices together. For example, you may have a category for ‘Core Switches’ and another for ‘Access Switches’. You can then use these Command Groups to filter devices in the devices table. Devices belong to one category, only.
- Commands - Commands are used to execute commands on devices. For example, you may have a command to ‘show version’ or ‘show ip interface brief’. You can then use these commands to execute commands on devices. Commands belong to one or more Command Groups.
- Vendors - Vendors are useful but arbitrary. For example, you may have a vendor for ‘Cisco’ and another for ‘Juniper’. You can then use these vendors to filter devices in the devices table. Devices belong to one vendor, only.
- Templates - Connection templates are used to connect to devices. For example, you may have a template for ‘Cisco SSH’ and another for ‘Juniper SSH’. You can then use these templates to connect to devices. Devices belong to one template, only.
- Tags - Tags are used to group devices together. For example, you may have a tag for ‘Core’ and another for ‘Access’. You can then use these tags to filter devices in the devices table. Devices belong to one or more tags.
Device Table & Main View
Section titled “Device Table & Main View”You can search, filter and edit table columns in the toolbar of the device table. Note that the table is paginated. And there are specific actions available to filter for up/down device status.
 Device Table
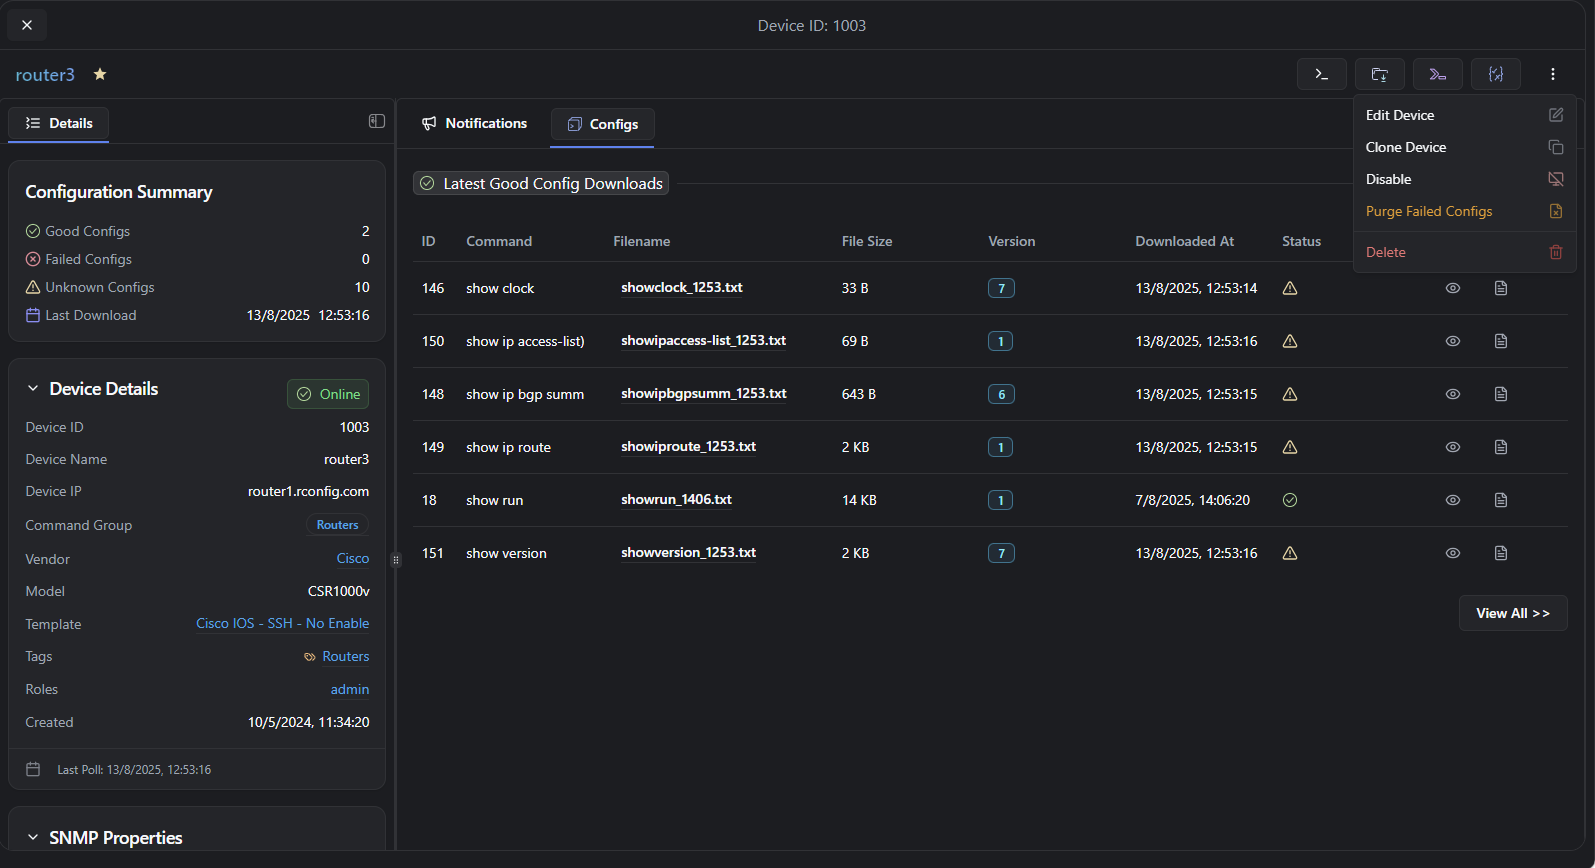
From the device main page, you can view configurations, initiate a download and view device logs, clone the device and copy the debug command to the clipboard.
 Device Main View
Adding/Editing a Device
Section titled “Adding/Editing a Device”Device Fields
Section titled “Device Fields”Let’s get into some detail on the Device Add/Edit forms.
 Device Form
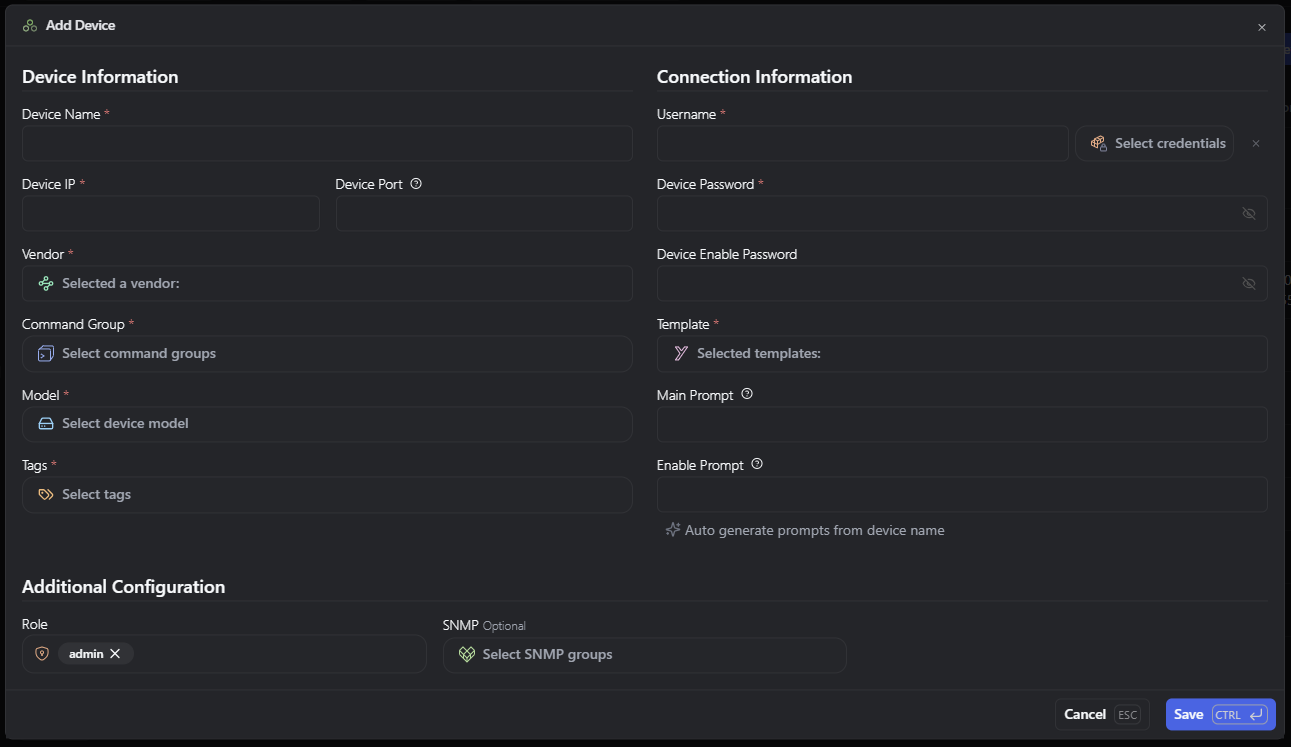
Required fields are denoted on the form with a red asterisk.
| Field | Notes |
|---|---|
| Device Name | Name field. Alphanumeric characters with underscores, dots and dashes are allowed. Spaces are not allowed - Min 3 characters |
| Device IP | You can specify a valid IP Address |
| Device Port | You can override the port as specific in the connection template manually by entering a numeric value here |
| Vendor | As configured in the Vendor section |
| Command Group | As configured in the Command Group section |
| Model | Can choose from existing, or just enter new string |
| Tags | Multiselect as configured in the Tags section |
| Role | Choose which roles can view/manage device |
| SNMP | Add device to SNMP polling group |
| Username | Type manually (option to select from set of credentials when clicking dropdown - this will immediately change the inputted credentials on the form) |
| Password | Type manually or auto populated when previous is selected |
| Enable Password | Optional if required or auto populated when previous is selected |
| Template | Must choose, please see templates help document for more information |
| Main Prompt | Preferred to be full specific prompt, but regex/ partial strings allowed. Please see the device prompts doc for more information |
| Enable Prompt | Preferred to be full specific prompt, but regex/ partial strings allowed. Please see the device prompts doc for more information |
Role-Based Access to Devices
Section titled “Role-Based Access to Devices”There is a feature to allow role-based access to devices. This feature is enabled by default, and the system admin role has access to all devices. This is hardcoded and cannot be changed. To add or edit roles to devices, simply edit the device in question, and change the role in the Role section.
 Device RBAC
When a user is restricted to a role, they will only see devices that have that role assigned to them. If a device has no role assigned to it, then the user will not see that device in the devices table. This includes related views such as Command Groups (previously known as Categories), commands, templates, and vendors.
Device RBAC Hierarchy
Section titled “Device RBAC Hierarchy”The device RBAC feature is hierarchical, a role can be assigned to a device or a tag. Command Groups (previously known as Categories) do not play a part in the hierarchy, as their purpose in the rConfig application is due to be rebranded. The hierarchy is as follows:
Tag - If a role is assigned to a tag, then all devices with that tag will inherit that role. Device - If a role is assigned to a device, then that device will have that role.
Troubleshooting Device RBAC
Section titled “Troubleshooting Device RBAC”If any issues are encountered with the device RBAC feature, you can run the following command to update the device roles on all devices to ensure they at least have admin roles attached to them.
php artisan rconfig:update-device-roles