rConfig - Settings
The settings section offers a streamlined interface for configuring system settings. The following sections provide detailed explanations for the options available in each tab.
System Settings
Banner
Some organizations have a legal or other requirement to add a warning banner to notify users of restrictions etc.. before they login. rConfig allows you to apply a standard banner to the login page. This is a free text field and should be kept brief if possible to avoid over consuming space on the login page.
System Timezone
Set the system timezone from this setting. This is a different configurable setting from the OS level timezone configuration and is required for rConfig to function correctly. The default is UTC, and you are recommended to change this depending on your services location. There are sometimes issues, saving the timezone, as it needs to be saved to the .env file directly on the disk. If you run into issues saving the timezone, please review the support KB article here.
The locale menu allows your to change your date and time style preferences. This is a new feature in V7, and is configurable on a per user basis. Please see the User section for more information.
SMTP Settings
Configuring mail settings in rConfig is very important. You will get notifications of events, and issues via email from rConfig, but this will not work unless mail is configured correctly.
Please contact your mail administrator if you are unsure of your organizations mail/ SMTP or relay settings. All fields are required. Authentication fields are only required if the Authentication button is set to on.
Device Credentials
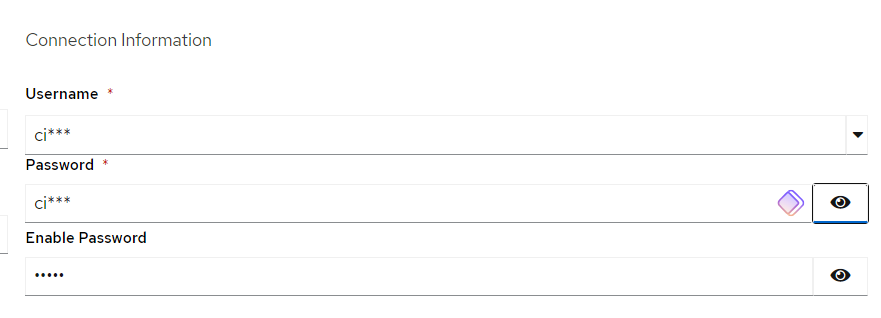
The Device Credentials tab allows you to set a default Username & Password that maybe used when manually adding devices later to conveniently input a standard Username & Password that you have use in your organization. All fields are optional.
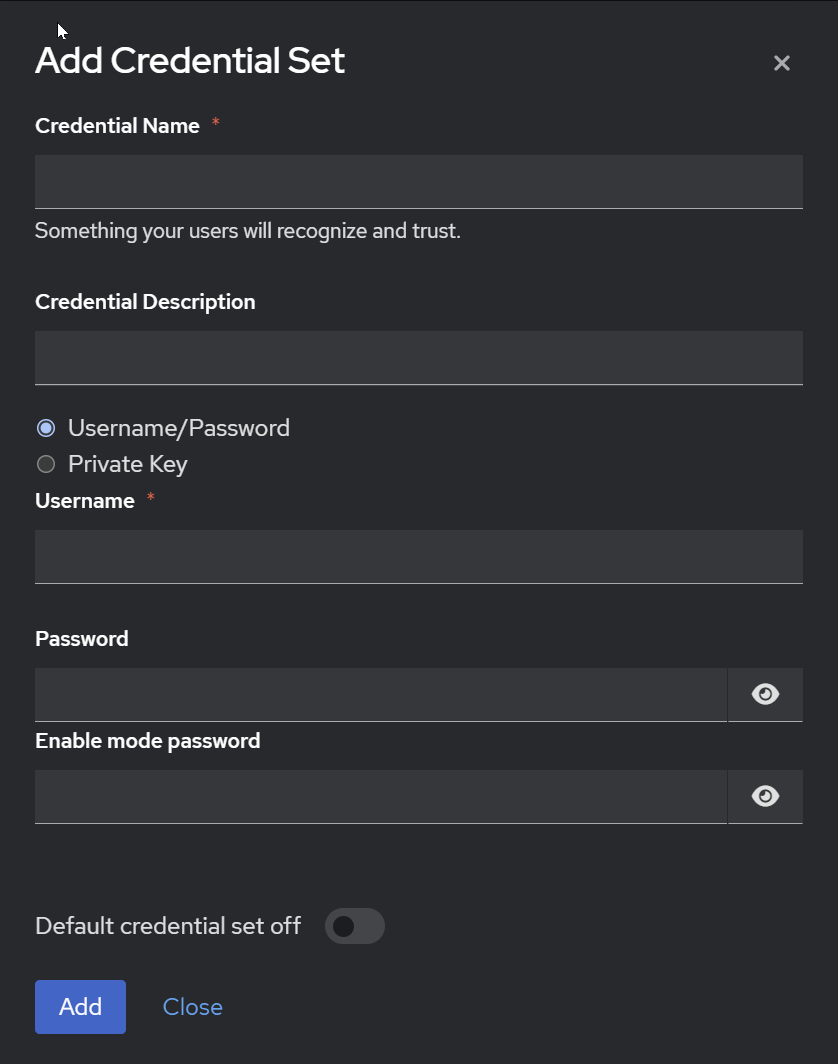
Credential Sets (Username/ Password)
A few important things to note when create credential sets:
- When selecting a credential set, the Username and Password fields will be populated with the values from the selected credential set from the Devices form.
- Only one credential set can be selected as Default. This is to avoid confusion when selecting a credential set to use as a default for your teams. If you want to use a different credential set as default, you will need to unselect the current default and then select the new default.
- The Credential Set Name is used to identify the credential set in the Devices form.
- You can update all devices creds in bulk by editing a credential set, and clicking the
Rotate device credentialsbutton. This will update all devices with the new credentials. Be careful with this option as it will immediately update all devices with this credential set with the new credentials. - You can also update device credentials from a credential set using the rConfig application Rest API. Please see the REST API Access section for more information.
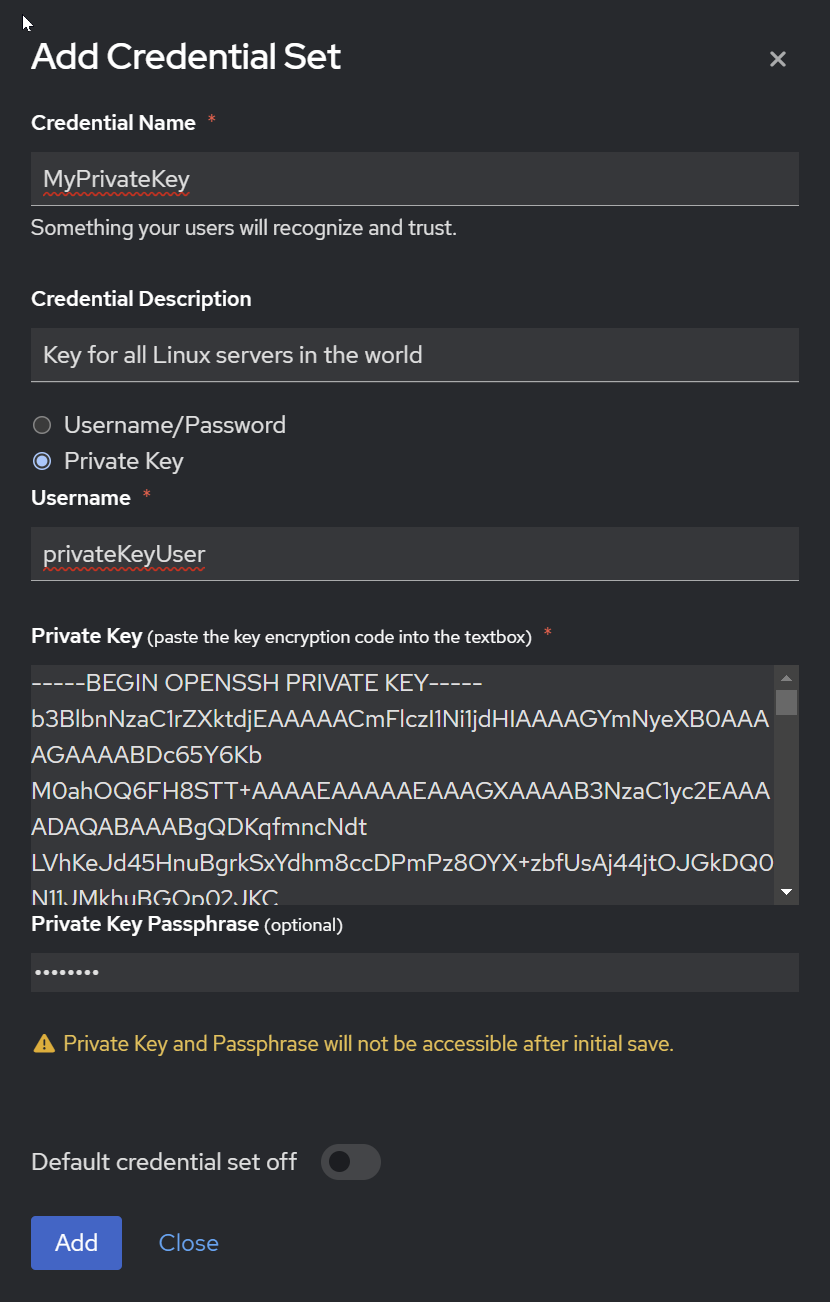
Credential Sets (SSH Key)
A few important things to note when create credential sets:
- A username is required when using a private SSH key. This is the username that the key is associated with.
- A passphrase is optional when using a private SSH key. This is the passphrase that is associated with the key.
- The passphrase and key will be stored in the database encrypted.
- The passphrase and key will not be retrievable from the database. If you lose the passphrase or key, you will need to re-input the passphrase and key via the form.
- When using SSH keys, they can only be configured in Device Credentials, meaning you must select a credential set for devices authentication that need to use private key authentication.
Mask Device Credentials
As of V7.0.7, you can now mask device credentials in the Device Edit page. To do so, you have to edit the .env file directly and clear the application cache. See below.
cd /var/www/html/rconfig7/current && vim .env# Add or edit the line belowMASK_DEVICE_CREDENTIALS=truecd /var/www/html/rconfig7/current && php artisan rconfig:clear-allThe masked credentials will be displayed in the Device Edit page.
TFTP Server
You can enable or disable the TFTP server from here. More information on the TFTP server can be found in the TFTP Serversection.
Logging & Debugging
Logging & Debugging Options
Logging & Debugging Options gives you the command line code to enable or disable debugging and logging. This is useful for troubleshooting and debugging issues with rConfig. The default is to have debugging and logging off. You can enable these options by running the commands in the terminal. If you get 500 errors, or support requests, you may be asked to enable these options to help troubleshoot the issue.
Security
Logging & Debugging Options
A notice to inform that ‘Password encryption is enabled for all passwords’ is present, and this is not configurable.
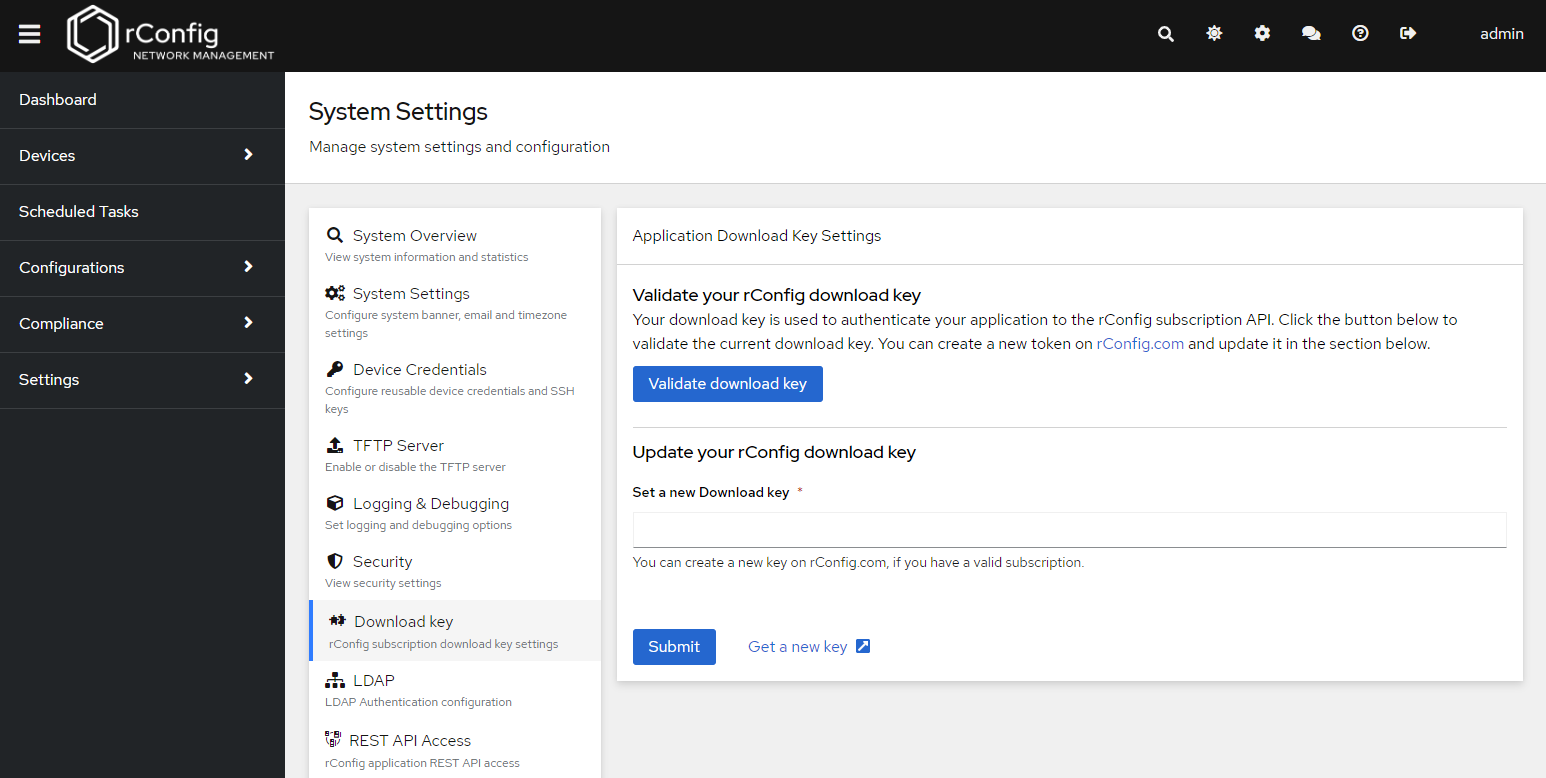
Download Key
Download Key Setting (previously API Token)
You will know, having purchased rConfig, that you must acquire an Download Key from the rConfig.com portal to install or update rConfig. The Download Key settings page allows you to validate your currently configured token, and change it if needed. Some notes on this;
- Your Download Key is tied to your account. Any misuse of the token will be recorded and acted on.
- You may validate your current token using the
Validate Current Tokenbutton. One validated per screenshot below, you may use this token to install or update rConfig. - From time to time you may need to change your token in the rConfig portal. During your subscription period you may do this as often as needed. But, you must update this form with the new token to update the current rConfig installation.
LDAP
As of V6 you may configure rConfig to use LDAP Authentication. Before we get into configuration, here are somethings to know about this LDAP implementation.
- Fallback to Local auth is the default if LDAP does not work or the LDAP servers are unreachable.
- Any users that are authorized and authentication via LDAP - their credentials are stored in rConfigs database encrypted, to allow local fallback.
- For the immediate login after an LDAP password change, both the old and new passwords will work until the new password is entered in rConfig login and authenticated correctly.
- Only AD LDAP is supported as of Version 6.0. OpenLDAP may come in the future.
- You should consult your AD administrator for assistance in configuring and testing LDAP settings.
- As of 6.8, only Active Directory, and FreeIPA is supported. OpenLDAP support is coming in a future version.
| Field | Notes |
|---|---|
| LDAP Enabled | Enable or disable LDAP Authentication - Off by default |
| LDAP Server | Hostname/ IP of LDAP Server - Multiple hosts can be added separated by commas. Hosts will be checked in order. |
| LDAP Port | LDAP Port if different from default of 389 |
| Use SSL | Option to SSL, the port will default to 636, and can be changed. |
| Use TLS | Option to choose TLS. SSL will be disabled, and the port will default to 389 and can be changed |
| Password Sync | Sync user LDAP passwords to database. They will be encrypted. Useful for local fallback incase LDAP is unavailable. |
| LDAP Bind Username | Username, if required to authenticate and read LDAP |
| LDAP Bind Password | Password, if required to authenticate and read LDAP |
| Base DN | A base dn is the point from where a server will search for users |
| Authorized Group | The authorized group for users sign in. This will be a single authorized group, that users should belong to. An empty value means the user can be anywhere in the directory. CN String name only, DN is not required. |
| Username field | This will be the username used to login, usually set to ‘userprincipalname’ in AD. (sAMAccountName is not supported for LDAP Username Field) |
| First Name field | Used to store the users firstname in rConfig DB |
| Last Name field | Used to store the users lastname in rConfig DB |
| Test LDAP | Allows you to test your LDAP settings, but be sure to save the settings first. |
FreeIPA Implementation Notes
To enable FreeIPA LDAP authentication, you must follow the steps below.
- Enable LDAP Authentication in rConfig. Open the .env file
vi /var/www/html/rconfig7/current/.env- Change or add the following lines
LDAP_SCHEMA=freeipa- Refresh the application cache
cd /var/www/html/rconfig7/current && php artisan rconfig:clear-all- Set the parameters in the LDAP settings page in rConfig. Some notes on this;
LDAP Username is normally the full DN of the user, such as
uid=ldapuser,cn=users,cn=accounts,dc=example,dc=com. Base DN is normallycn=users,cn=accounts,dc=example,dc=com. Username field is normallyuid.
rConfig support team can provide some limited support to help with LDAP implementation, but often AD admin support if a good first step for assistance.
REST API Access
Starting with version 6.2, the REST API interface is fully supported. Within this tab, users have the capability to generate and remove tokens, as well as to observe existing tokens. To access comprehensive API documentation, please click the ‘View Docs’ button.
The below screenshot shows how to access the documentation for the rConfig API.
Import /Export
In this section, you can import and export your rConfig data. This is useful if you want to move your settings to another rConfig installation, or if you want to backup your settings. The Device import wizard walks you through the process of importing your device data. You can export a number of tables directly from the database in the second section of this page.
Backup Strategy
The system backup cleanup strategy below will be used to clean up old system backups. The default settings will keep all system backups for a certain amount of days. After that period only a daily system backup will be kept. After that period only weekly system backups will be kept and so on. No matter how you configure it the strategy will never deleted the newest system backup. This relates to rConfig system backups only, and not device configuration backups.
Steps for a successful system backup strategy
- Start a manual backup from the backups page
- Set you backup clean up strategy per the settings below
- Configure a daily, weekly or other backup scheduled task
- Configure a daily, weekly or other Backup Clean Up scheduled task
- Monitor email notifications and logs for success and failures
You can check for latest version from this page as we release new versions. This section also has detailed update and upgrade instructions. When an update is available, release notes for that update can be view from this page also.
About
License and Support Information is available on this page.