rConfig - TFTP Server (Legacy)
A TFTP Server was introduced to V6.6.0. This allows users to upload files to the rConfig server via TFTP. This is useful for users who have devices that do not support SCP or SFTP. The TFTP server is disabled by default and can be enabled in the rConfig settings page. The TFTP server is only accessible from the rConfig server itself and is not accessible from the internet, unless you open a port to it from the internet. Which would be a bad idea!
Enable/Disable TFTP
To enable or disable the TFTP server, go to the rConfig settings page and click on the TFTP Server tab. Here you can enable or disable the TFTP server. If you enable the TFTP server, you will need to restart the rConfig service for the changes to take effect.
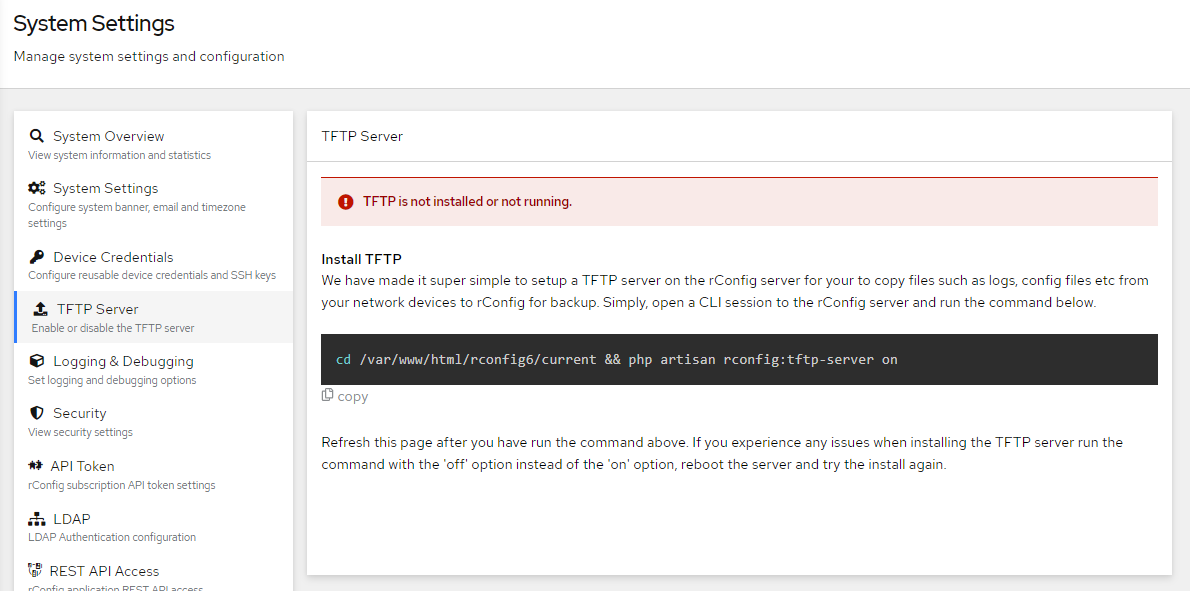
[root@v7dev1 rconfig7]# cd /var/www/html/rconfig7 && php artisan rconfig:tftp-server onToggling TFTP server to onTFTP server is not installedInstalling TFTP ServerCreated symlink /etc/systemd/system/multi-user.target.wants/tftp-server.service → /etc/systemd/system/tftp-server.service.Created symlink /etc/systemd/system/sockets.target.wants/tftp-server.socket → /etc/systemd/system/tftp-server.socket.FirewallD is not runningFirewallD is not running"""● tftp-server.service - Tftp Server\n Loaded: loaded (/etc/systemd/system/tftp-server.service; enabled; vendor preset: disabled)\n Active: active (running) since Tue 2022-09-06 15:03:47 IST; 572ms ago\n Docs: man:in.tftpd\n Main PID: 6654 (in.tftpd)\n Tasks: 1 (limit: 48871)\n Memory: 196.0K\n CGroup: /system.slice/tftp-server.service\n └─6654 /usr/sbin/in.tftpd -c -p -s /var/lib/tftpboot\n\nSep 06 15:03:47 v6dev2.rconfig.com systemd[1]: Started Tftp Server.\n"""TFTP server has been installed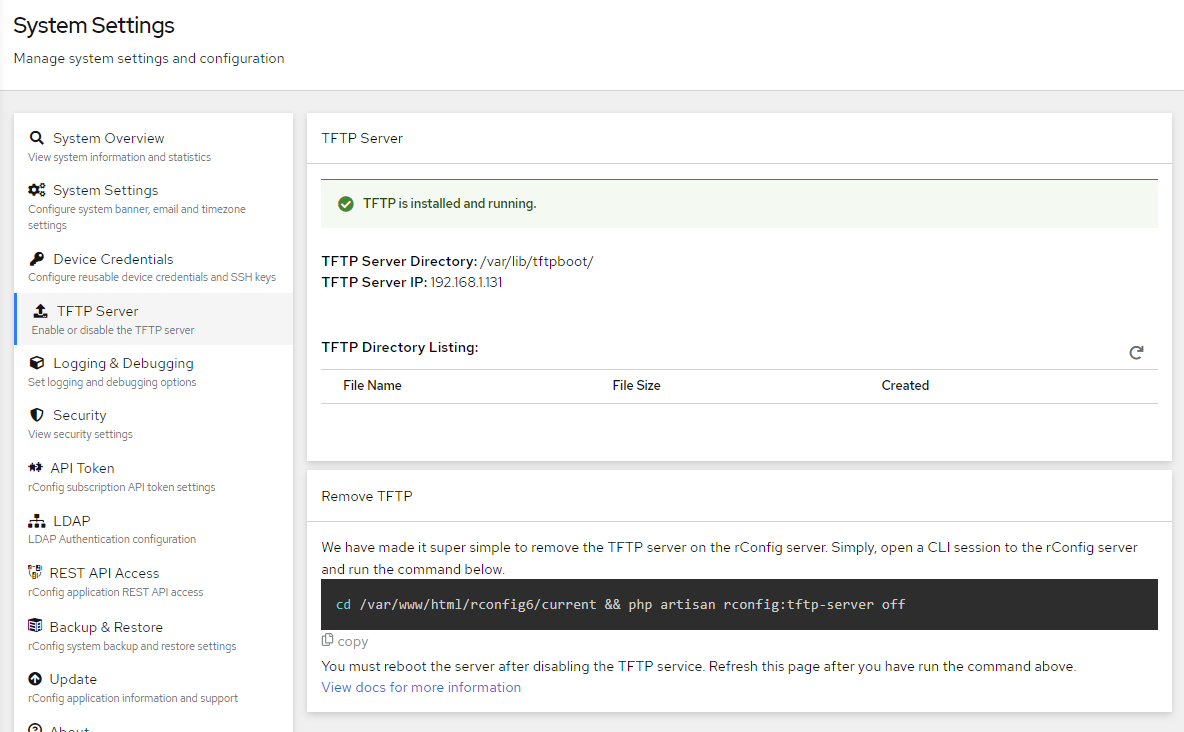
How it works
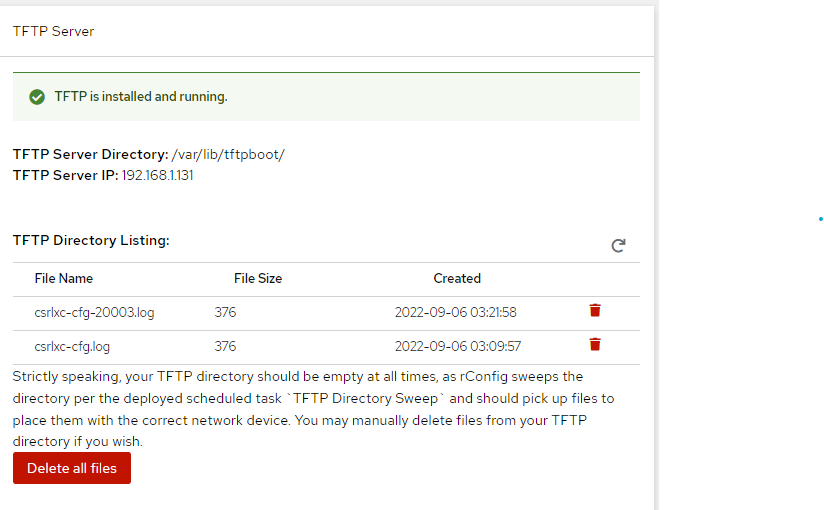
The actual implementation behind the scenes is a simple TFTP server installed on the OS and listens on UDP port 69 as is standard for TFTP. The TFTP server is installed using the in.tftpd package. The TFTP server is installed to the /var/lib/tftpboot directory. This is the default directory for the TFTP server. The contents of the TFTP directory can be viewed directly from an SSH session to the server or the TFTP settings page per the above screenshot.
Strictly speaking, your TFTP directory should be empty at all times, as rConfig sweeps the directory per the deployed scheduled task TFTP Directory Sweep and should pick up files to place them with the correct network device. You may manually delete files from your TFTP directory if you wish.

TFTP Sweep task automatically deployed with TFTP Setup. Frequency of runs can be adjusted.
The sweep task looks at the filenames in the directory, and if any filenames contain the ID of a device, it moves that file to the devices storage location. The file will then be presented on the Device View page. You may also sweep the directory manually using the following command:
cd /var/www/html/rconfig7/current && php artisan rconfig:sweep-tftp-dirFound 1 valid file in TFTP directory.If any files are found without a valid device ID in the filename they will not be moved and will remain in the TFTP directory. You may manually remove these files from the TFTP settings page.
How to upload files manually
To copy device files from the devices local storage to the rConfig TFTP server for processing and storage you must use the copy tftp command. The copy tftp command is a Cisco IOS command and is used to copy files from the device to a TFTP server. The copy tftp command is not supported on all devices. You should check your own devices documentation to see if it supports the copy tftp or similar command.
When adding the copy tftp command to a Cisco device, you must specify the TFTP server IP address and the filename to be copied. The filename must be unique and must not contain any spaces. The filename must also be unique across all devices.
The following example shows how to copy a Cisco IOS device configuration file to the rConfig TFTP server:
Router#conf tRouter(config)#file prompt quietrouter1#copy csrlxc-cfg.log tftp://192.168.1.131/csrlxc-cfg-20003.log!!376 bytes copied in 0.004 secs (94000 bytes/sec)Please note the use of ‘file prompt quiet’ to suppress the prompt for the filename. This is not required but is a good practice to avoid the prompt on Cisco devices. Check with other vendors documentation to see if this is supported.
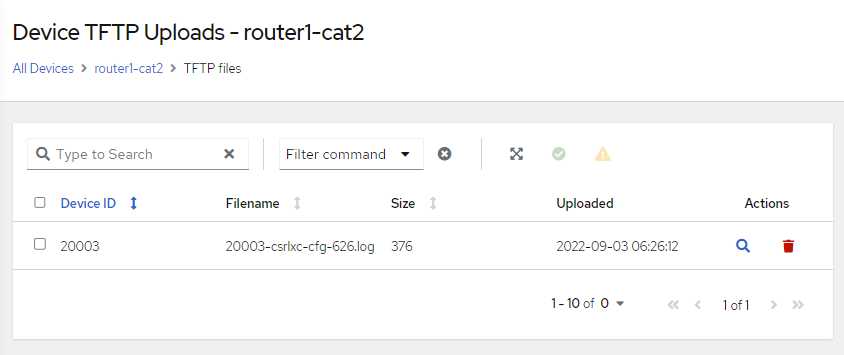
See output of TFTP directory in the GUI below after the file was uploaded successfully.
How to upload files automatically
We can automate the uploaded of such files from the local storage of Network devices (vlan.dat files etc..) by add the copy command as part of the devices command/ category set in rConfig. This will allow the file to be uploaded to the TFTP server automatically when the device is polled. This is useful for files that are not updated often and are not likely to change. See an example below as configured in the commands section of the rConfig GUI.

copy csrlxc-cfg.log tftp://192.168.1.131/{deviceid}-csrlxc-cfg.logTake special note of the variable entered in the command. This is the device ID of the device. This is a variable that is replaced with the actual device ID when the command is run. This is how rConfig knows which device the file belongs to. The device ID is a unique number assigned to each device in rConfig. The device ID is not the same as the device name. The device ID is a number that is assigned to each device in the order that the device was added to rConfig. The device ID is visible in the GUI. The device ID is also visible in the database in the devices table in the id column. Also, a timestamp will be appended to the filename once saved to the TFTP directory. This is to ensure that the file is unique and will not be overwritten by a subsequent upload.
How to view uploaded files
If files have the correct device ID in the filename, they will be moved to the devices storage location and will be presented on the Device View page. Go to the device view page and a new table will be available at the bottom of the page.
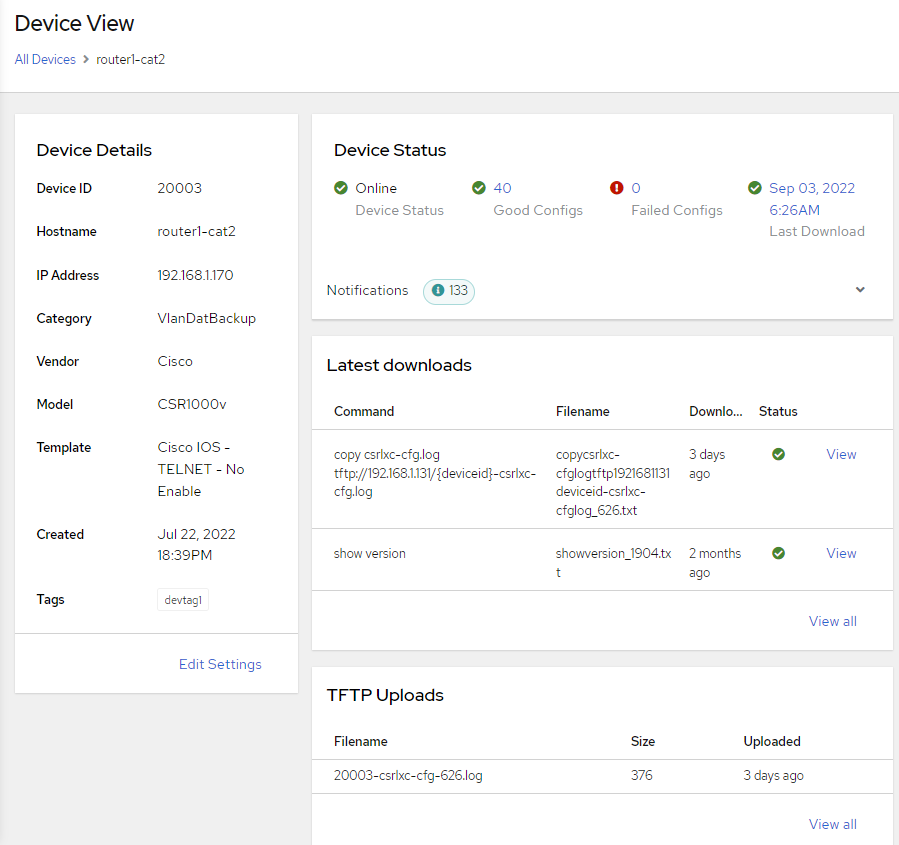
Click View all to view all uploaded files, and for more actions, such as view, delete and download.