Clear Redis RBAC Cache
rConfig Vector Server Installation: Enterprise Network Management Platform Setup
rConfig Vector Server Installation: Enterprise Network Management Platform Setup
Section titled “rConfig Vector Server Installation: Enterprise Network Management Platform Setup”Licensing Requirements
Section titled “Licensing Requirements”rConfig Vector is a commercial licensed product requiring valid licensing for operation. Organizations without current licensing should contact [email protected] for licensing information. rConfig V8 Professional customers may upgrade existing licenses and installations to rConfig Vector.
Prerequisites
Section titled “Prerequisites”Prior to commencing installation, verify the following requirements:
Server Specifications
Section titled “Server Specifications”Server requirements align closely with rConfig V8 specifications. Consult OS Configuration for detailed requirements. Enhanced resource allocation is recommended for Vector deployments. Minimum server specifications:
- 4 CPU Cores minimum
- 16 GB RAM minimum
- 250 GB storage minimum
Infrastructure and Security Requirements
Section titled “Infrastructure and Security Requirements”In most deployment scenarios, the rConfig Vector server requires internet accessibility for agent connectivity. Agents may also connect via private networks where connectivity and routing permit. Verify necessary infrastructure and security controls are implemented to support the chosen connectivity model.
The server must be accessible on port 443 (HTTPS) from authorized sources. Implement appropriate firewall rules and valid SSL/TLS certificates on the server.
Infrastructure Requirements:
- Public IP address (NAT or direct assignment) with source IP restrictions
- Firewall rules permitting inbound traffic on port 443 exclusively from authorized agent source IP addresses
- Valid SSL/TLS certificate (no self-signed certificates permitted). TLS 1.2 or higher required.
- DNS resolution configured for the server
- Reverse DNS configuration (optional but recommended)
- Outbound internet connectivity for update verification
- Integration with organizational monitoring systems for continuous connectivity verification
- Additional security controls as required by organizational policy (multi-factor authentication, intrusion prevention systems, intrusion detection systems, etc.)
Installation Procedures
Section titled “Installation Procedures”Installation procedures closely follow V8 Professional methodology and provide streamlined deployment. After completing the server build, continue with the Vector Agent installation steps to onboard devices.
Complete the rConfig Vector Server installation by executing the following procedures. All
commands require root user privileges.
- Configure database user account (MySQL or MariaDB)
- Download deployment script
- Execute initialization deployment script
- Verify installation completion
Installation Procedures by Operating System
Section titled “Installation Procedures by Operating System”Database User Configuration
Section titled “Database User Configuration”Rocky Linux 9+ deployments require creation of a dedicated database user account. Authenticate to the MariaDB/MySQL database server using the root account. The root password was established during OS configuration.
sudo mariadb -u root -pCreate a database user account with appropriate credentials. The example below demonstrates the procedure; however, implement organizationally-appropriate username and password policies.
The grant statement below creates the user and assigns privileges in a single operation.
GRANT ALL PRIVILEGES ON *.* TO 'user1'@localhost IDENTIFIED BY 'password1';FLUSH PRIVILEGES;quit;Deployment Script Download
Section titled “Deployment Script Download”mkdir -p /var/www/html/rconfig8cd /var/www/html/rconfig8wget https://dl.rconfig.com/downloads/rconfig8-vector-deploy.sh -O rconfig8-vector-deploy.shchmod +x rconfig8-vector-deploy.shNote: Press the enter key to accept default values when prompted during the download and configuration process.
Deployment Script Initialization
Section titled “Deployment Script Initialization”Prepare the following configuration parameters before executing the initialization command:
- Database host - ‘localhost’ for standard single-server deployments
- Database username - Database username created in the previous step
- Database password - Database password established in the previous step
- Hostname - The fully qualified domain name (FQDN) for the server; configure DNS resolution prior to installation
- API Token - Retrieved from the license keys section in the rConfig portal (exclude angle brackets)
With the configuration parameters prepared, execute the following command to initialize the rConfig installation:
./rconfig8-vector-deploy.sh --mode=init --apitoken=yourApiToken --dbuser=user1 --dbpass="password1" --hostname=rconfig8vm.domain.localApplication Deployment and Verification
Section titled “Application Deployment and Verification”Following successful initialization, execute deployments (updates) using:
./rconfig8-vector-deploy.sh --mode=deploy --apitoken=<someCode>Respond to prompts as required. Default values may be accepted by pressing the enter key.
Ubuntu Installation Procedures
Section titled “Ubuntu Installation Procedures”Ubuntu installation procedures follow similar patterns to other distributions with distribution-specific scripts. If not previously completed, install Ubuntu Server and execute the OS configuration script per the instructions in Ubuntu Configuration Script.
Database User Configuration
Section titled “Database User Configuration”Ubuntu deployments require creation of a dedicated database user account. Authenticate to the MariaDB/MySQL database server using the root account. The root password was established during OS configuration.
sudo mariadb -u root -pCreate the database user account with appropriate credentials. The example below demonstrates the procedure; implement organizationally-appropriate security policies for production credentials.
GRANT ALL PRIVILEGES ON *.* TO 'user1'@localhost IDENTIFIED BY 'password1';FLUSH PRIVILEGES;quit;Deployment Script Download
Section titled “Deployment Script Download”sudo mkdir -p /var/www/html/rconfig8cd /var/www/html/rconfig8sudo wget https://dl.rconfig.com/downloads/rconfig8-vector-deploy-ubuntu.sh -O rconfig8-vector-deploy-ubuntu.shsudo chmod +x rconfig8-vector-deploy-ubuntu.shNote: Press the enter key to accept default values when prompted during the download and configuration process.
Deployment Script Initialization
Section titled “Deployment Script Initialization”Prepare the following configuration parameters before executing the initialization command:
- Database host - ‘localhost’ for standard single-server deployments
- Database username - The username created in the previous step
- Database password - The password created in the previous step
- Hostname - The fully qualified domain name (FQDN) for the server; configure DNS resolution prior to installation
- API Token - Retrieved from the license keys section in the rConfig portal (exclude angle brackets)
With the configuration parameters prepared, execute the following command to initialize the rConfig V8 installation:
sudo ./rconfig8-vector-deploy-ubuntu.sh --mode=init --apitoken=yourApiToken --dbuser=user1 --dbpass="password1" --hostname=rconfig8vm.rconfig.comApplication Deployment and Verification
Section titled “Application Deployment and Verification”sudo ./rconfig8-vector-deploy-ubuntu.sh --mode=deploy --apitoken=yourApiTokenRespond to prompts as required. Default values may be accepted by pressing the enter key.
Apache Web Server Configuration
Section titled “Apache Web Server Configuration”sudo a2enmod rewritesudo service apache2 restartAdvanced Configuration
Section titled “Advanced Configuration”Command-Line Options
Section titled “Command-Line Options”The deployment script supports multiple command-line parameters for flexible configuration:
Required Parameters for Initialization Mode:
Section titled “Required Parameters for Initialization Mode:”--mode=init- Initialize new installation--apitoken- rConfig API authentication token--dbuser- Database username--dbpass- Database password--hostname- Server hostname (FQDN)
Required Parameters for Deployment Mode:
Section titled “Required Parameters for Deployment Mode:”--mode=deploy- Update existing installation--apitoken- rConfig API authentication token
Optional Parameters (Both Modes):
Section titled “Optional Parameters (Both Modes):”--dbhost- Database host (default: 127.0.0.1)--dbport- Database port (default: 3306)--help- Display usage information
Command Examples
Section titled “Command Examples”Custom database configuration:
Section titled “Custom database configuration:”./rconfig8-vector-deploy.sh --mode=init --apitoken=abc123 --dbuser=rconfig --dbpass="mypass" --dbhost=192.168.1.100 --hostname=rconfig.company.comUpdate existing installation:
Section titled “Update existing installation:”./rconfig8-vector-deploy.sh --mode=deploy --apitoken=abc123HTTP 403 Access Forbidden Error Resolution
Section titled “HTTP 403 Access Forbidden Error Resolution”If encountering HTTP 403 Access Forbidden errors following Vector Server updates, cached RBAC data may require clearing.
The error may appear as follows when accessing Settings > Agents:
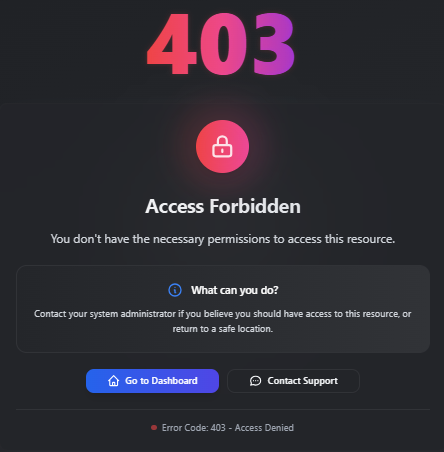
To resolve, execute the following commands:
# This error typically results from cached data from previous rConfig versions
redis-cliselect 1keys *del KEYNAME # (any key containing "permissions")
exitcd /var/www/html/rconfig8/current && php artisan rconfig:clear-all
Video demonstration of the resolution process:
Version Rollback
Section titled “Version Rollback”To revert to a previous release version:
./rconfig8-vector-deploy.sh --mode=rollbackDeployment Architecture Features
Section titled “Deployment Architecture Features”Zero-Downtime Deployment Strategy
Section titled “Zero-Downtime Deployment Strategy”rConfig V8 implements a symlink-based deployment architecture ensuring continuous availability during updates:
- New releases deploy to timestamped directories
- Atomic symlink updates ensure instantaneous transitions
- Previous releases remain available for immediate rollback
Progress Monitoring
Section titled “Progress Monitoring”The deployment script provides comprehensive progress visibility:
- Visual progress indicators
- Step-by-step execution status
- Complete operation logging to
/var/log/rconfig-deploy.log
Error Handling and Recovery
Section titled “Error Handling and Recovery”Enhanced error handling capabilities include:
- Detailed error diagnostics
- Recovery procedure recommendations
- Support contact information
- Comprehensive operational logging
Post-Installation Configuration
Section titled “Post-Installation Configuration”Upon successful installation completion, access the web interface using the server IP address or hostname with the following default credentials:
Username: [email protected]
Password: admin
Troubleshooting Procedures
Section titled “Troubleshooting Procedures”Common Installation Issues
Section titled “Common Installation Issues”-
Permission-Related Errors
- Verify root user privileges for script execution
- Validate file ownership:
chown -R apache /var/www/html/rconfig8
-
Database Connectivity Issues
- Verify database credentials accuracy
- Test connectivity:
mariadb -u username -p -h hostname
-
API Token Authentication Problems
- Verify token accuracy from rConfig portal
- Confirm network connectivity to dl.rconfig.com
-
Service Availability Issues
- Verify Apache status:
systemctl status httpd - Verify Supervisor status:
systemctl status supervisord
- Verify Apache status:
Log File Locations
Section titled “Log File Locations”- Deployment Log:
/var/log/rconfig-deploy.log - Apache Logs:
/var/log/httpd/(RHEL/CentOS) or/var/log/apache2/(Ubuntu) - Application Logs:
/var/www/html/rconfig8/persistentData/storage/logs/
Support Resources
Section titled “Support Resources”For installation assistance:
- Review the deployment log file for error details
- Consult this documentation for troubleshooting procedures
- Contact V8 support: [email protected]
- Access the support portal: rConfig Portal
Migration from V7
Section titled “Migration from V7”For rConfig V7 upgrades, the V8 deployment script will:
- Automatically detect existing V7 installations
- Preserve existing data and configuration settings
- Remove legacy Envoy deployment components
- Migrate to the enhanced deployment system
Next Steps
Section titled “Next Steps”After completing rConfig Vector Server installation:
- Install Vector Agents on target systems to enable distributed network management
- Review Vector Features and Capabilities to understand the full platform potential
- Configure Security Hardening for enterprise deployment requirements
- Explore Upgrade Options if migrating from V8 Professional