xFTP Server - TFTP, FTP, and SFTP for Network Device File Transfers
xFTP Server: Secure File Transfer for Network Devices
Section titled “xFTP Server: Secure File Transfer for Network Devices”After reading this page, I can deploy and configure the rConfig xFTP server, choose the right protocol (TFTP, FTP, or SFTP) for my devices, and set up automated file uploads with device-matched processing and retention policies.
How xFTP works
Section titled “How xFTP works”Network devices upload files via TFTP, FTP, or SFTP into a shared inbox directory (/srv/xftp/). A scheduled sweeper then moves matched files into each device’s xftpuploads/ directory and records the lifecycle in the xftp_uploads database table.
Protocols
Section titled “Protocols”| Protocol | Port | Auth | Encryption | When to use |
|---|---|---|---|---|
| TFTP | 69 (UDP) | None | None | Legacy or isolated environments |
| FTP | 21 (TCP) | Username + password | None | Devices lacking SFTP support |
| SFTP/SCP | Configurable (e.g. 2222) | Username + password | SSH | Production and sensitive data |
Directory layout
Section titled “Directory layout”- Inbox (raw uploads):
/srv/xftp/ - Processed device storage (moved files):
/var/www/html/rconfig8/storage/app/rconfig/data/<Category>/<device-name>/xftpuploads/Scheduled sweep
Section titled “Scheduled sweep”The sweeper runs on a configured schedule and moves matched inbox files to device storage:
php artisan rconfig:sweep-xftp-dirTo trigger a sweep manually:
cd /var/www/html/rconfig8php artisan rconfig:sweep-xftp-dirWhen to use xFTP
Section titled “When to use xFTP”Use xFTP when devices need to push non-configuration files, binary data, firmware images, or archive content to rConfig for centralised storage. If you need only configuration backups, use the standard backup workflow instead.
Prerequisites
Section titled “Prerequisites”- Docker installed on the rConfig server (the setup wizard can install it automatically)
- Network firewall rules open for the protocol ports you plan to use (69/UDP, 21/TCP, and/or your chosen SFTP port)
- rConfig V8 installed and accessible
- Admin access to Settings in the rConfig UI
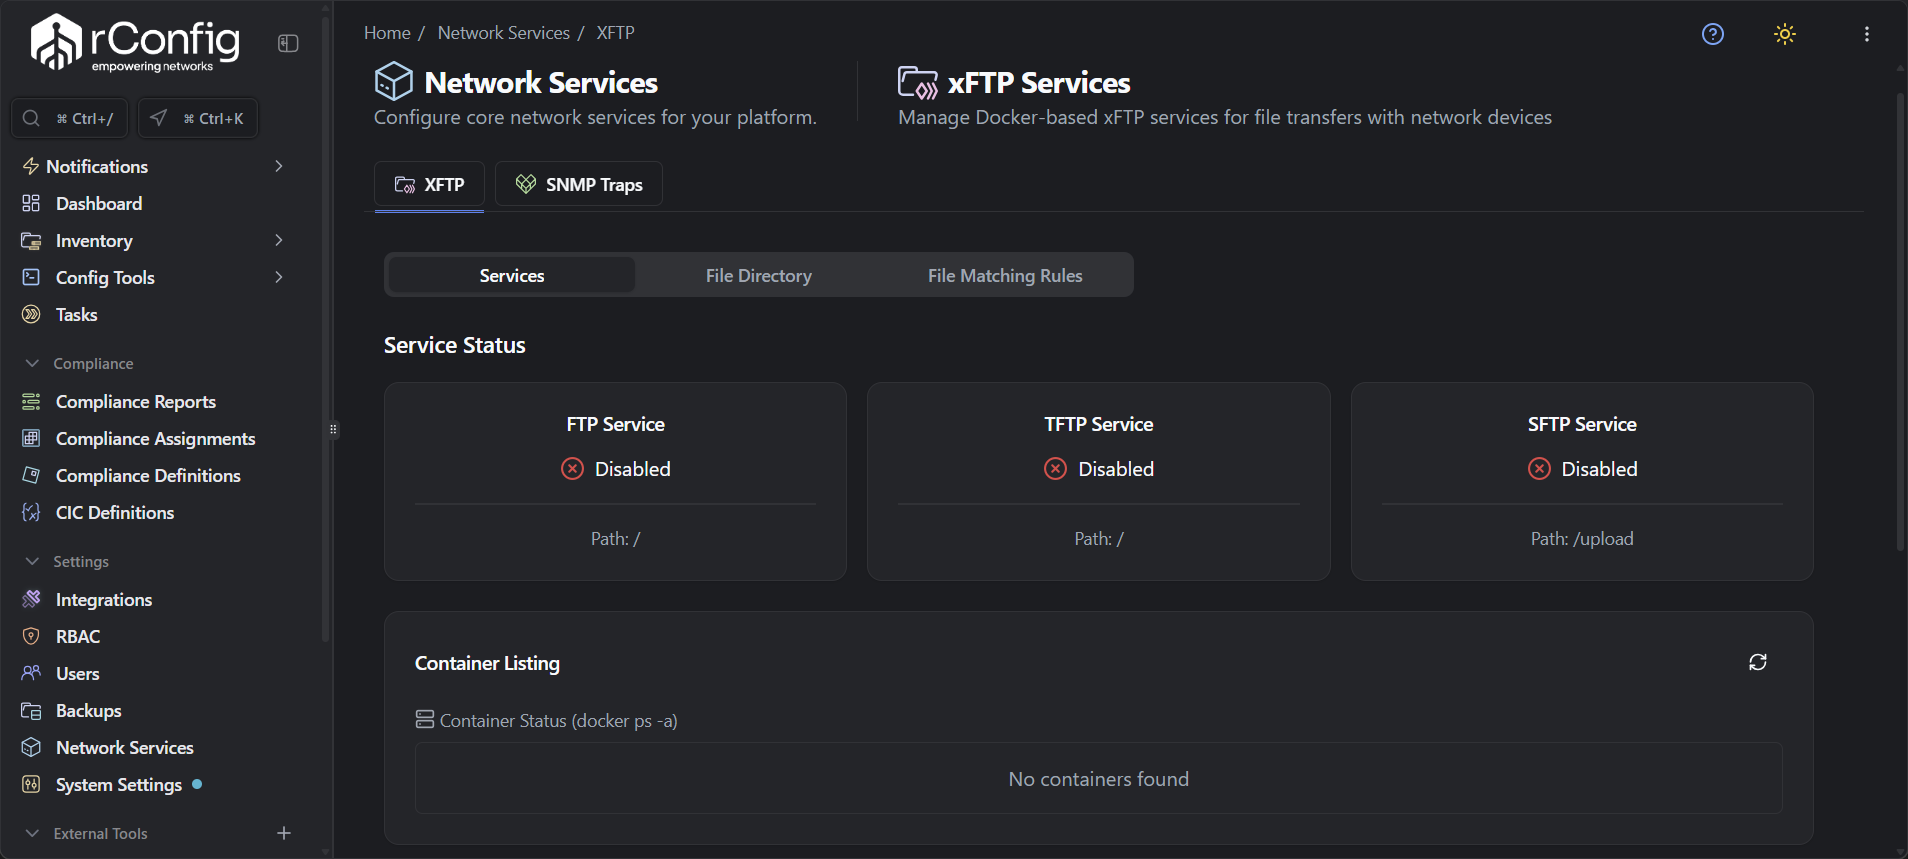
Managing xFTP services
Section titled “Managing xFTP services”Manage xFTP Docker microservices through the UI or CLI.
Web interface: Navigate to Platform → Network Services → XFTP
CLI:
php artisan rconfig:xftp-toggleCheck service status at any time:
php artisan rconfig:xftp-toggle --status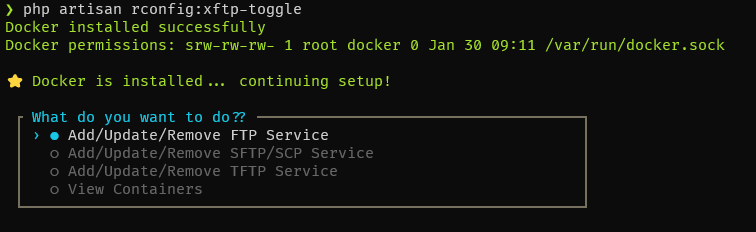

Deploying xFTP services
Section titled “Deploying xFTP services”Run the interactive toggle command and choose which protocol to deploy:
php artisan rconfig:xftp-toggleTFTP service deployment
Section titled “TFTP service deployment”TFTP provides basic file transfer without authentication. Suitable for legacy devices and isolated environments.
-
Run
php artisan rconfig:xftp-toggleand choose TFTP from the protocol list.
-
Docker pulls the TFTP image on first deployment.
-
The TFTP container starts automatically.
-
Verify the service shows TFTP running on port 69.
Default configuration: port 69 (UDP), no authentication, upload directory /srv/xftp/. Any device with network access to the rConfig server can upload files.
To stop: run php artisan rconfig:xftp-toggle, select TFTP, and confirm removal. Files already in /srv/xftp/ or device storage are not deleted.
FTP service deployment
Section titled “FTP service deployment”FTP provides authenticated file transfer with credential-based access.
-
Run
php artisan rconfig:xftp-toggleand choose FTP.
-
Enter the FTP username and password when prompted.
-
Docker pulls the FTP image on first deployment.
-
The FTP container starts with the configured credentials.
-
Verify the service shows FTP running on port 21.
Default configuration: port 21 (TCP), username and password authentication, active and passive transfer modes, upload directory /srv/xftp/.
Credential storage: FTP credentials are stored in .env and referenced in device commands using {ftpusername} and {ftppassword}. When redeploying, the wizard prompts to reuse existing credentials or enter new ones.
To stop: run php artisan rconfig:xftp-toggle, select FTP, and confirm removal. Credentials in .env are preserved.
SFTP/SCP service deployment
Section titled “SFTP/SCP service deployment”SFTP provides encrypted, authenticated file transfer over SSH. Use for production environments and sensitive data.
-
Run
php artisan rconfig:xftp-toggleand choose SFTP.
-
Enter the SFTP port (must not conflict with host SSH on port 22 — 2222 is a common choice).
-
Enter the SFTP username and password.
-
Docker pulls the SFTP image on first deployment.
-
The SFTP container starts with the configured port and credentials.
-
Verify the service shows SFTP running on your chosen port.

Default configuration: port configurable (recommended 2222, cannot be 22), SSH/TCP encryption, username and password authentication, upload directory /srv/xftp/. The same container handles both SFTP and SCP connections.
SFTP vs SCP: SFTP is preferred for modern devices and supports directory listing and resumable transfers. SCP is simpler and suits legacy devices and scripting.
Connection syntax:
# SFTPsftp -P 2222 username@rconfig-server-ip
# SCPscp -P 2222 localfile.txt username@rconfig-server-ip:/remote/path/
To stop: run php artisan rconfig:xftp-toggle, select SFTP, and confirm removal. Credentials and port settings in .env are preserved.
Uploading files from devices
Section titled “Uploading files from devices”File naming and device ID
Section titled “File naming and device ID”For rConfig to associate an uploaded file with a device, the filename must include the device ID before a dash:
{deviceid}-filename.extValid patterns:
tftp://192.168.1.131/{deviceid}-vlan.datftp://server/{deviceid}-config.logsftp://server/{deviceid}-firmware.bin
Invalid patterns:
tftp://192.168.1.131/vlan-{deviceid}.dat(device ID not before the dash)ftp://server/{deviceid}config.log(no dash separator)
Find the device ID in the rConfig UI on the device list or device detail page. It is also available in the devices table (id column) and is automatically substituted when you use the {deviceid} variable in commands.
Manual upload examples
Section titled “Manual upload examples”TFTP (Cisco IOS):
Router(config)#file prompt quietRouter#copy vlan.dat tftp://192.168.1.131/1234-vlan.datFTP (Cisco IOS):
Router#copy vlan.dat ftp://ftpuser:ftppass@192.168.1.131/1234-vlan.datUsing credential variables (recommended):
Router#copy vlan.dat ftp://{ftpusername}:{ftppassword}@192.168.1.131/{deviceid}-vlan.datSFTP (Cisco IOS):
Router#copy vlan.dat sftp://sftpuser:sftppass@192.168.1.131:2222/1234-vlan.datUsing credential variables:
Router#copy vlan.dat sftp://{sftpusername}:{sftppassword}@192.168.1.131:2222/{deviceid}-vlan.datAutomated uploads via command categories
Section titled “Automated uploads via command categories”Incorporate upload commands into rConfig command categories so files transfer automatically during device polling.
-
Navigate to Settings → Commands in the rConfig UI.
-
Create or open the command category used by the target devices.
-
Add the upload command with variables:
Terminal window copy vlan.dat tftp://192.168.1.131/{deviceid}-vlan.dat -
Assign the category to the relevant devices.
-
When rConfig runs a backup, the upload command executes automatically.
File matching patterns (V8.1.2+)
Section titled “File matching patterns (V8.1.2+)”When filenames do not contain a numeric device ID, use pattern-based routing to map uploads to devices.
Where: Platform → Network Services → XFTP → File Matching Rules tab
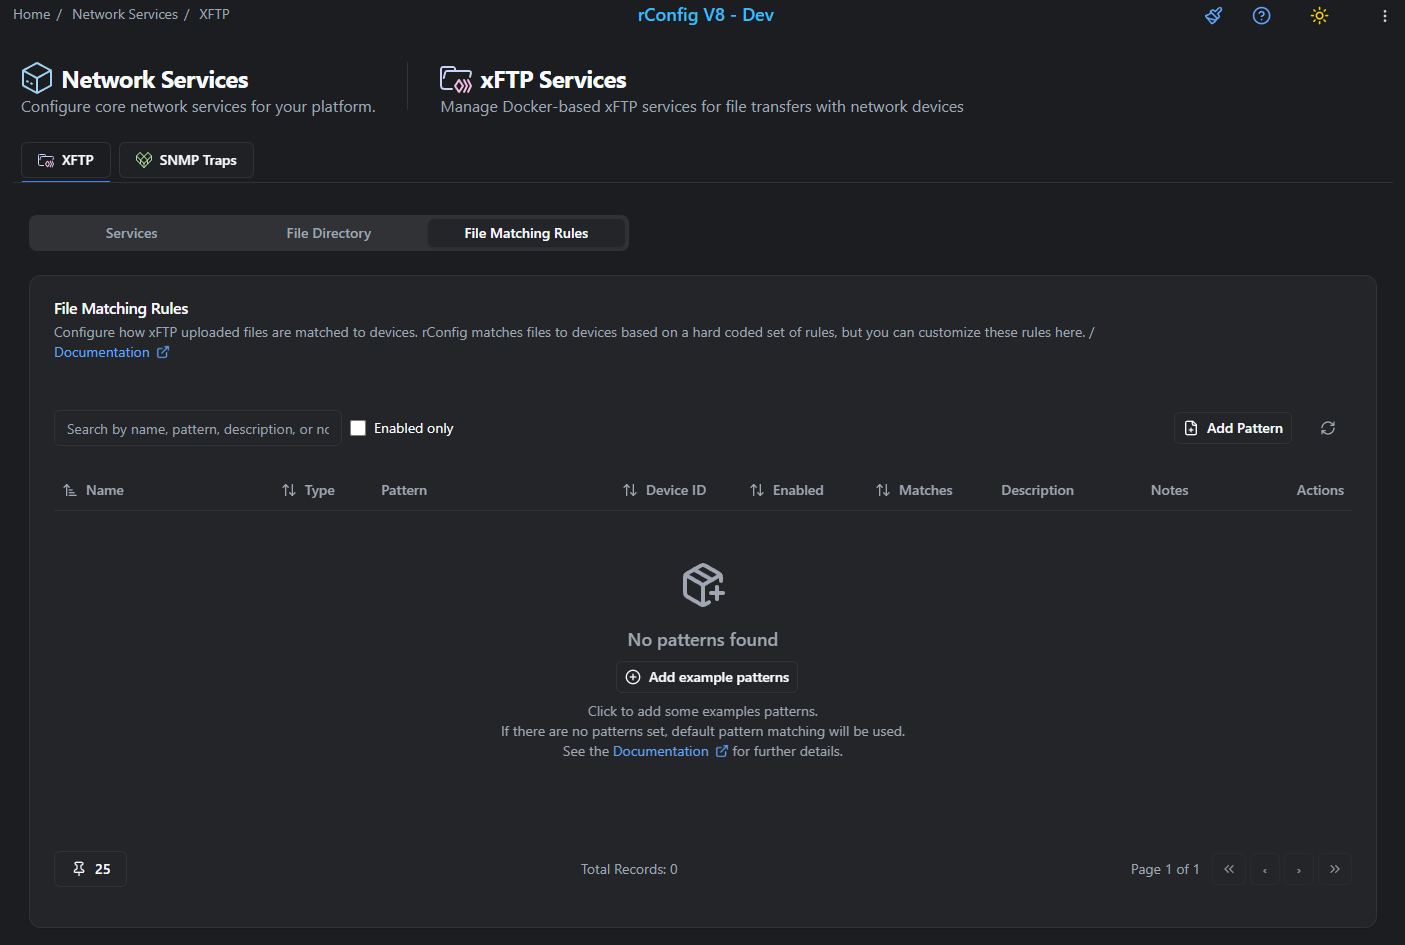
Pattern types: regex, prefix, suffix, contains, exact
Rule precedence: First match wins (ordered by pattern ID). If no rule matches, rConfig falls back to legacy ID extraction from the filename.
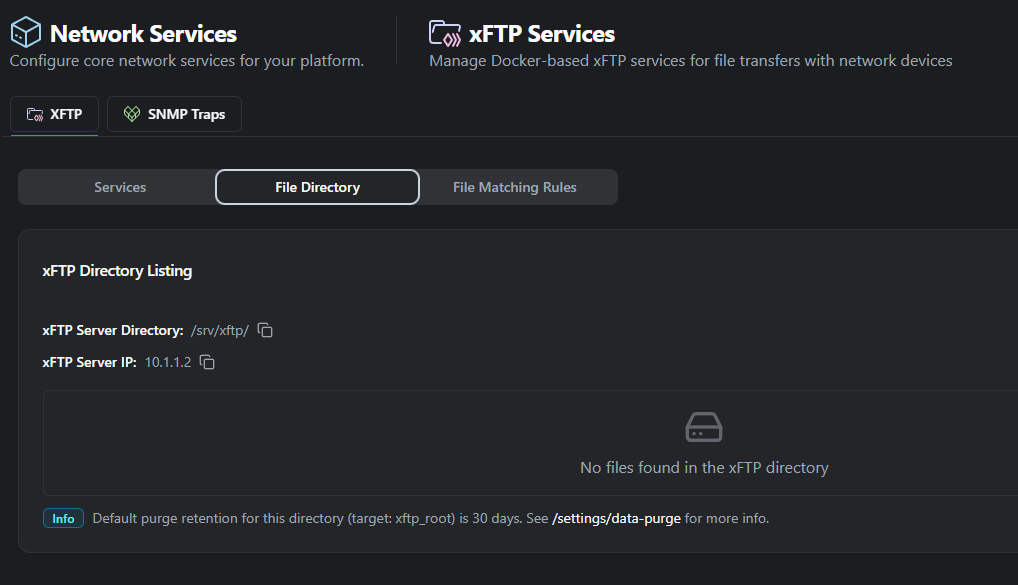
Viewing and managing uploaded files (V8.1.2+)
Section titled “Viewing and managing uploaded files (V8.1.2+)”File Directory (raw /srv/xftp/ inbox)
Section titled “File Directory (raw /srv/xftp/ inbox)”Navigate to Platform → Network Services → XFTP → File Directory tab to see files physically present in /srv/xftp/ that are awaiting the sweep or were not yet matched to a device.
The table columns are: File name, Type, Device ID, File Size, Created, Action. rConfig infers file type (text, binary, archive) automatically.
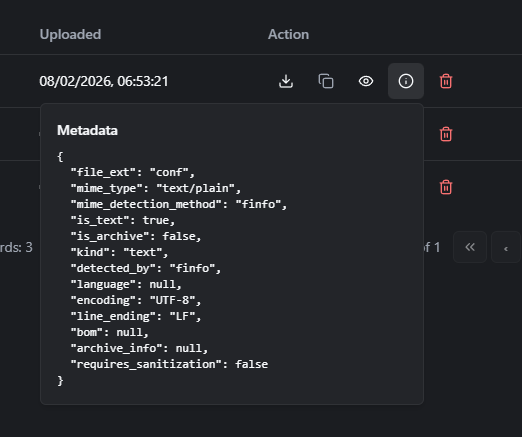
Available actions per file: Download, Copy path, Peek (eye icon — text only, capped at 1 MB), Metadata info (info icon), Delete. A Delete all files button clears the entire inbox.
Device view: processed uploads
Section titled “Device view: processed uploads”Navigate to Devices → [Device Name] and scroll to the uploaded files section.

The table shows a paginated, database-backed history of moved files. Actions are the same as the File Directory: download, copy path, peek (text only), metadata info, and delete.
Click View All to access the full file management interface.
Backfilling upload tracking (V8.1.2+)
Section titled “Backfilling upload tracking (V8.1.2+)”If you upgraded and already have files on disk without tracking rows, populate xftp_uploads from the filesystem:
php artisan rconfig:xftp-backfill-uploads
# Dry run (no changes made)php artisan rconfig:xftp-backfill-uploads --dry-run
# Limit scanned files (0 = unlimited)php artisan rconfig:xftp-backfill-uploads --limit=1000
Retention and auto-cleanup (V8.1.2+)
Section titled “Retention and auto-cleanup (V8.1.2+)”xFTP retention integrates with the existing purge framework (settings_purge).
Targets:
| Target | Covers | Default retention |
|---|---|---|
xftp_root | Tracked inbox files (/srv/xftp/) | 30 days |
xftp_device_uploads | Tracked moved device uploads | 90 days |
Run via CLI:
# Run all purge targetsphp artisan rconfig:data-purge
# Run only xFTP targetsphp artisan rconfig:data-purge --table=xftp_rootphp artisan rconfig:data-purge --table=xftp_device_uploads
# Dry runphp artisan rconfig:data-purge --table=xftp_root --dry-runAdvanced configuration
Section titled “Advanced configuration”Custom upload directory
Section titled “Custom upload directory”Organizations can deploy their own FTP/SFTP services and configure rConfig to process files from a custom directory.
-
Edit
.envto set the custom path:Terminal window XFTP_ROOT_DIR=/path/to/custom/upload/directory -
Create the directory with correct permissions:
Terminal window sudo mkdir -p /path/to/custom/upload/directorysudo chown www-data:www-data /path/to/custom/upload/directorysudo chmod 755 /path/to/custom/upload/directory -
Verify rConfig can access it by running a manual sweep.
-
Point your external FTP/SFTP service to upload files into
XFTP_ROOT_DIR.
Running multiple services
Section titled “Running multiple services”All three services can run simultaneously on separate ports. Deploy them one at a time using php artisan rconfig:xftp-toggle and selecting each protocol in turn.
Once deployed, assign protocols to device groups based on capability:
- Legacy switches: TFTP (port 69)
- Modern routers: FTP (port 21)
- Security appliances: SFTP (port 2222)
Security
Section titled “Security”Protocol comparison:
| Protocol | Authentication | Encryption | Recommended for |
|---|---|---|---|
| TFTP | None | None | Isolated lab networks only |
| FTP | Username + password | None | Devices without SFTP |
| SFTP | SSH credentials | Full (SSH) | Production and compliance |
Network-level restrictions:
# Limit upload sources to trusted networkssudo firewall-cmd --permanent --add-rich-rule='  rule family="ipv4"  source address="10.0.0.0/8"  port protocol="tcp" port="21"  accept'
sudo firewall-cmd --permanent --add-rich-rule='  rule family="ipv4"  source address="10.0.0.0/8"  port protocol="tcp" port="2222"  accept'
sudo firewall-cmd --reload
Credential management:
# Restrict .env file permissionschmod 600 /var/www/html/rconfig8/current/.envchown www-data:www-data /var/www/html/rconfig8/current/.envTo rotate credentials: update .env, redeploy the affected service, then update device configurations or rely on credential variables for automatic substitution.
Common gotchas
Section titled “Common gotchas”Troubleshooting
Section titled “Troubleshooting”Files not appearing on the device page
Section titled “Files not appearing on the device page”-
Check the inbox for the file:
Terminal window ls -la /srv/xftp/ -
Verify the filename contains the device ID before a dash (e.g.
1234-vlan.dat). -
Confirm the device ID exists in rConfig:
Terminal window mysql -u rconfig -p rconfig -e "SELECT id, device_name FROM devices WHERE id = 1234;" -
Run a manual sweep:
Terminal window php artisan rconfig:sweep-xftp-dir -
Check sweep logs for errors:
Terminal window tail -50 /var/www/html/rconfig8/current/storage/logs/laravel.log | grep sweep
Upload failures
Section titled “Upload failures”Service not running:
php artisan rconfig:xftp-toggle --statusphp artisan rconfig:xftp-toggle # restart if neededFirewall blocking:
telnet <rconfig-server-ip> 69    # TFTPtelnet <rconfig-server-ip> 21    # FTPtelnet <rconfig-server-ip> 2222  # SFTP
# Open ports if blockedsudo firewall-cmd --add-port=69/udp --permanentsudo firewall-cmd --add-port=21/tcp --permanentsudo firewall-cmd --add-port=2222/tcp --permanentsudo firewall-cmd --reload
Authentication failure (FTP/SFTP):
grep -E 'FTP_USERNAME|FTP_PASSWORD|SFTP_USERNAME|SFTP_PASSWORD' /var/www/html/rconfig8/current/.env
# Test FTP manuallyftp <rconfig-server-ip>
# Test SFTP manuallysftp -P 2222 username@<rconfig-server-ip>
Disk space:
df -h /srv/xftp/Container fails to start
Section titled “Container fails to start”-
Check container logs:
Terminal window docker ps -adocker logs rconfig-tftpdocker logs rconfig-ftpdocker logs rconfig-sftp -
Check for port conflicts:
Terminal window sudo netstat -tulpn | grep :69sudo netstat -tulpn | grep :21sudo netstat -tulpn | grep :2222 -
Check directory permissions:
Terminal window ls -la /srv/xftp/sudo chown -R www-data:www-data /srv/xftp/sudo chmod 755 /srv/xftp/ -
Restart Docker if needed:
Terminal window sudo systemctl restart dockersudo journalctl -u docker -n 50
After resolving the issue, remove the failed container and redeploy:
docker rm rconfig-<service>php artisan rconfig:xftp-toggleSweep task not processing files
Section titled “Sweep task not processing files”-
Navigate to Tasks → Scheduled Tasks and confirm the TFTP Directory Sweep task is enabled.
-
Check the task run history for errors.
-
Run manually and check output:
Terminal window php artisan rconfig:sweep-xftp-dir -
Verify the Laravel scheduler cron is active:
Terminal window crontab -u www-data -l | grep schedule
What’s next
Section titled “What’s next”- Configure device backups - Set up automated configuration backups alongside xFTP file uploads
- Manage devices in rConfig - Add and configure the devices that will push files to xFTP
- Set up scheduled tasks - Configure the xFTP sweep frequency and other automated jobs