Clear Redis RBAC Cache
rConfig V8 Pro to Vector Server Upgrade
rConfig V8 Pro to Vector Server Upgrade: Enterprise Platform Migration
Section titled “rConfig V8 Pro to Vector Server Upgrade: Enterprise Platform Migration”rConfig Vector Server represents an enhanced edition of rConfig V8 Professional, delivering advanced capabilities for network configuration and device management. Migration from V8 Professional to Vector Server provides access to expanded functionality, enhanced performance characteristics, and strengthened security features. The upgrade procedure follows an in-place migration approach, requiring license acquisition, script execution, and Vector Server configuration for existing agent infrastructure.
When to use this
Section titled “When to use this”Follow this guide when you have a working rConfig V8 Professional installation and have purchased a Vector Server licence. This is an in-place migration — your existing devices, configurations, and history remain intact. To upgrade from V7 to Vector directly, use the Vector V7 to V8 upgrade guide instead.
Prerequisites
Section titled “Prerequisites”- rConfig V8 Professional installed and operational at
/var/www/html/rconfig8 - Root or
sudoSSH access to the server - Vector Server licence provisioned by rConfig support (contact support to request this before starting)
- API authentication token from the rConfig customer portal
- Complete system and database backups taken, verified, and stored off-server
Vector Server Upgrade Procedures by Operating System
Section titled “Vector Server Upgrade Procedures by Operating System”rConfig V8 Professional to Vector Server Upgrade Procedures
-
Establish SSH connection to the server and elevate to root user privileges
Terminal window ssh user@your-server-ip -
Navigate to the rConfig application directory
Terminal window cd /var/www/html/rconfig8/ -
Download the current deployment script. This script requires valid licensing as provisioned by support services.
Terminal window cd /var/www/html/rconfig8/wget https://dl.rconfig.com/downloads/rconfig8-vector-deploy.sh -O rconfig8-vector-deploy.shchmod +x rconfig8-vector-deploy.sh -
Execute the deployment script Replace
<someCode>with your API authentication token.Terminal window ./rconfig8-vector-deploy.sh --mode=deploy --apitoken=<someCode> -
Verify upgrade completion
- Following deployment script completion, update legacy directory path references in the database for
rconfig5,rconfig6, orrconfig7directories:Terminal window cd /var/www/html/rconfig8/currentphp artisan rconfig:updatedb8 - Verify the rConfig version reflects the Vector Server update.
- Navigate to the Agents menu under Settings.
- When adding or modifying device configurations, verify that the Agent option is available.
- Verify that the application logo has updated to the Vector branding.
- Following deployment script completion, update legacy directory path references in the database for
Vector Server upgrade on CentOS, Rocky, RHEL, Alma, and AWS is complete. Continue with Vector agent installation to register managed endpoints.
rConfig V8 Professional to Vector Server Upgrade Procedures
-
Establish SSH connection to the server and elevate to root user privileges
Terminal window ssh user@your-server-ip -
Navigate to the rConfig application directory
Terminal window cd /var/www/html/rconfig8/ -
Download the current deployment script. This script requires valid licensing as provisioned by support services.
Terminal window cd /var/www/html/rconfig8/sudo wget https://dl.rconfig.com/downloads/rconfig8-vector-deploy-ubuntu.sh -O rconfig8-vector-deploy-ubuntu.shsudo chmod +x rconfig8-vector-deploy-ubuntu.sh -
Execute the deployment script Replace
<someCode>with your API authentication token.Terminal window sudo ./rconfig8-vector-deploy-ubuntu.sh --mode=deploy --apitoken=yourApiToken -
Verify upgrade completion
- Following deployment script completion, update legacy directory path references in the database for
rconfig5,rconfig6, orrconfig7directories:
Terminal window cd /var/www/html/rconfig8/currentphp artisan rconfig:updatedb8- Verify the rConfig version reflects the Vector Server update.
- Navigate to the Agents menu under Settings.
- When adding or modifying device configurations, verify that the Agent option is available.
- Verify that the application logo has updated to the Vector branding.
- Following deployment script completion, update legacy directory path references in the database for
Vector Server upgrade on Ubuntu is complete. Continue with Vector agent installation to register managed endpoints.
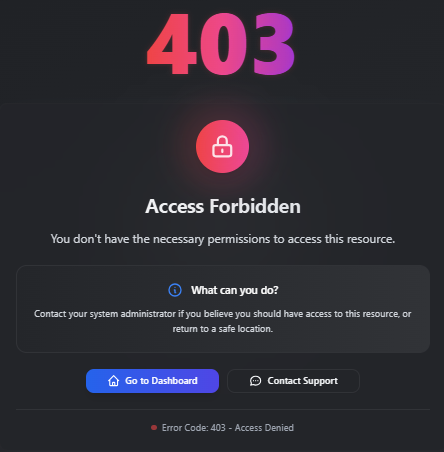
HTTP 403 Access Forbidden Error Resolution
Section titled “HTTP 403 Access Forbidden Error Resolution”If encountering HTTP 403 Access Forbidden errors following Vector Server upgrade, cached RBAC data may require clearing.
The error may appear as follows when accessing Settings > Agents:
To resolve, execute the following commands:
# This error typically results from cached data from previous rConfig versions
redis-cliselect 1keys *del KEYNAME # (any key containing "permissions")
exitcd /var/www/html/rconfig8/current && php artisan rconfig:clear-all
Video demonstration of the resolution process:
What’s next
Section titled “What’s next”- Vector Agent Installation - Deploy and register agents on your managed devices
- Device Management - Verify devices and credentials transferred correctly from V8 Pro
- CLI Commands - Reference for Vector-specific artisan commands