Statseeker Device Sync V2
Statseeker Device Sync V2: End-to-End Setup in rConfig V8.2.0
Section titled “Statseeker Device Sync V2: End-to-End Setup in rConfig V8.2.0”The V2 Statseeker driver pulls device inventory from a Statseeker server using its REST API and feeds it through the unified V2 pipeline. This guide is the model V2 driver setup — every step you will follow for the other V2 drivers (Zabbix, Nautobot, NetBox, PRTG, AKIPS) is the same pattern, with only the Setup tab fields and upstream conventions changing per driver.
| Platform | rConfig V8 Support | Auth supported | V2 Status |
|---|---|---|---|
| Statseeker | V8.2.0+ | Bearer token, API token, or username/password | Field tested |
Mental Model: End Goal First
Section titled “Mental Model: End Goal First”The point of setting up a V2 integration is to land in a steady state where rConfig’s device inventory is continuously reconciled against Statseeker on a schedule, with no operator in the loop. That end state looks like this:
A Scheduled Task of type Integration V2 Job runs the Statseeker instance in Apply mode on a cron, e.g. nightly. It runs the same six-stage pipeline you’ll run interactively in this guide, writes any
createandupdatedecisions to rConfig, leaves any conflicts or ambiguous matches in Problem Devices for review, and notifies you on completion.
To get there, you walk a one-time setup and a sanity-check loop:
- Create the integration instance — Statseeker connectivity and auth in the Setup tab. Validate with Test Connection.
- Set up the Device Profiles the synced devices will inherit from. This happens under Inventory → Device Profiles, not in the integration itself.
- Run an Extract Preview to confirm filters return the right Statseeker devices.
- Run a Sync Preview to walk the full pipeline (canonicalize → reconcile → decide) without writing.
- Run a Full Sync (Apply) once the preview’s decisions look right.
- Schedule the integration to run on a cron from the rConfig scheduler.
Each of these steps is below, with screenshots and the exact controls to use.
%%{init: {'themeVariables': {'fontSize': '60px'}}}%%
flowchart LR
    A[Create instance<br/>Setup tab] --> B[Test Connection]
    B --> C[Device Profiles<br/>Inventory]
    C --> D[Extract Preview]
    D --> E[Sync Preview]
    E --> F[Full Sync · Apply]
    F --> G[Scheduled Task<br/>recurring sync]

  classDef step font-size:60px,stroke-width:2px;
  class A,B,C,D,E,F,G step;
Prerequisites
Section titled “Prerequisites”Statseeker:
- A reachable Statseeker server with REST API enabled (
/api/v2.1/) - Either a bearer token / API token, or a username and password with read access on the device list (
/api/v2.1/cdt_device/) - Network connectivity from rConfig to Statseeker on the API port
- Optional: device groups in Statseeker if you want to drive Device Profile resolution or filtering by group
rConfig V8.2.0+:
- Administrator access
- A clear answer to: which Device Profile (vendor, category, template, credential set, optional SNMP group / Vector agent) every synced device should adopt by default
Step 1 — Create the Integration Instance (Setup Tab)
Section titled “Step 1 — Create the Integration Instance (Setup Tab)”1.1 Open the V2 driver picker
Section titled “1.1 Open the V2 driver picker”Navigate to Settings → Integrations, then click New V2 Integration. The driver picker shows every V2 driver in two groups: drivers you’ve already configured and drivers you haven’t.
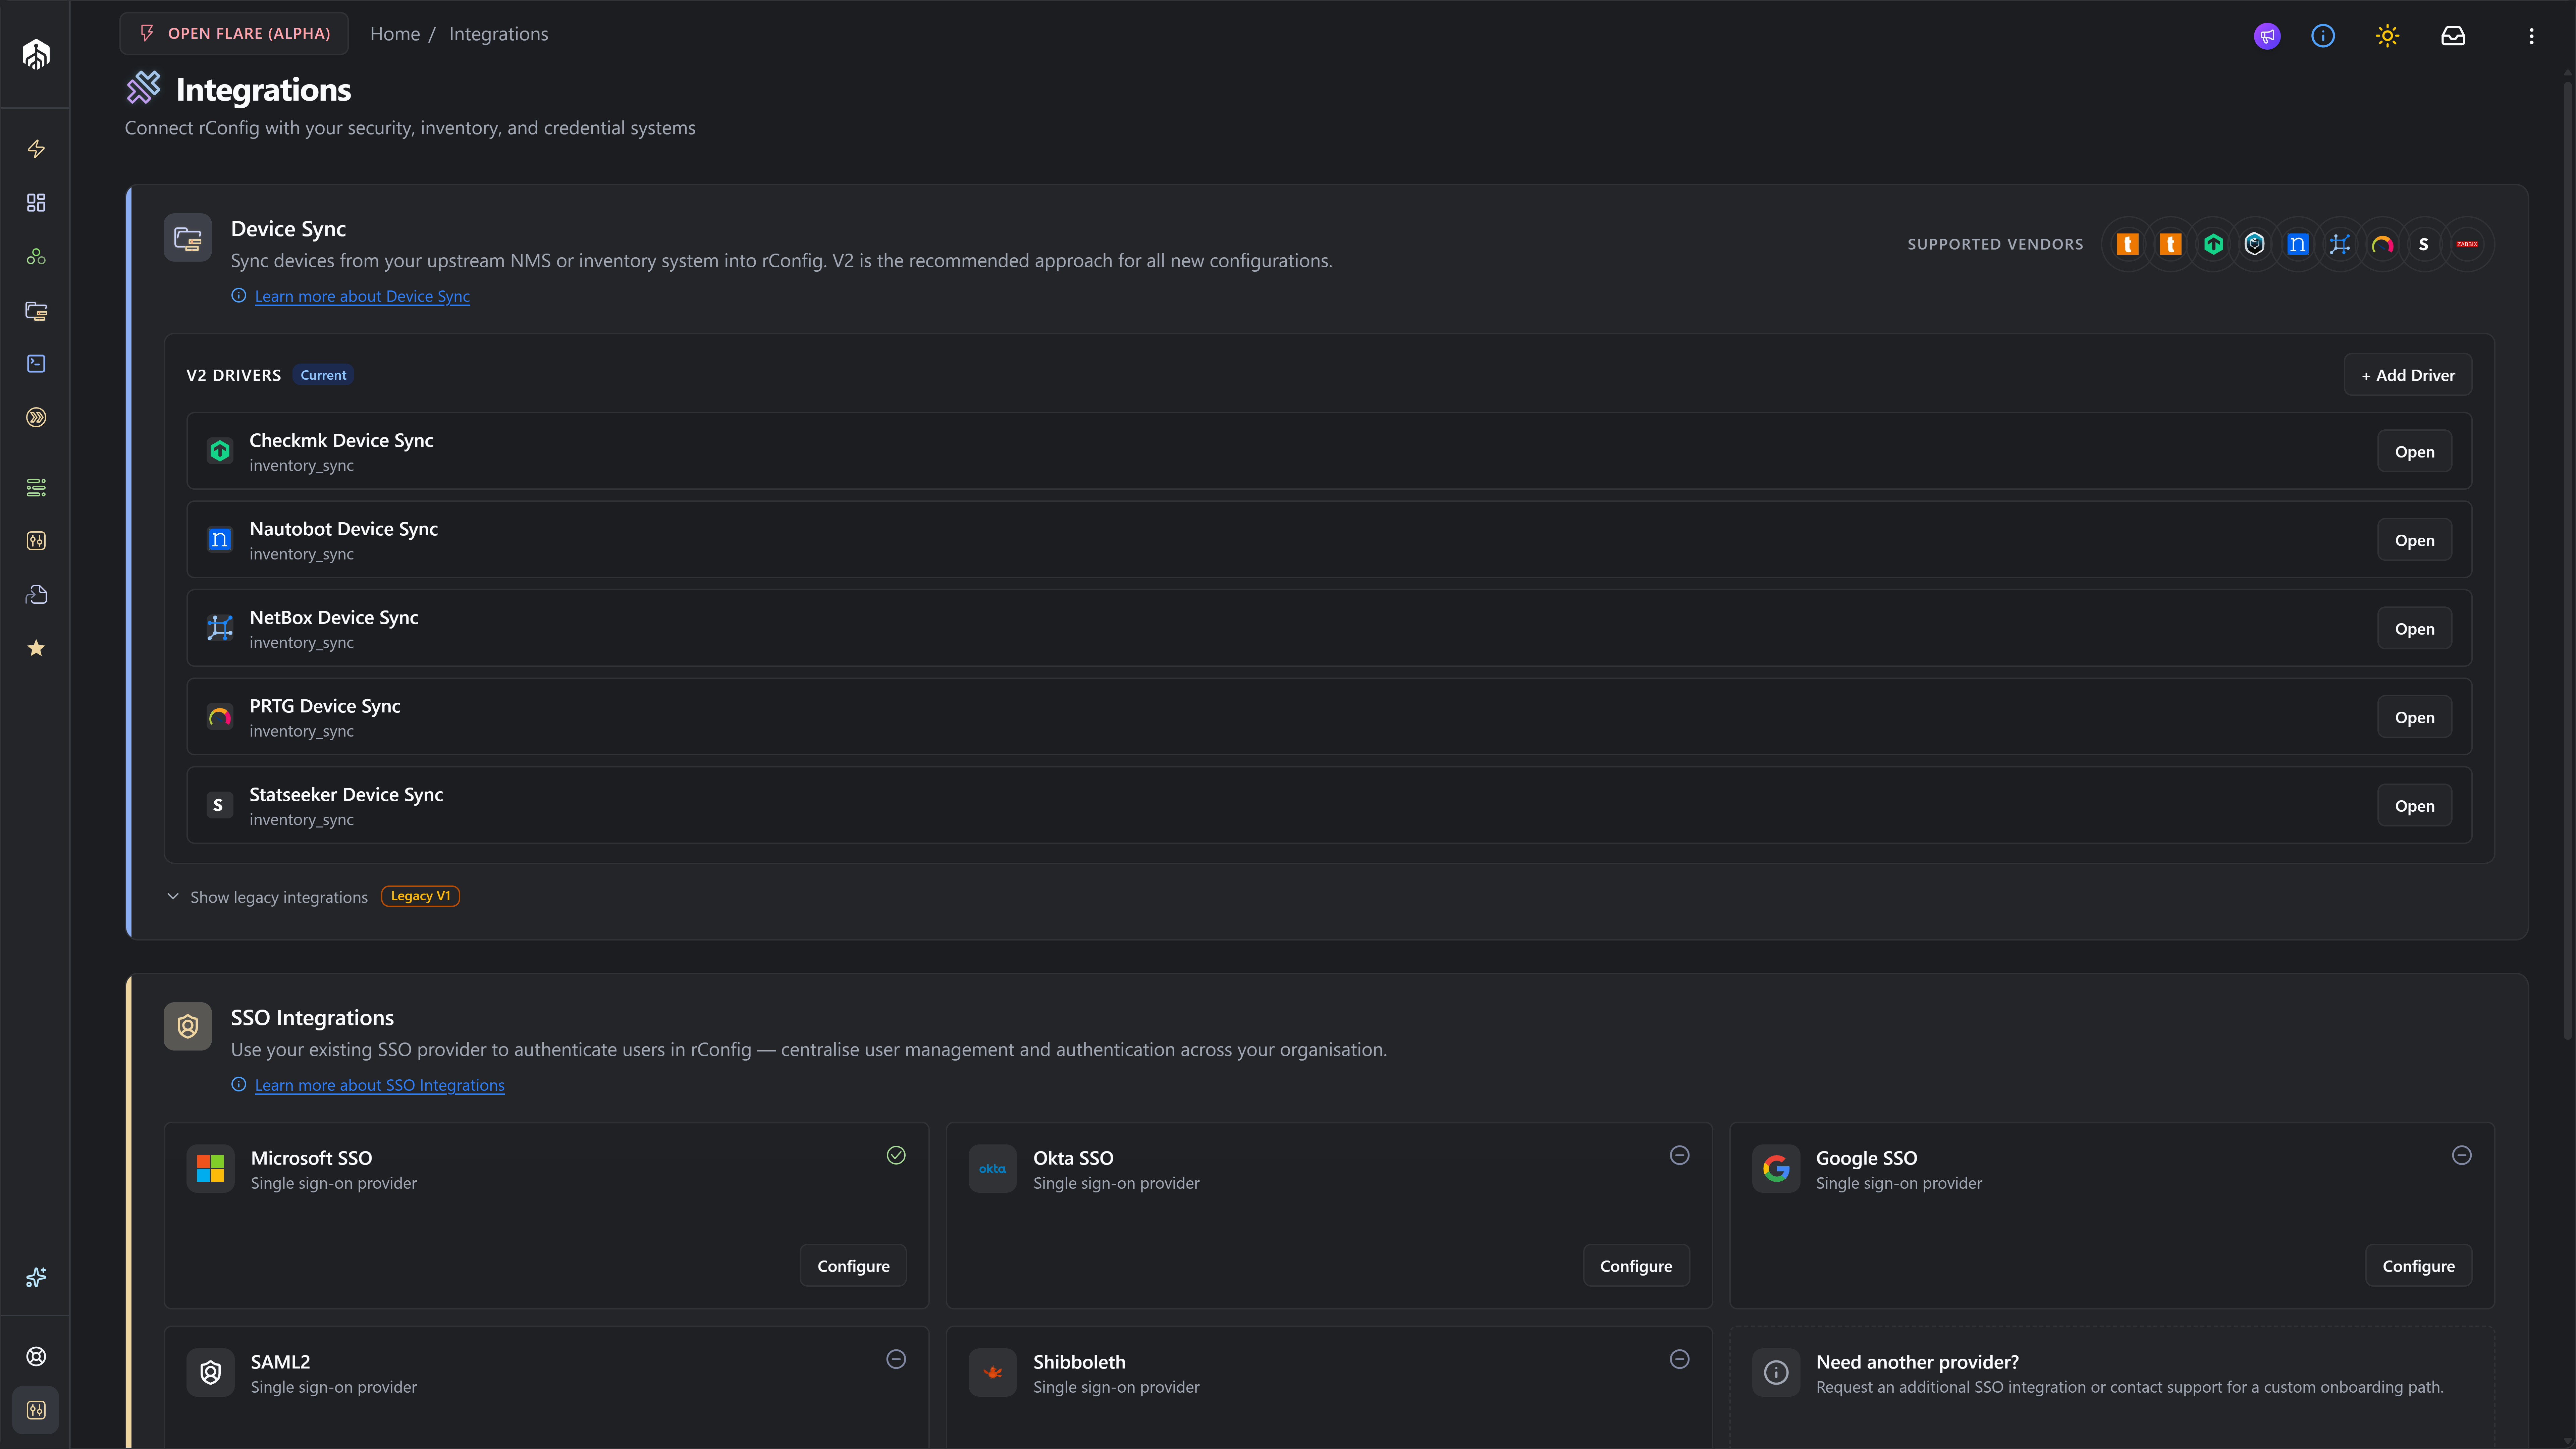
Each card carries the driver’s verification badge — Field tested for Statseeker — plus a link to its docs page. Click the Statseeker card.
1.2 Fill in the schema-driven Setup tab
Section titled “1.2 Fill in the schema-driven Setup tab”The driver picker drops you straight into the instance Detail page on the Setup tab. The form is rendered from statseeker.schema.php and is laid out in two sections.
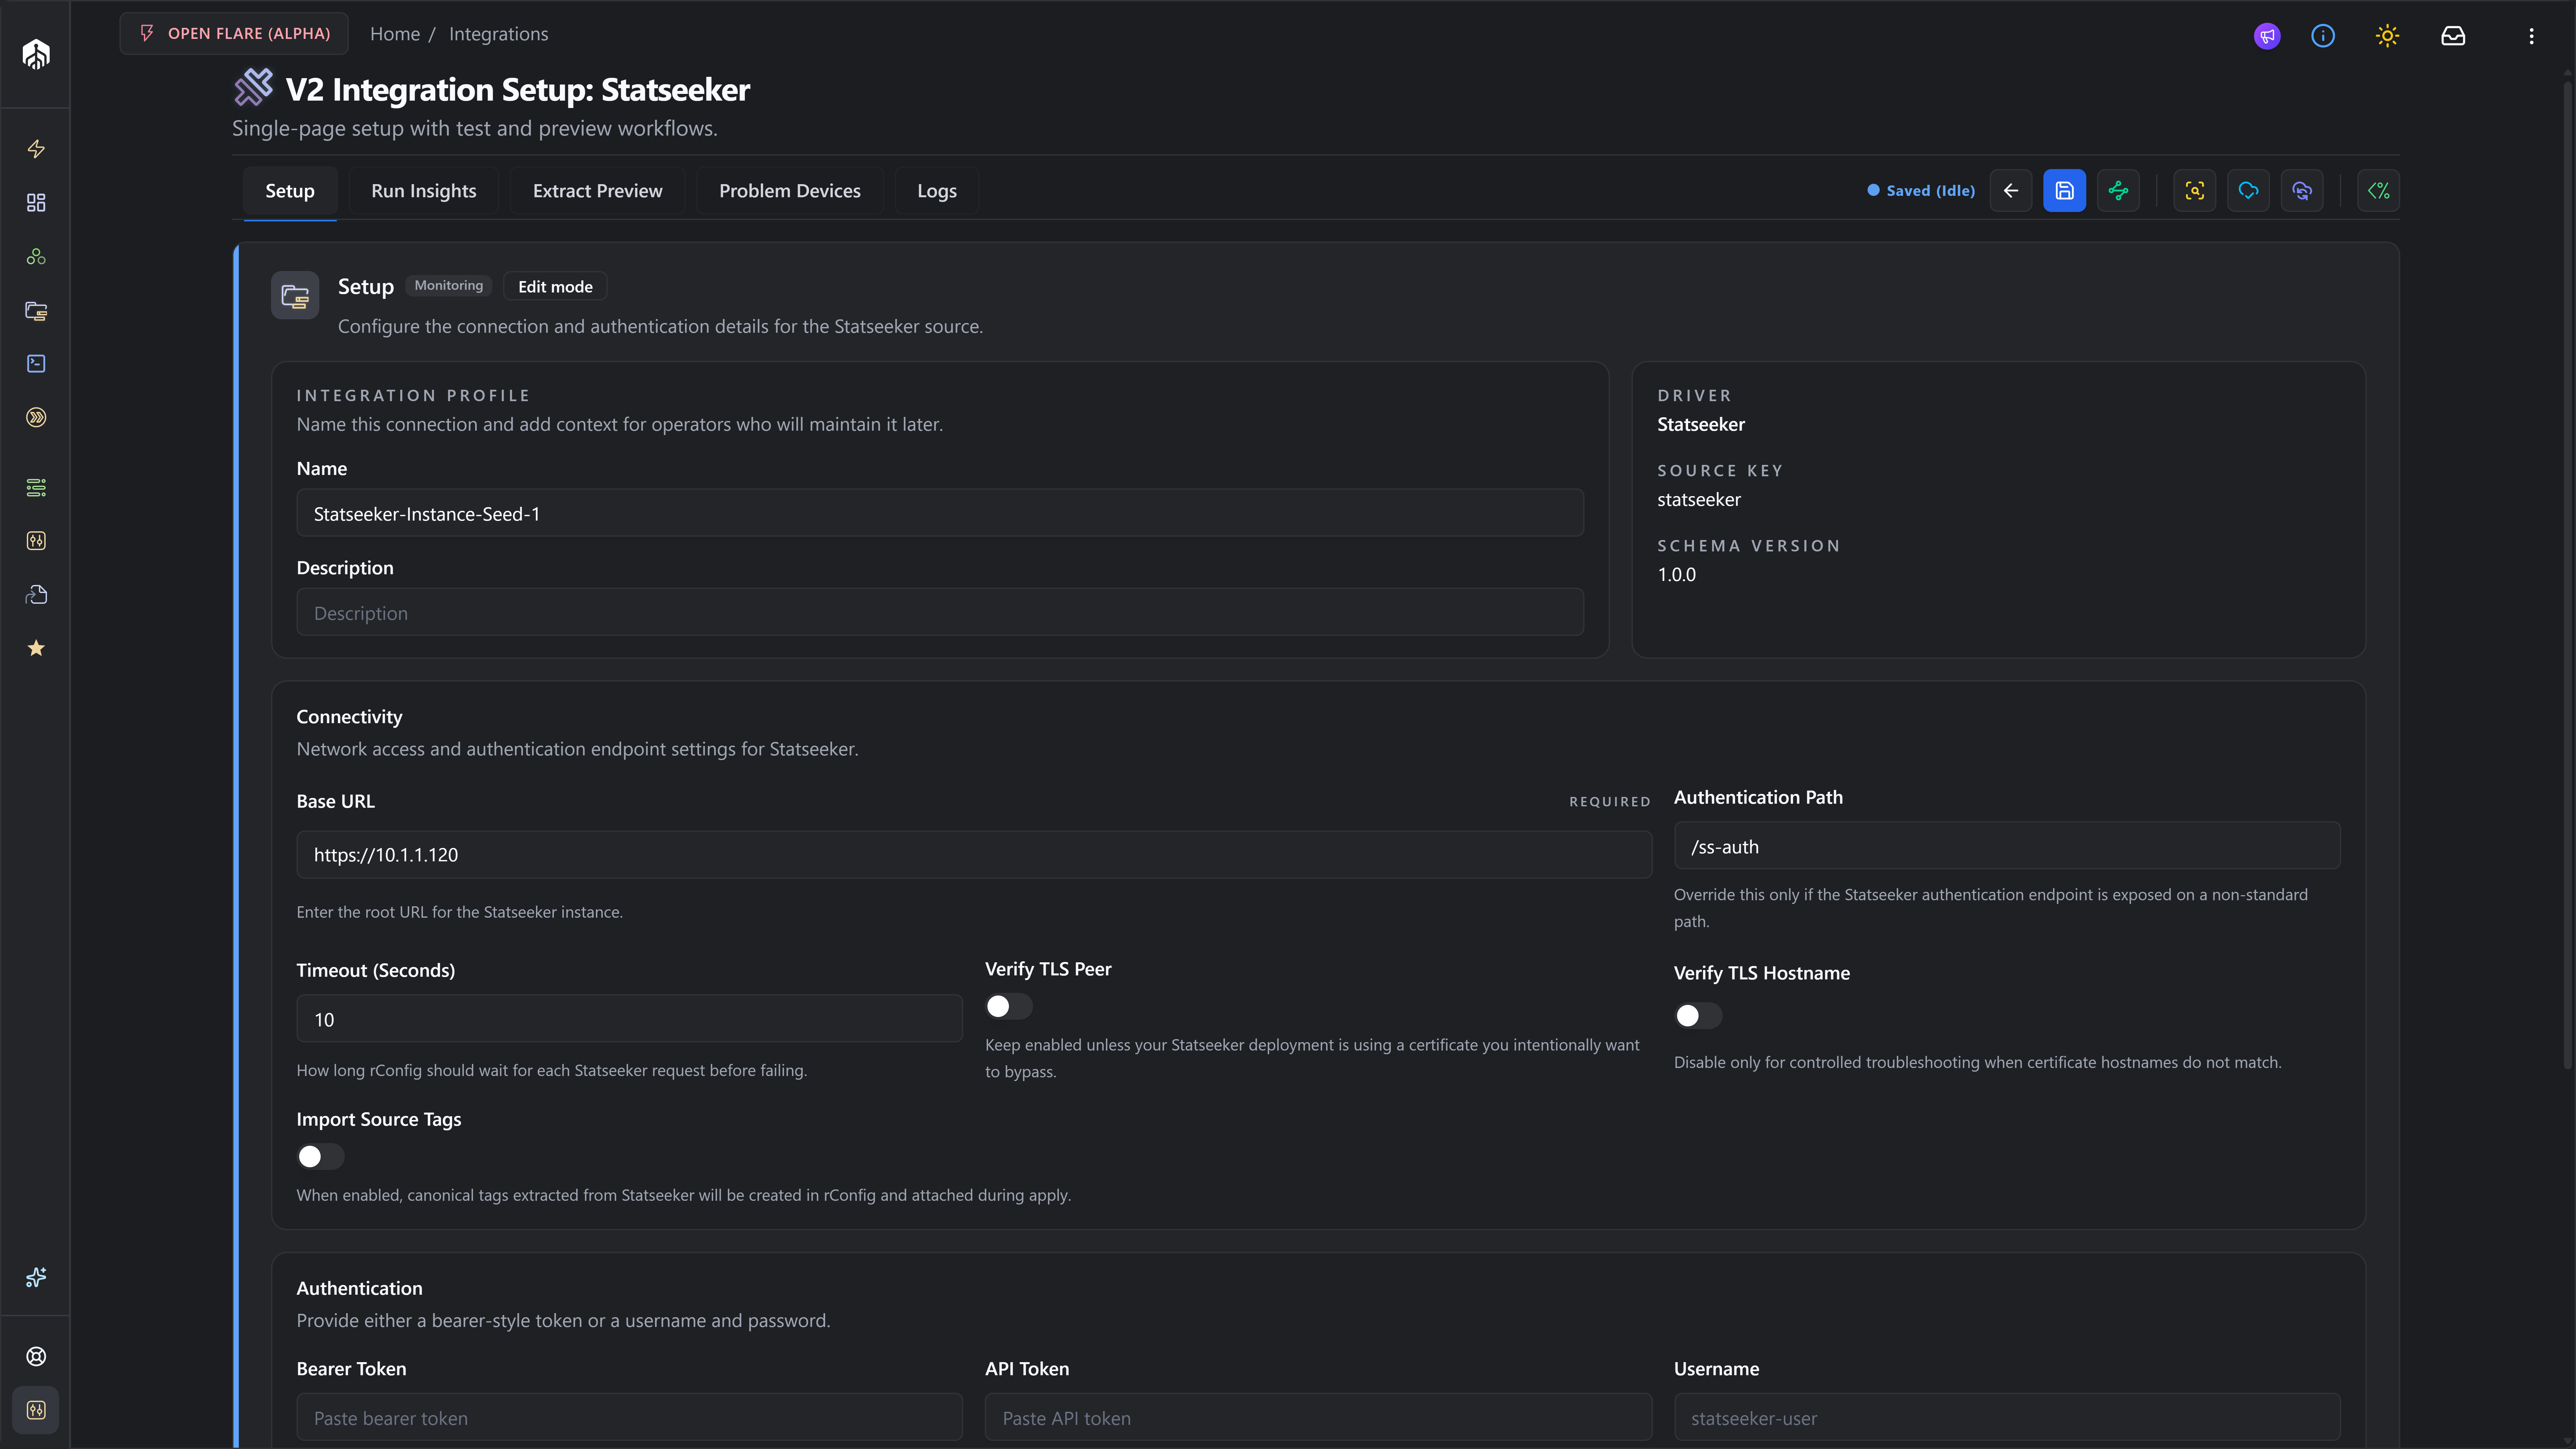
Connectivity
| Field | Default | Notes |
|---|---|---|
| Base URL | required | Root of the Statseeker server, e.g. https://statseeker.example.com. No trailing slash needed. |
| Authentication Path | /ss-auth | Only override for non-standard deployments. Used when authenticating with username/password. |
| Timeout (Seconds) | 30 | HTTP request timeout. Range 1–120. Increase for very large device lists. |
| Verify TLS Peer | on | Leave on for production. Disable only for self-signed labs. |
| Verify TLS Hostname | on | Leave on for production. Disable only for hostname mismatches in labs. |
| Import Source Tags | off | When on, canonical tags extracted from Statseeker are created in rConfig and attached on Apply. |
Authentication — provide one of these:
- Bearer Token (preferred). Stored as a secret. The driver uses it directly.
- API Token. Stored as a secret. Used when your Statseeker deployment exposes API tokens rather than bearer.
- Username + Password. The driver POSTs to
auth_path(default/ss-auth) to exchange credentials for a token.
1.3 Test the connection
Section titled “1.3 Test the connection”Click Test Connection in the action bar at the top of the page.

The driver hits GET /api/v2.1/ and reports:
ok: trueand a green status — Statseeker is reachable and the auth material works.ok: falsewith an HTTP status, request path and a short response snippet — fix the failing piece (URL, TLS, credentials) and retry.
Common failures:
| What you see | Most likely fix |
|---|---|
| Connection refused / timeout | Wrong Base URL or firewall in between rConfig and Statseeker. |
SSL / certificate error | Self-signed cert — toggle Verify TLS Peer / Hostname off (lab only). |
401 / 403 from /api/v2.1/ | Bearer/API token invalid, or username/password wrong, or auth_path overridden. |
200 but auth still rejected | Auth path returned a body without a token — confirm Statseeker auth contract. |
1.4 Save
Section titled “1.4 Save”Click Save. The runtime config is written to integration_instances.runtime_config and the auth material is stored via secrets_ref. The save indicator in the action bar flips to Saved once persisted.
You now have a functional Statseeker integration instance — but no Device Profile has been chosen yet, so a sync would mark every candidate as profile_unresolved. Do not run a preview yet. Move to Step 2.
Step 2 — Set Up Device Profiles (Inventory)
Section titled “Step 2 — Set Up Device Profiles (Inventory)”Device Profiles live outside the integration. They are the rConfig-side definition of what a synced device should look like — vendor, category, device template, credential set, optional SNMP group and Vector agent. Each profile has a slug; the V2 driver matches an upstream record’s group/tag to that slug to pick the profile.
2.1 Open the Device Profiles page
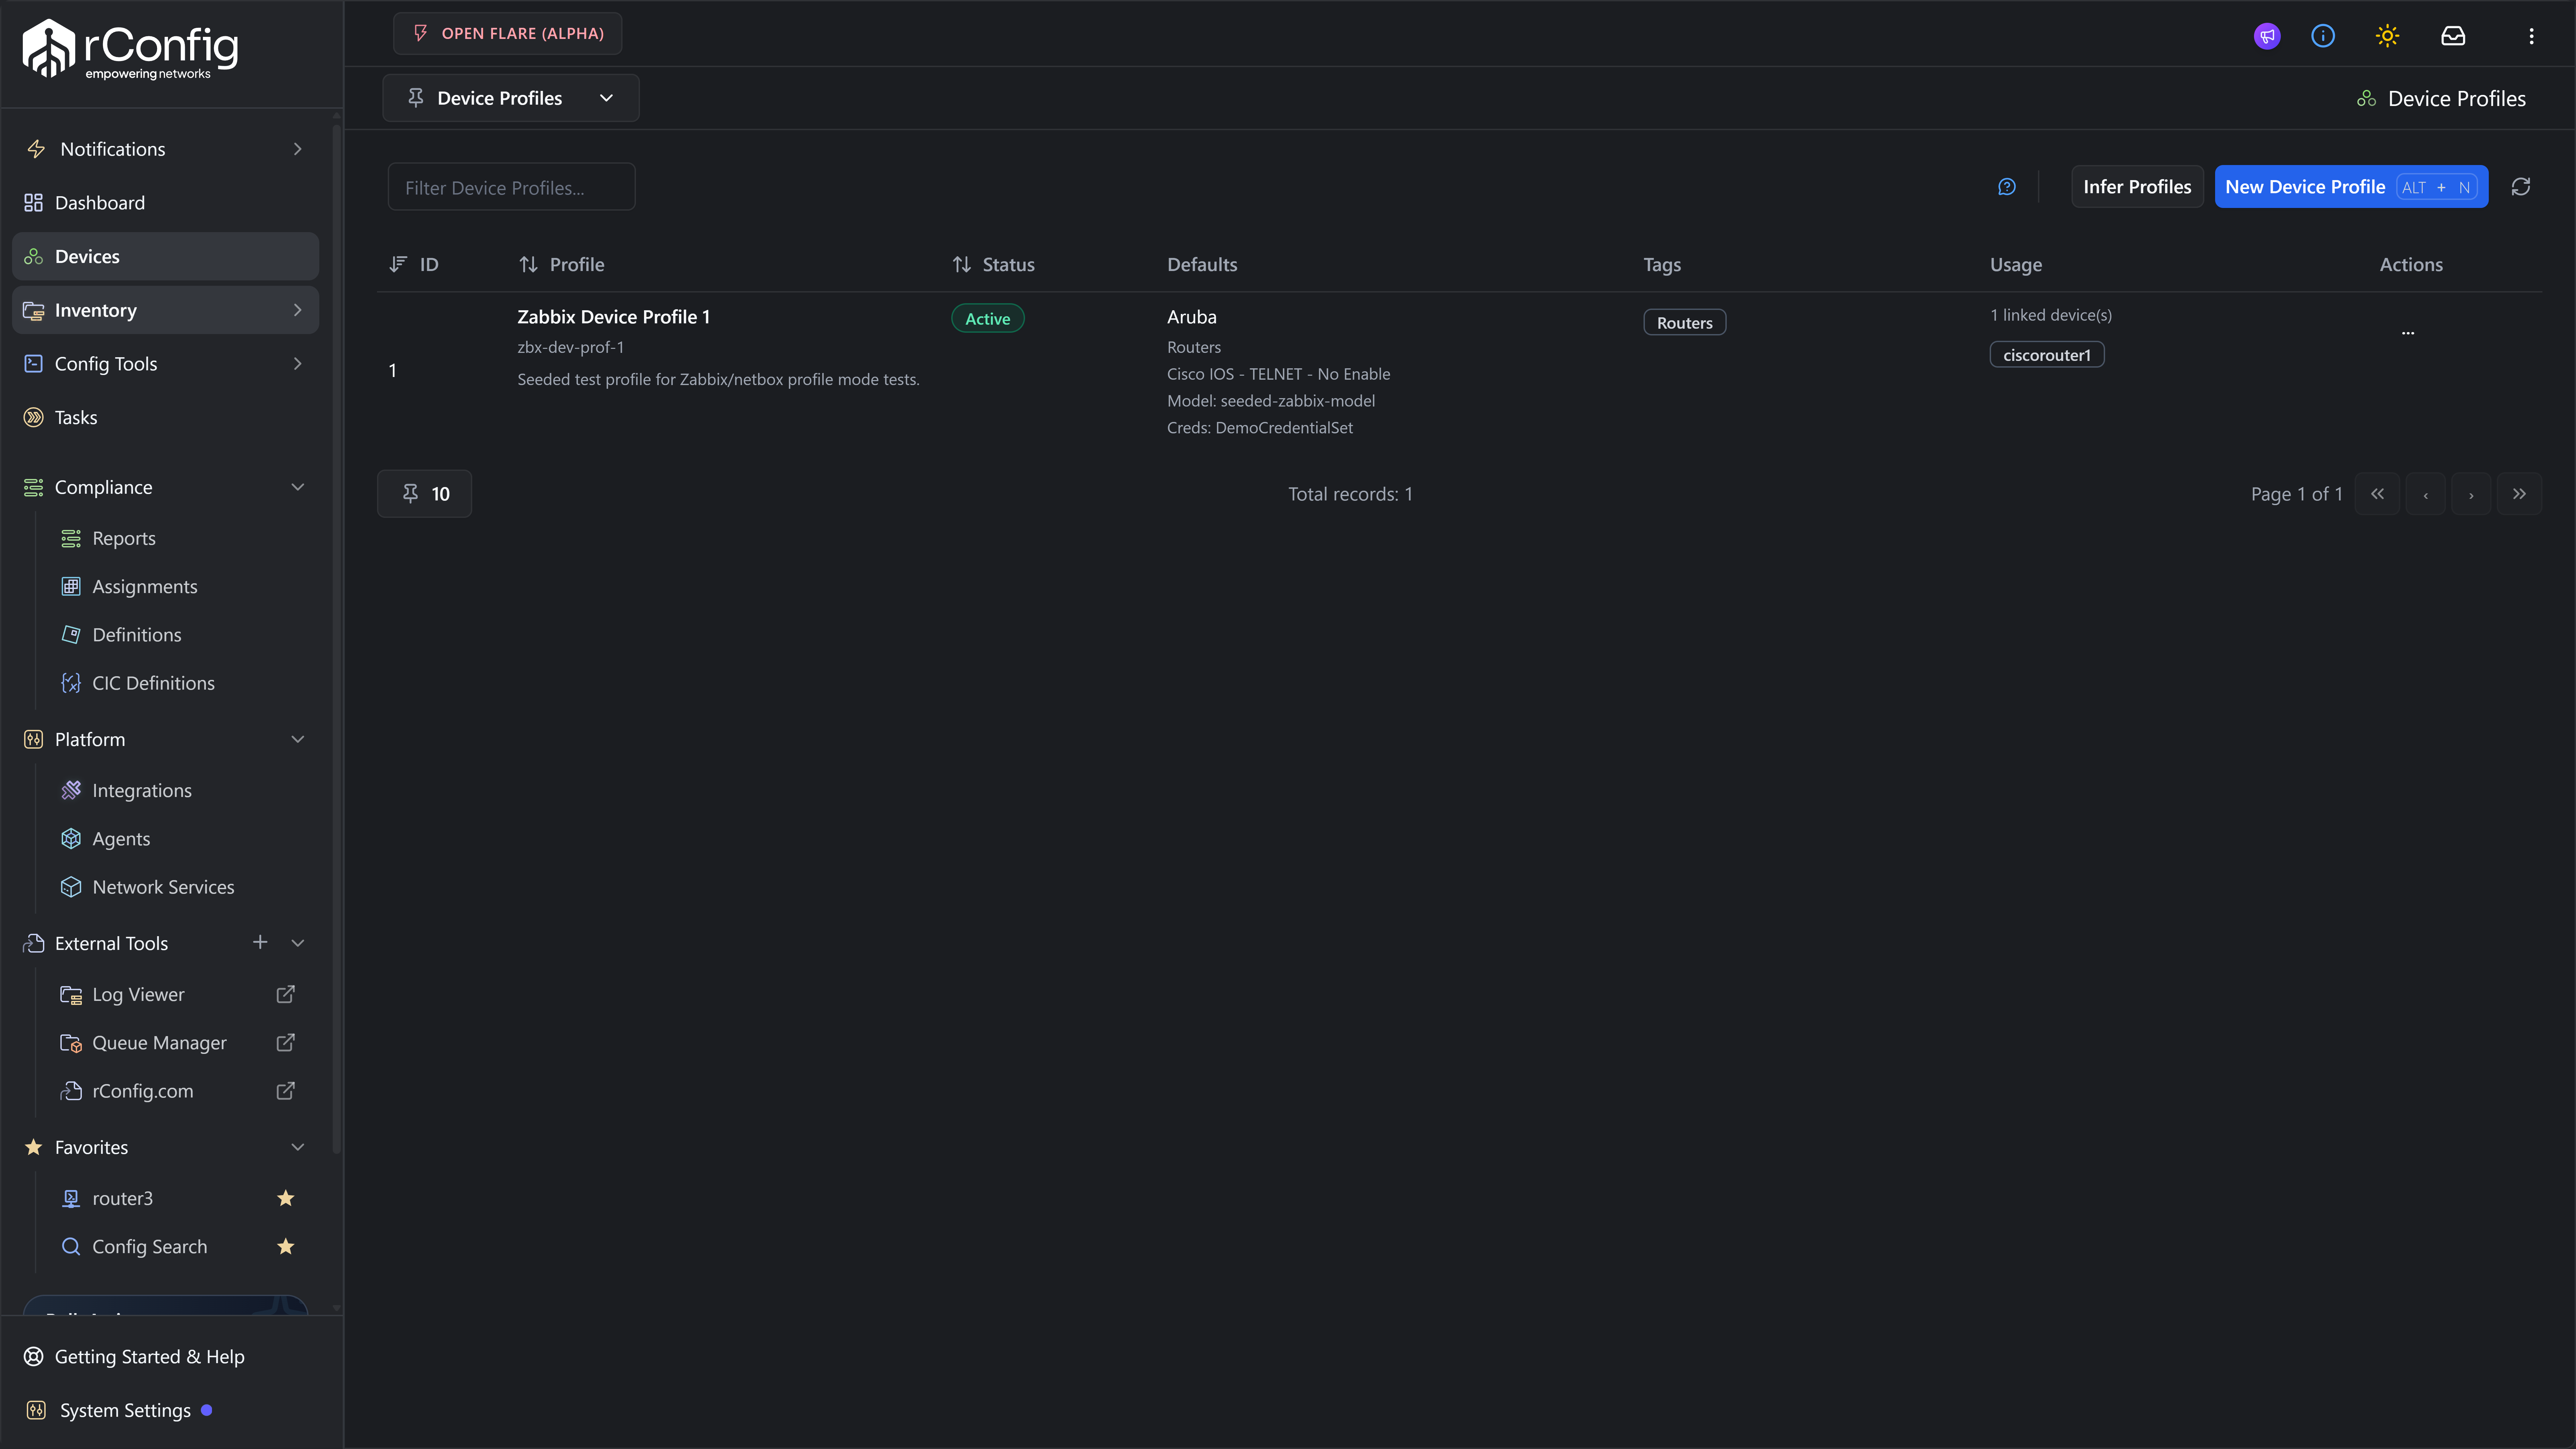
Section titled “2.1 Open the Device Profiles page”Navigate to Inventory → Device Profiles.
2.2 Create a Device Profile per device class
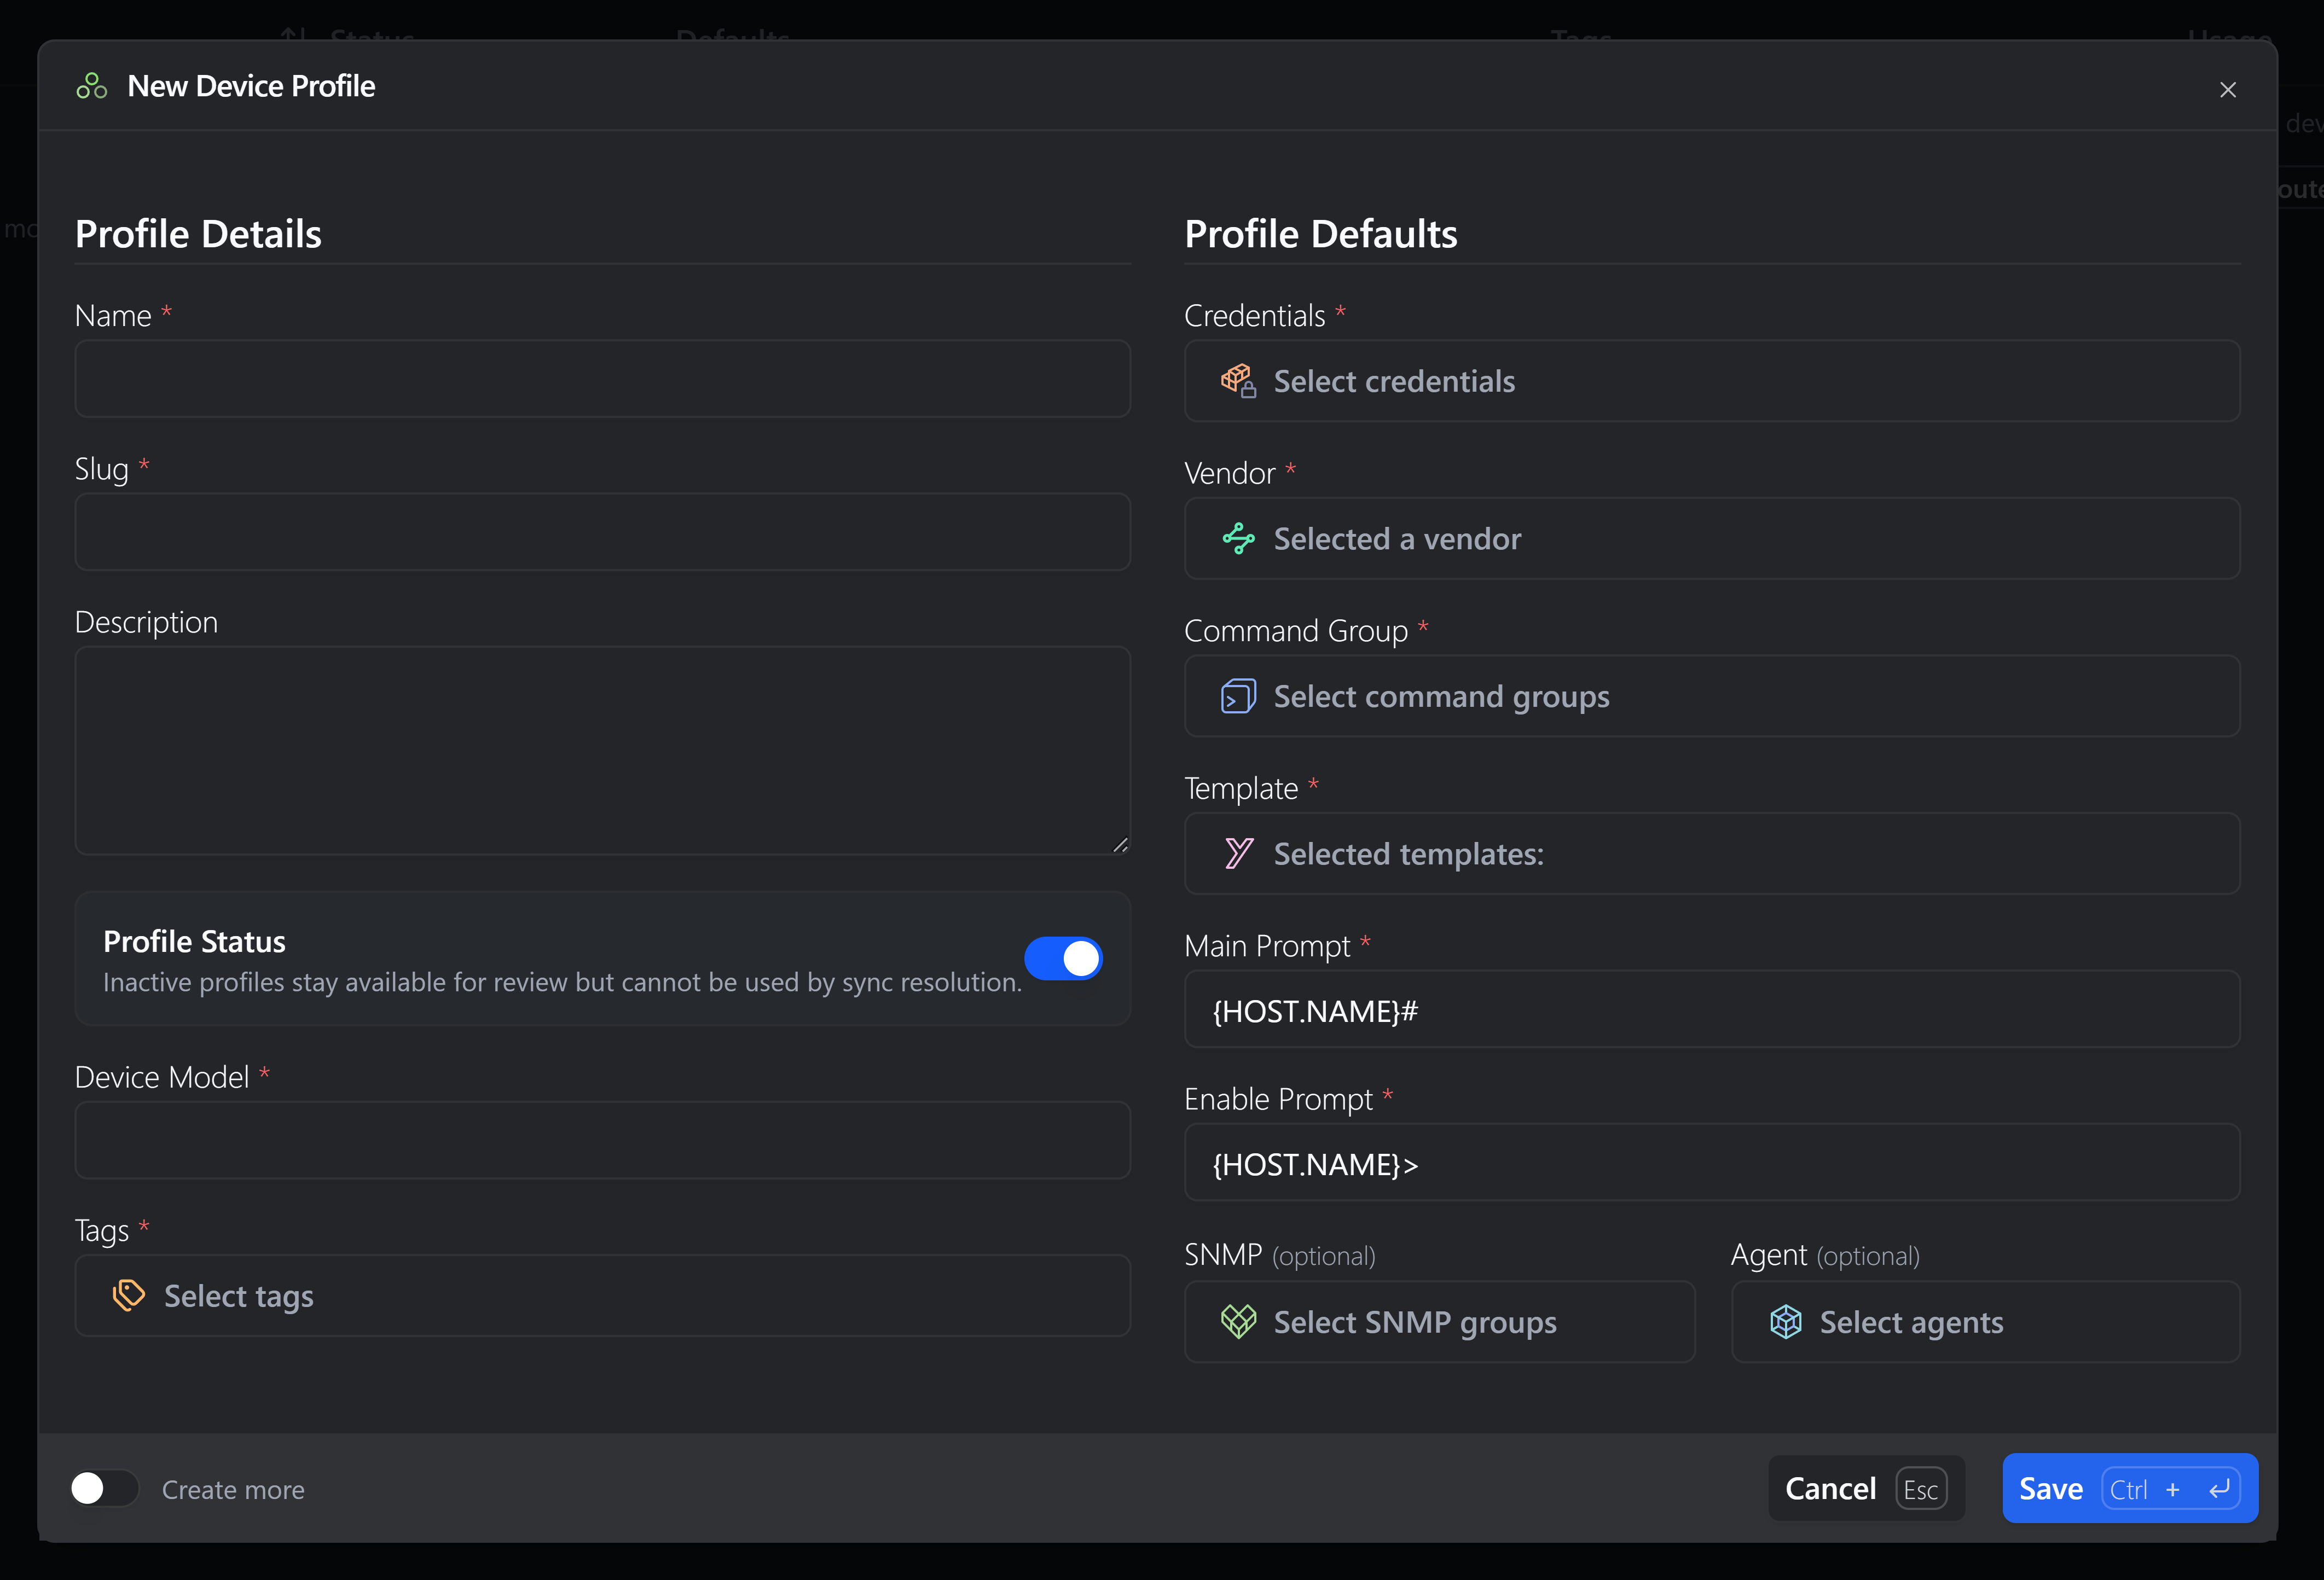
Section titled “2.2 Create a Device Profile per device class”For each device class you want to sync (e.g. Cisco IOS Core Routers, Arista Edge Switches), click New Device Profile and fill in:
- Name — human-readable.
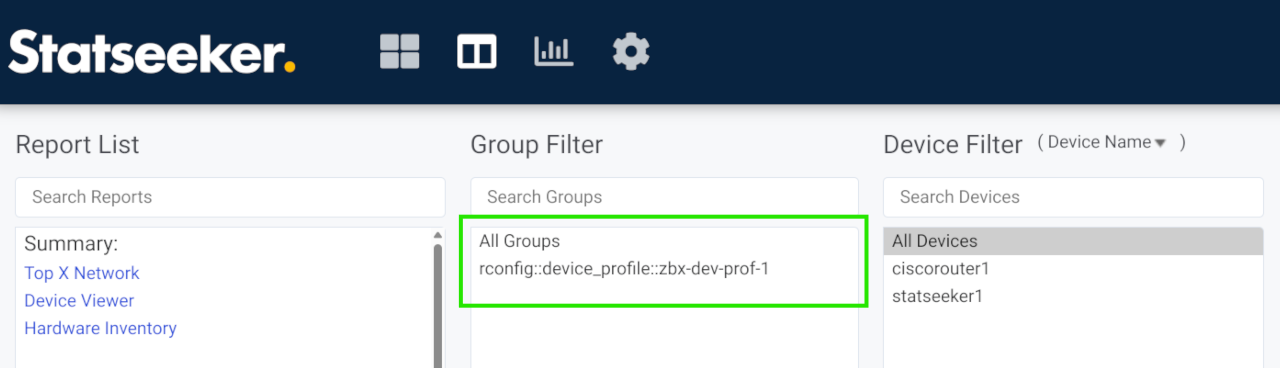
- Slug — the value Statseeker will reference. This is the value you must put on a Statseeker group / tag.
- Vendor, Category, Template — standard rConfig device classification.
- Credential set — used by rConfig to log in for backups.
- SNMP group, Vector agent, default tags, default model / prompt patterns — optional.
2.3 Map the slug on the Statseeker side
Section titled “2.3 Map the slug on the Statseeker side”The Statseeker driver looks for the profile slug on each device record in this order (statseeker.schema.php → device_profile.source_profile_paths):
tagsgroupgroupsgroup_namegroup_path
In practice, the cleanest approach is to name your Statseeker groups to match your Device Profile slugs. A device in the Statseeker group cisco-ios-core will resolve to a Device Profile with slug = cisco-ios-core, no extra tagging required.
If you cannot rename groups, you can also set a default profile on the Statseeker integration instance so candidates that don’t resolve a profile inherit a sensible fallback rather than landing in Problem Devices.
Step 3 — Run an Extract Preview
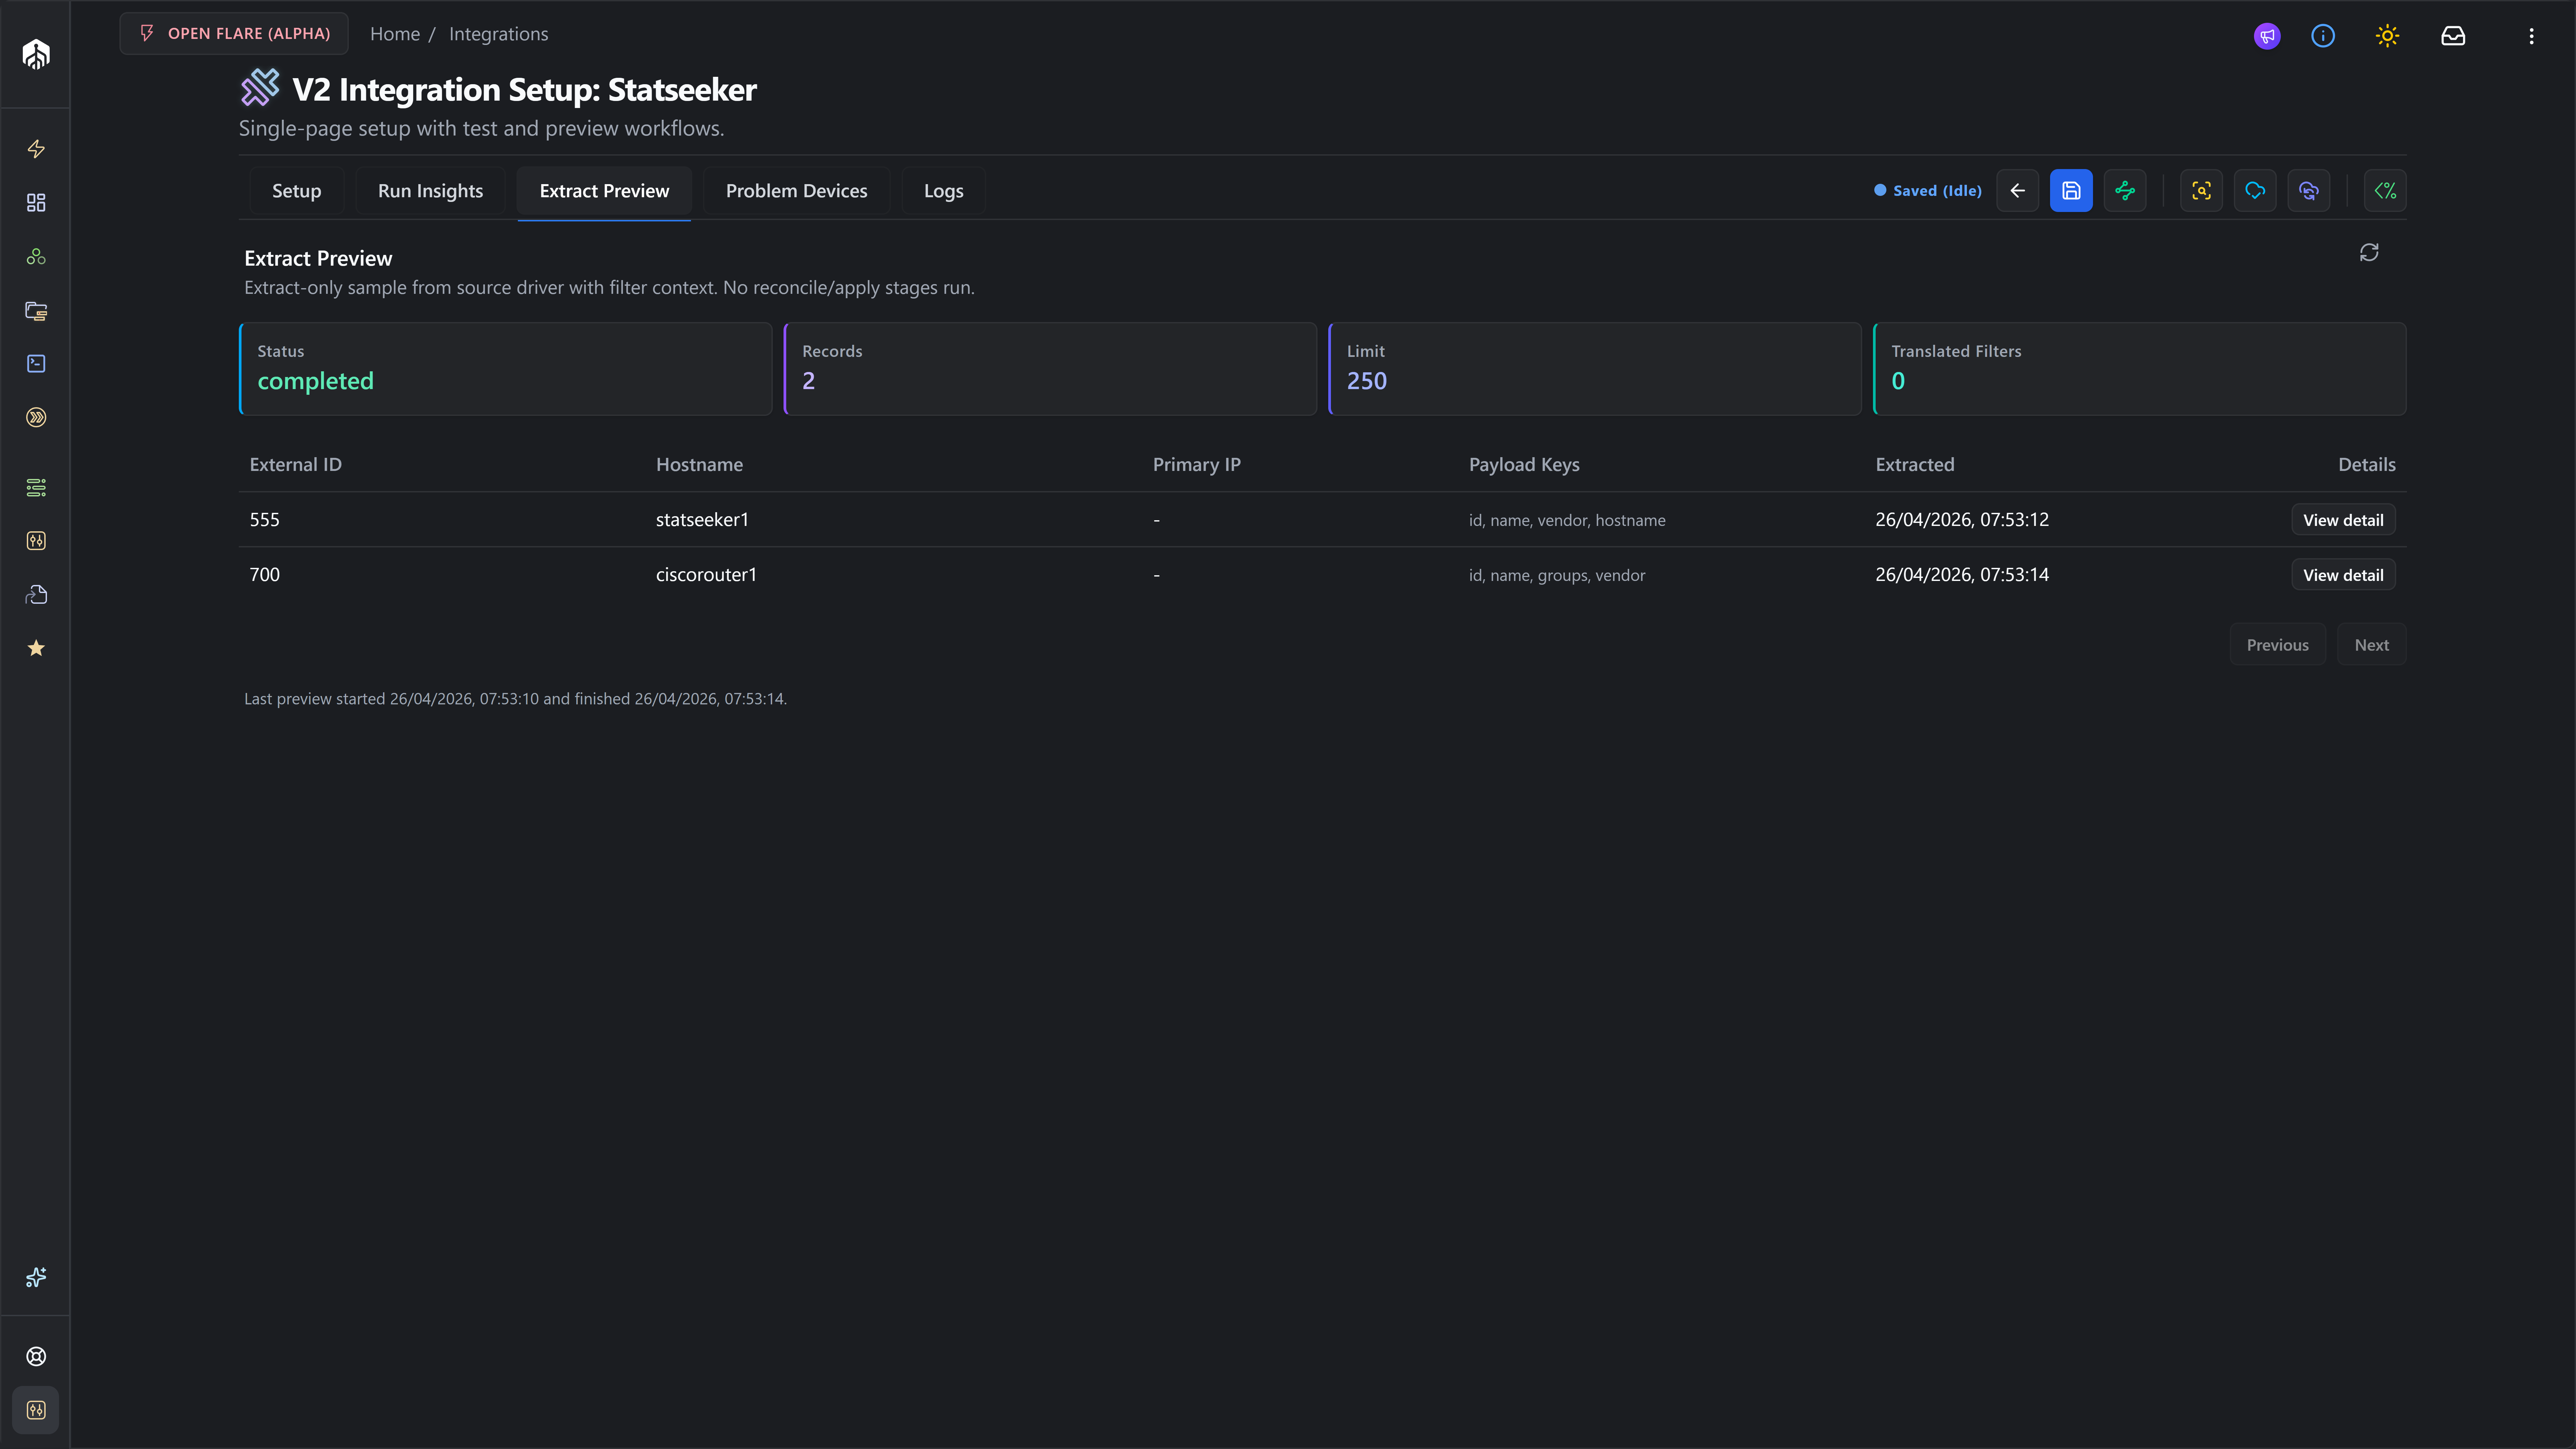
Section titled “Step 3 — Run an Extract Preview”Return to Settings → Integrations → V2 → Statseeker and click Extract Preview in the action bar (amber download icon).
Extract Preview hits Statseeker exactly the way a real sync would, but stops the moment the records come back — no canonicalize, no reconcile, no writes. Use it to confirm your filter set returns the devices you expect.

Statseeker supports filters on:
name(operators:equals,contains,in)group(operators:equals,in) — translated to thegroupsquery parameterstatus(operators:equals,in)
Open a row’s Details hover to see the full raw payload — confirm name, the chosen IP field (ip_address / ip / primary_ip / host) and the group/tag value used for profile resolution are all present.
For the full anatomy of this tab, see the Extract Preview Tab reference.
Step 4 — Run a Sync Preview
Section titled “Step 4 — Run a Sync Preview”Click Preview Sync in the action bar (sky icon). Sync Preview runs the complete pipeline through decide and stops without writing:
validate_setup— repeats Test Connection / credential checks.extract— same call as Extract Preview, but the records are persisted tointegration_source_records.canonicalize— normalizes each record into the canonical device shape; flags missing hostname/IP or unresolved profiles asinvalid.reconcile— matches each candidate against existing rConfig devices using identity fingerprints; returns a tier ofstrong/medium/ambiguous/none.decide— combines the match with policy to produce acreate,update,skiporconflictper candidate.
Switch to the Run Insights tab to inspect the result.
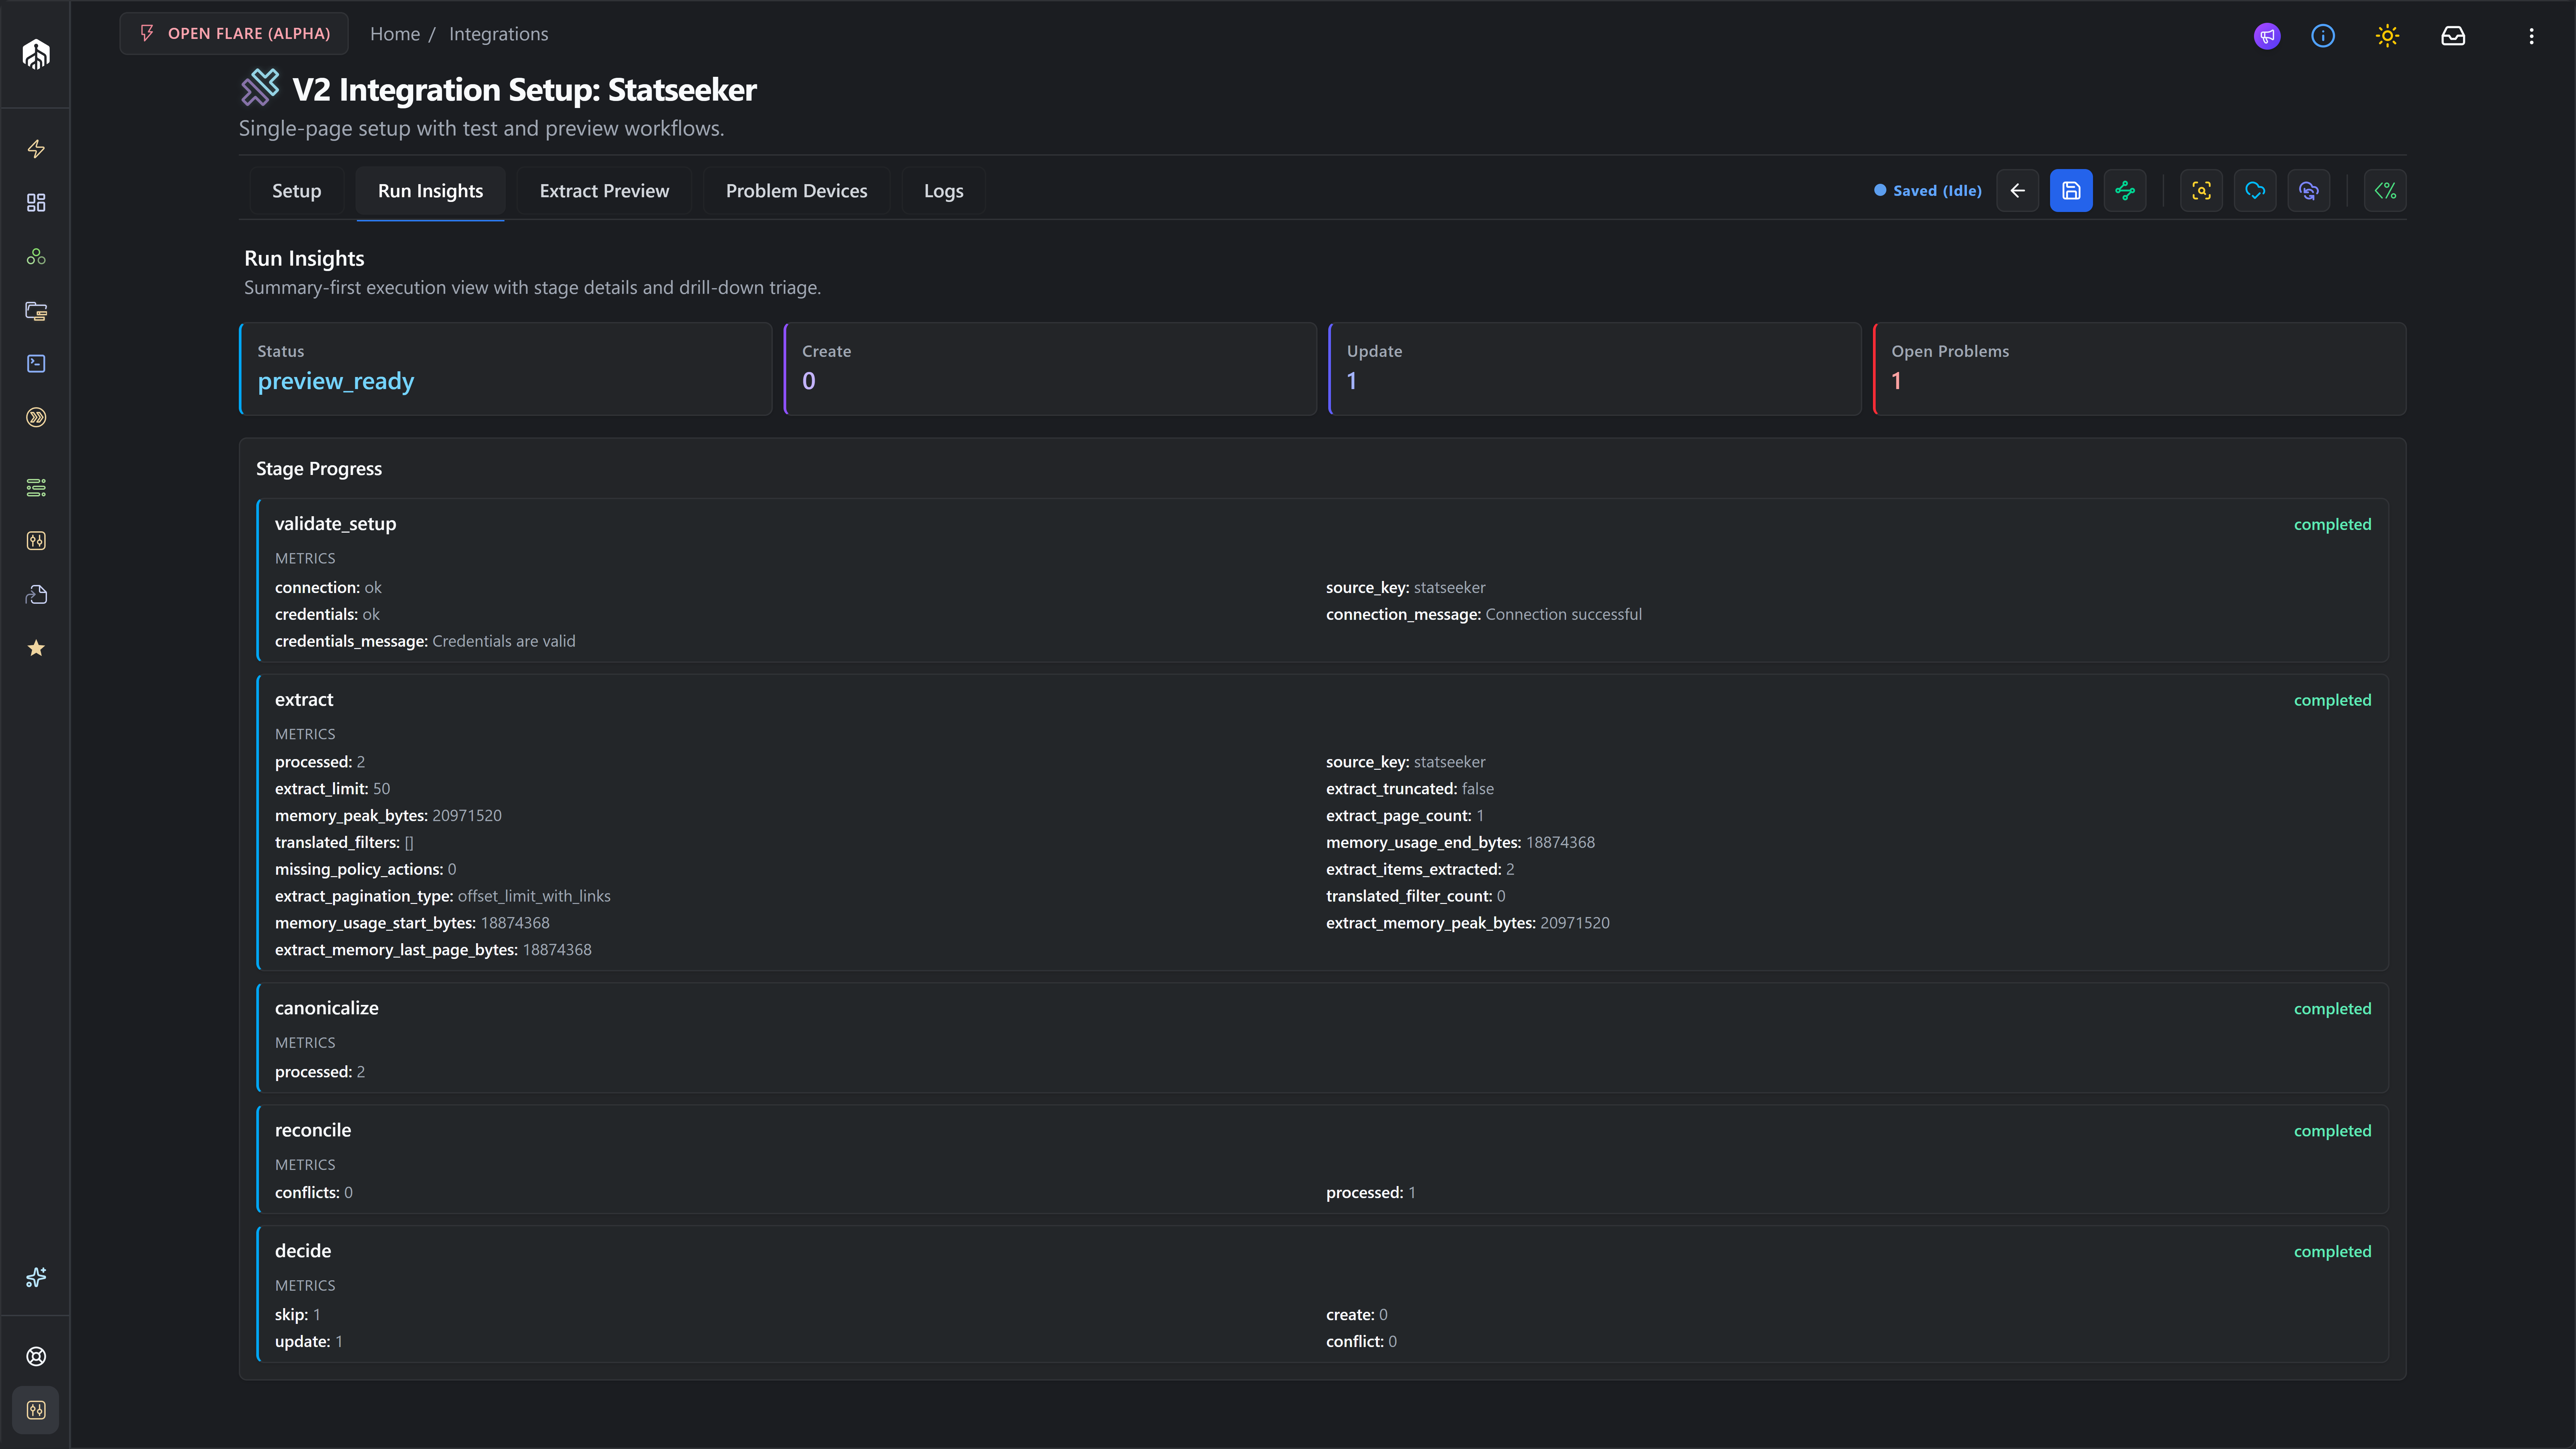
The four summary cards tell you the headline:
- Status — should read
preview_readyfor a clean preview. - Create — candidates that would be created on Apply.
- Update — candidates that would update an existing device.
- Open Problems — anything that needs review before Apply.
Below, each pipeline stage shows its own metrics. For Statseeker the most-watched ones are:
extract.items_extracted— should match the Extract Preview count (within filter scope).canonicalize.invalid— non-zero means missing hostname / primary IP, or unresolved Device Profile slug.reconcile.ambiguous— non-zero means more than one rConfig device matches the same Statseeker device.
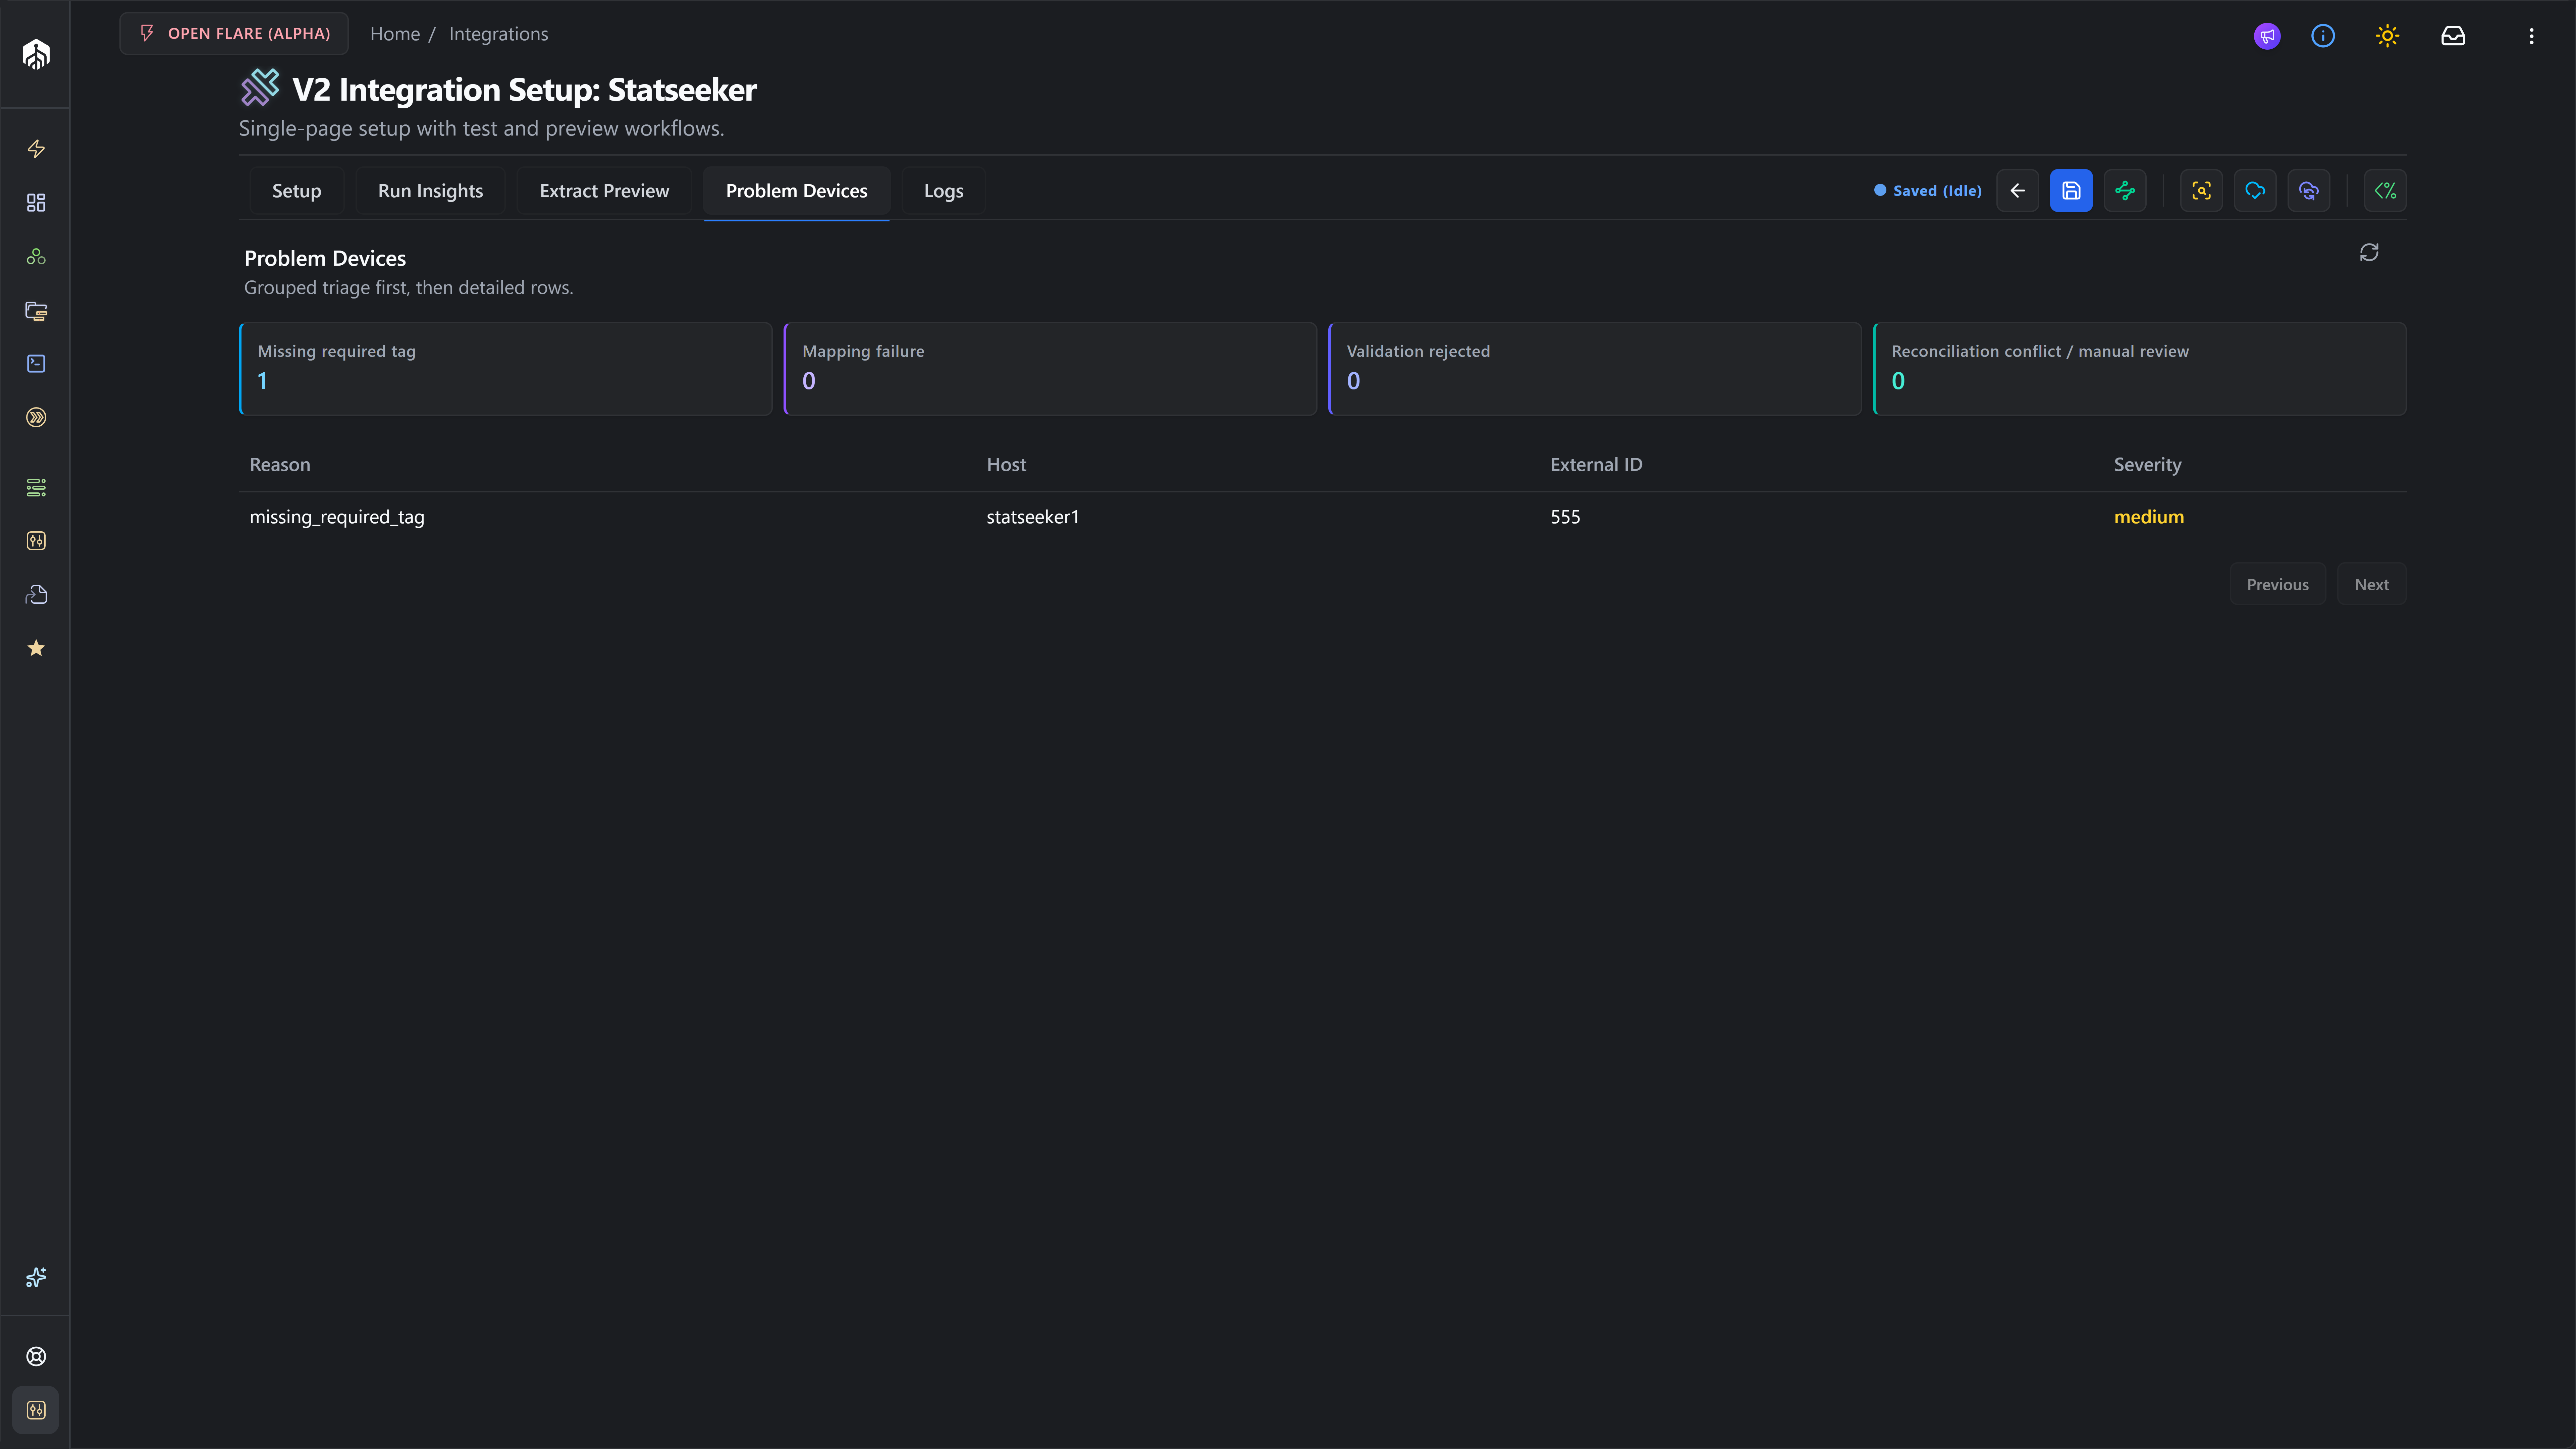
If Open Problems is greater than zero, switch to the Problem Devices tab and triage the rows.
For the full anatomy of these tabs, see the Run Insights Tab reference and Problem Devices Tab reference.
Step 5 — Run a Full Sync (Apply)
Section titled “Step 5 — Run a Full Sync (Apply)”When the Sync Preview decisions look correct and Open Problems is at an acceptable level, click Full Sync in the action bar (indigo icon).
Full Sync re-runs the full pipeline and finishes by executing the apply stage:
- Creates new devices for each
decision = create. - Updates existing devices for each
decision = update. - Assigns the resolved Device Profile to each affected device.
- Syncs canonical tags onto the device when Import Source Tags was on at Setup.
- Updates
integration_device_links(first_seen,last_seen). - Schedules an initial configuration backup for newly created devices.
Re-check Problem Devices after Apply — Apply does not auto-resolve ambiguous_match or conflict rows; those still need a human.
Step 6 — The Debug Console
Section titled “Step 6 — The Debug Console”For any of the runs above, you can swap the action-bar button for the Open Debug Console button (shimmer icon). The Debug Console runs the same Artisan command synchronously and streams its native stdout/stderr into a modal:
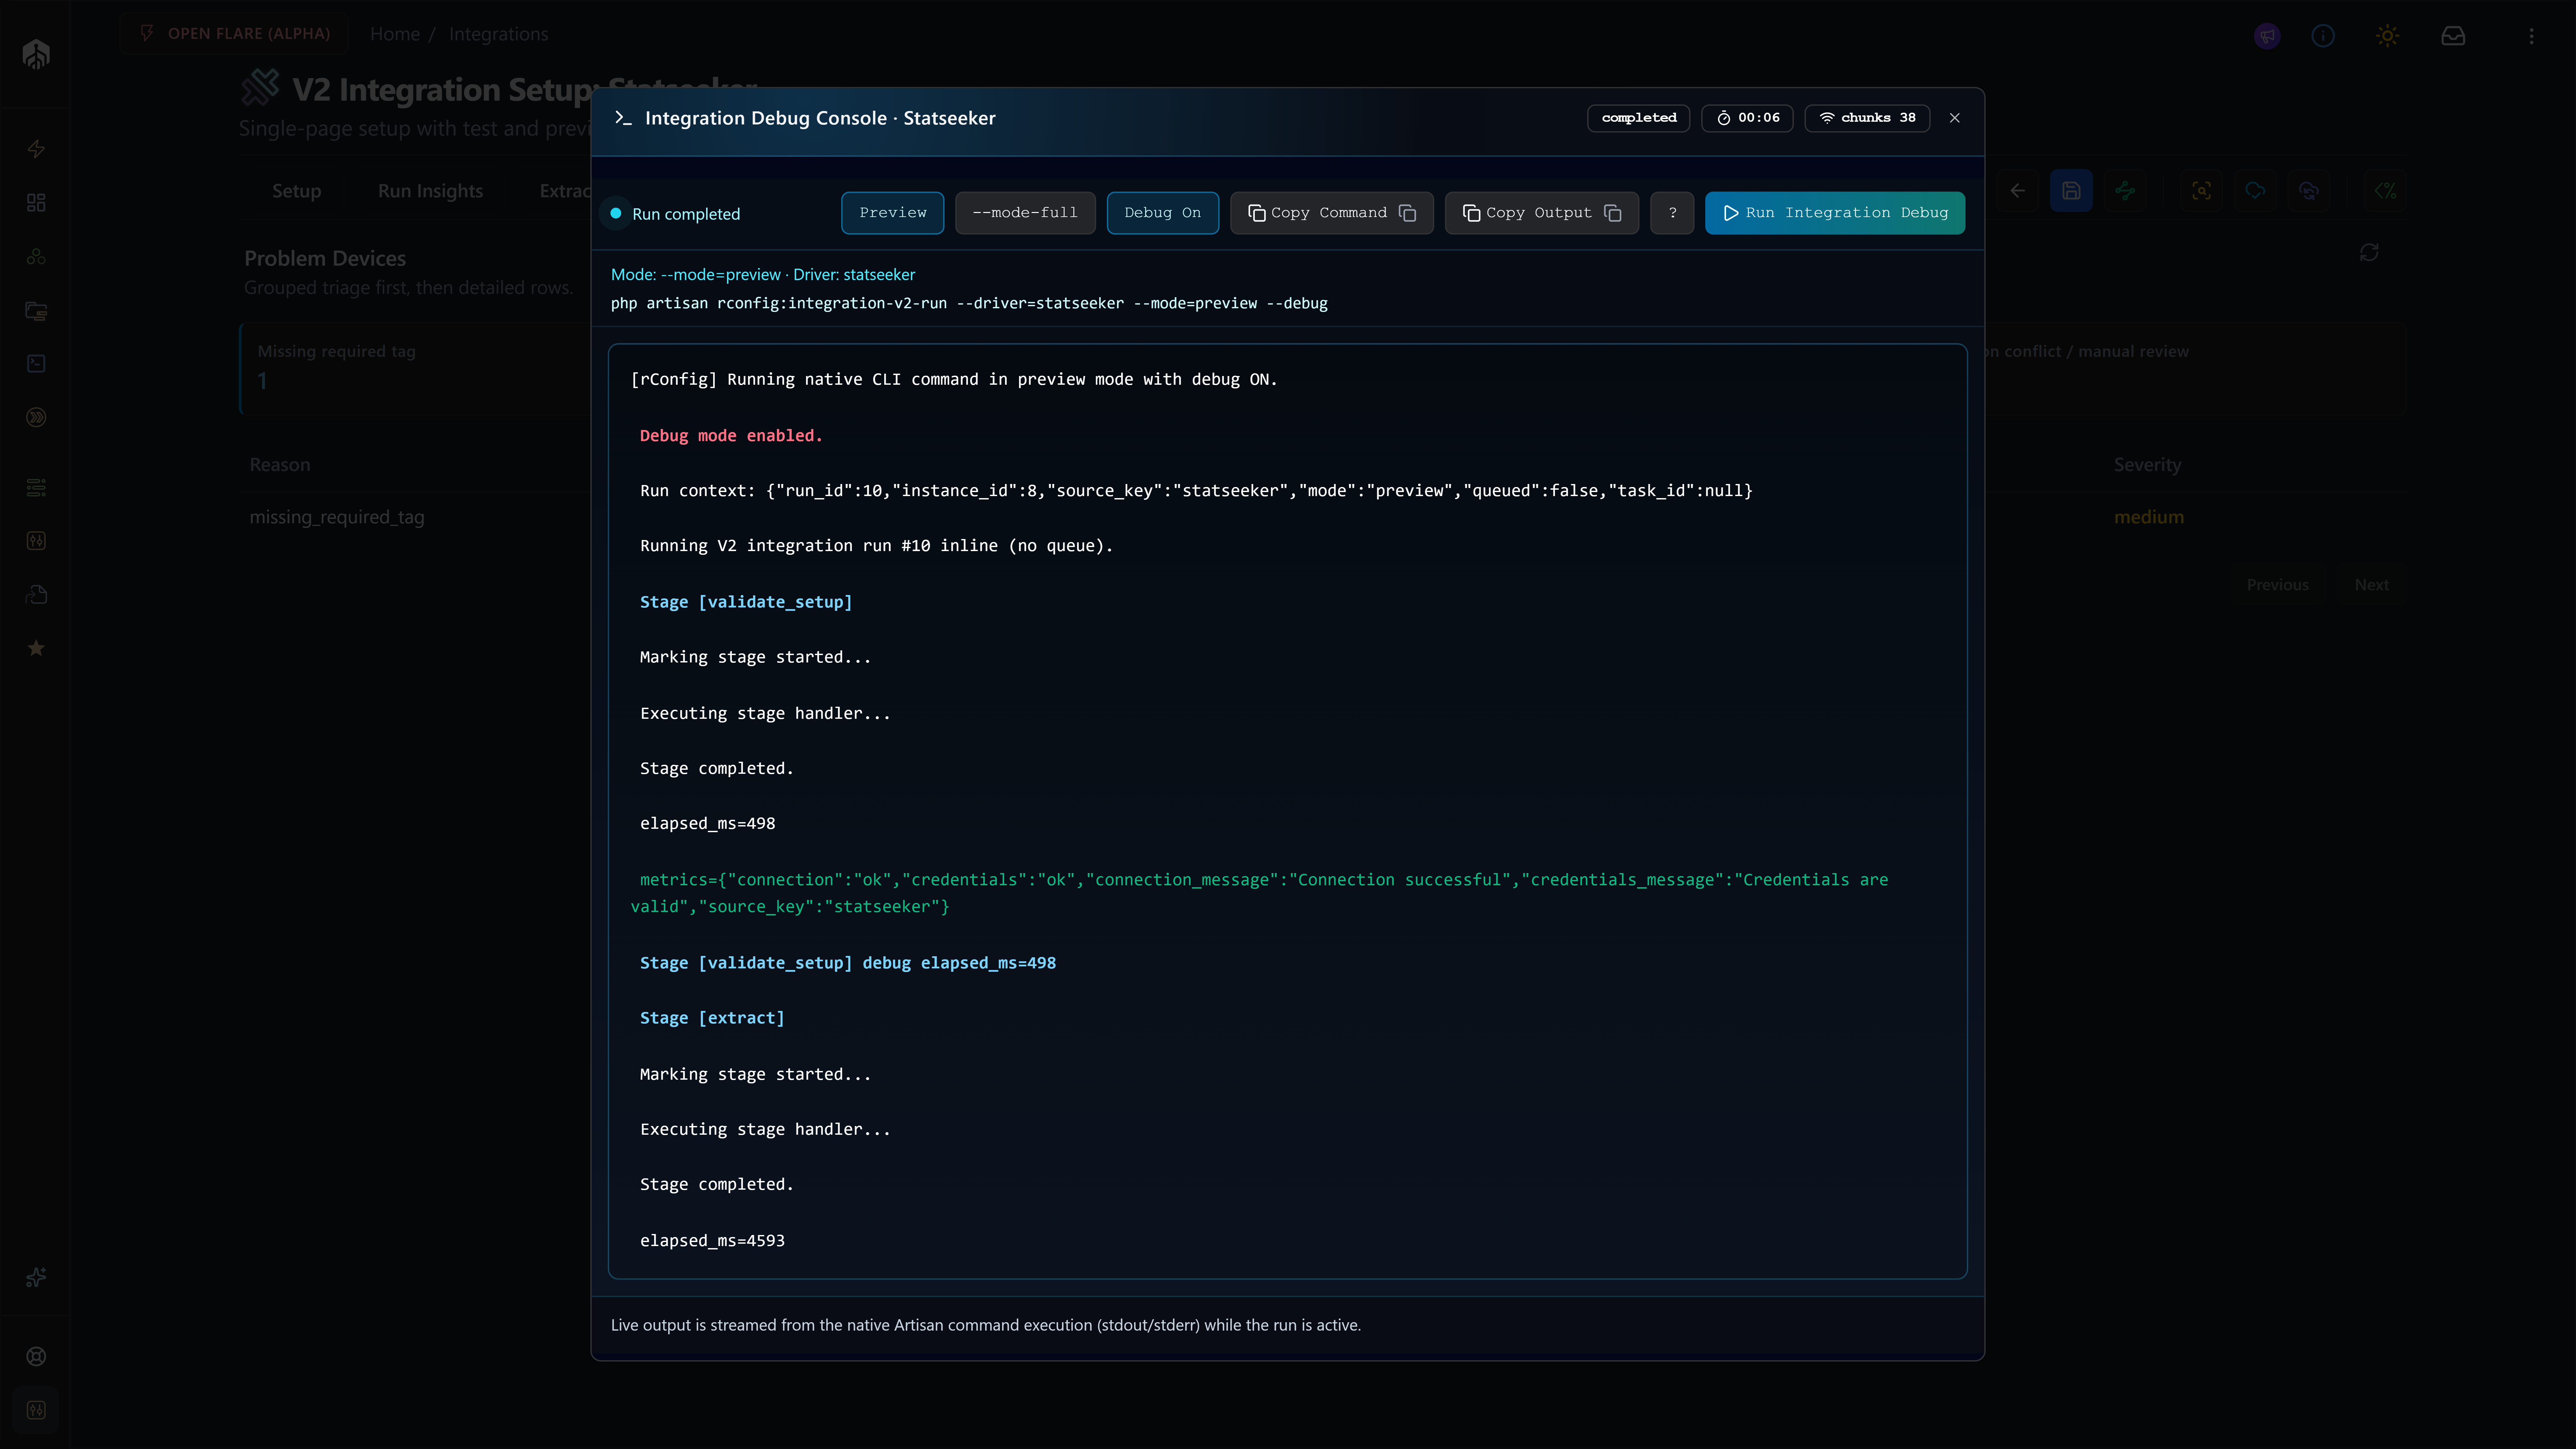
The dialog gives you:
- Mode toggle — Preview / Apply.
- Debug toggle — adds
--debugfor per-stage timings and the chained exception trace on failure. - The exact command line that will run, and a Copy Command button to run it from a terminal instead.
- A live phase indicator (
validating,extracting,canonicalizing, …) and an elapsed counter. - A streamed output console with a Copy Output button — paste straight into a support ticket.
- A decision-reason crib sheet behind the ? button.
Use the Debug Console when:
- You need to watch a run live, instead of waiting for Run Insights.
- A run is failing and you need the chained exception trace.
- You want to capture a copy-pasteable transcript for a support ticket.
For the full anatomy of the dialog, see the Debug Console reference.
Step 7 — Schedule the Sync
Section titled “Step 7 — Schedule the Sync”Once a manual Full Sync completes cleanly, schedule it. Navigate to Scheduled Tasks → Add Task → Integration V2 Job, pick the Statseeker instance, choose Apply mode, and set the cron schedule.
A common production pattern:
- Hourly Preview — drift detection only, no writes. Surfaces new Problem Devices fast.
- Nightly Apply — commits real changes during the maintenance window.
The scheduled task ID is forwarded to the run via --task-id=<id> so completion notifications fan out correctly.
CLI Reference
Section titled “CLI Reference”The same V2 commands work for Statseeker as for every other driver:
# Sync Preview (does not write)php /var/www/html/rconfig8/current/artisan rconfig:integration-v2-run --driver=statseeker --mode=preview
# Full Sync (Apply) by explicit instance ID, with debug outputphp artisan rconfig:integration-v2-run 21 --mode=apply --debug
# Queue an async run (worker picks it up)php artisan rconfig:integration-v2-run 21 --mode=apply --queue| Option | Shortcut | Description |
|---|---|---|
--driver= | Source key (statseeker). Alternative to instance ID when one instance only. | |
--mode= | preview (default) or apply. | |
--trigger= | -t | Trigger type for audit metadata (default manual). |
--debug | -d | Verbose stage timings, metrics, chained exceptions on failure. |
--task-id= | Associate the run with a Scheduled Task for completion notifications. | |
--queue | Dispatch to the queue instead of running inline. |
Driver Reference
Section titled “Driver Reference”Statseeker fields the driver reads
Section titled “Statseeker fields the driver reads”| Canonical field | Statseeker payload paths checked, in order |
|---|---|
| External ID | id → deviceid → cdt_deviceid |
| Hostname | name → hostname → device_name → sys_name |
| Primary IP | ip_address → ip → primary_ip → host |
| Serial | serial → serial_number |
| Vendor | vendor → manufacturer |
| Model | model → device_model |
| Tags / Profile | tags → group → groups → group_name → group_path |
If hostname or primary IP cannot be resolved from any of these paths, the candidate is marked invalid during canonicalize.
Reconciliation policy
Section titled “Reconciliation policy”- Strong match — by
instance_link_external_id(i.e. a candidate whose Statseekeridwas previously seen on another run). - Medium match — hostname and primary IP both unique in rConfig.
- No automatic medium-match auto-relink, no cross-family matching — defaults are conservative.
Missing upstream policy
Section titled “Missing upstream policy”The default mode is disable_link_only — when a previously-synced Statseeker device disappears from the upstream, rConfig disables the integration_device_links row but leaves the device intact. Other modes are available in the Policies view.
Troubleshooting
Section titled “Troubleshooting”- Connection works, credentials fail. Confirm the
auth_path(default/ss-auth) is correct for your Statseeker version. Confirm the chosen credential type matches what the deployment accepts (bearer vs API token vs username/password). - Extract returns zero devices. Run Extract Preview, double-check the
name/group/statusfilters, and confirm the Statseeker user can see the target devices in the Statseeker UI. - Canonicalize flags candidates as invalid. Check the upstream record has at least one of the hostname paths and one of the primary-IP paths populated. The Statseeker driver tolerates sparse records by hydrating from
/api/v2.1/cdt_device/{id}/{field}— if hydration also returns empty, the row is genuinely missing data. - Profile resolution fails. Make sure the Statseeker group/tag value matches an active rConfig Device Profile slug. Either rename groups upstream or set a default profile on the integration instance.
- Reconciliation produces ambiguous matches. Two rConfig devices share the same hostname or primary IP. Resolve in Problem Devices by picking the correct target, or de-duplicate the device list.
- Run truncated. Check the
extract.truncatedandextract.truncation_reasonmetrics on the Run Insights stage card. Statseeker’s pagination cap is configurable in the schema (endpoints.devices.pagination.max_pages); raise it or tighten filters.