
How to connect an AI agent to rConfig V8 over MCP
How to connect an AI agent to rConfig V8 over MCP
Section titled “How to connect an AI agent to rConfig V8 over MCP”After reading this page, you can generate an MCP access token and connect an external AI agent (Claude Code, Cursor, Gemini CLI, or any other MCP-compatible client) directly to your rConfig instance.
When to use this
Section titled “When to use this”Use this page when you want an AI coding agent or copilot to query your rConfig inventory, configs, and compliance status directly, instead of copying data into the agent by hand. This is the live, always-on counterpart to the downloadable Skill: connect here for an ongoing session; download a Skill when the agent needs a portable, offline-installable package instead.
Prerequisites
Section titled “Prerequisites”- Access to the AI Center in rConfig
- An MCP-compatible agent or client (Claude Code, Cursor, Gemini CLI, or another MCP client)
What the MCP server exposes
Section titled “What the MCP server exposes”The MCP endpoint is read-only end to end. Every tool it exposes reads data, none of them write to a device, a config, or rConfig’s own records.
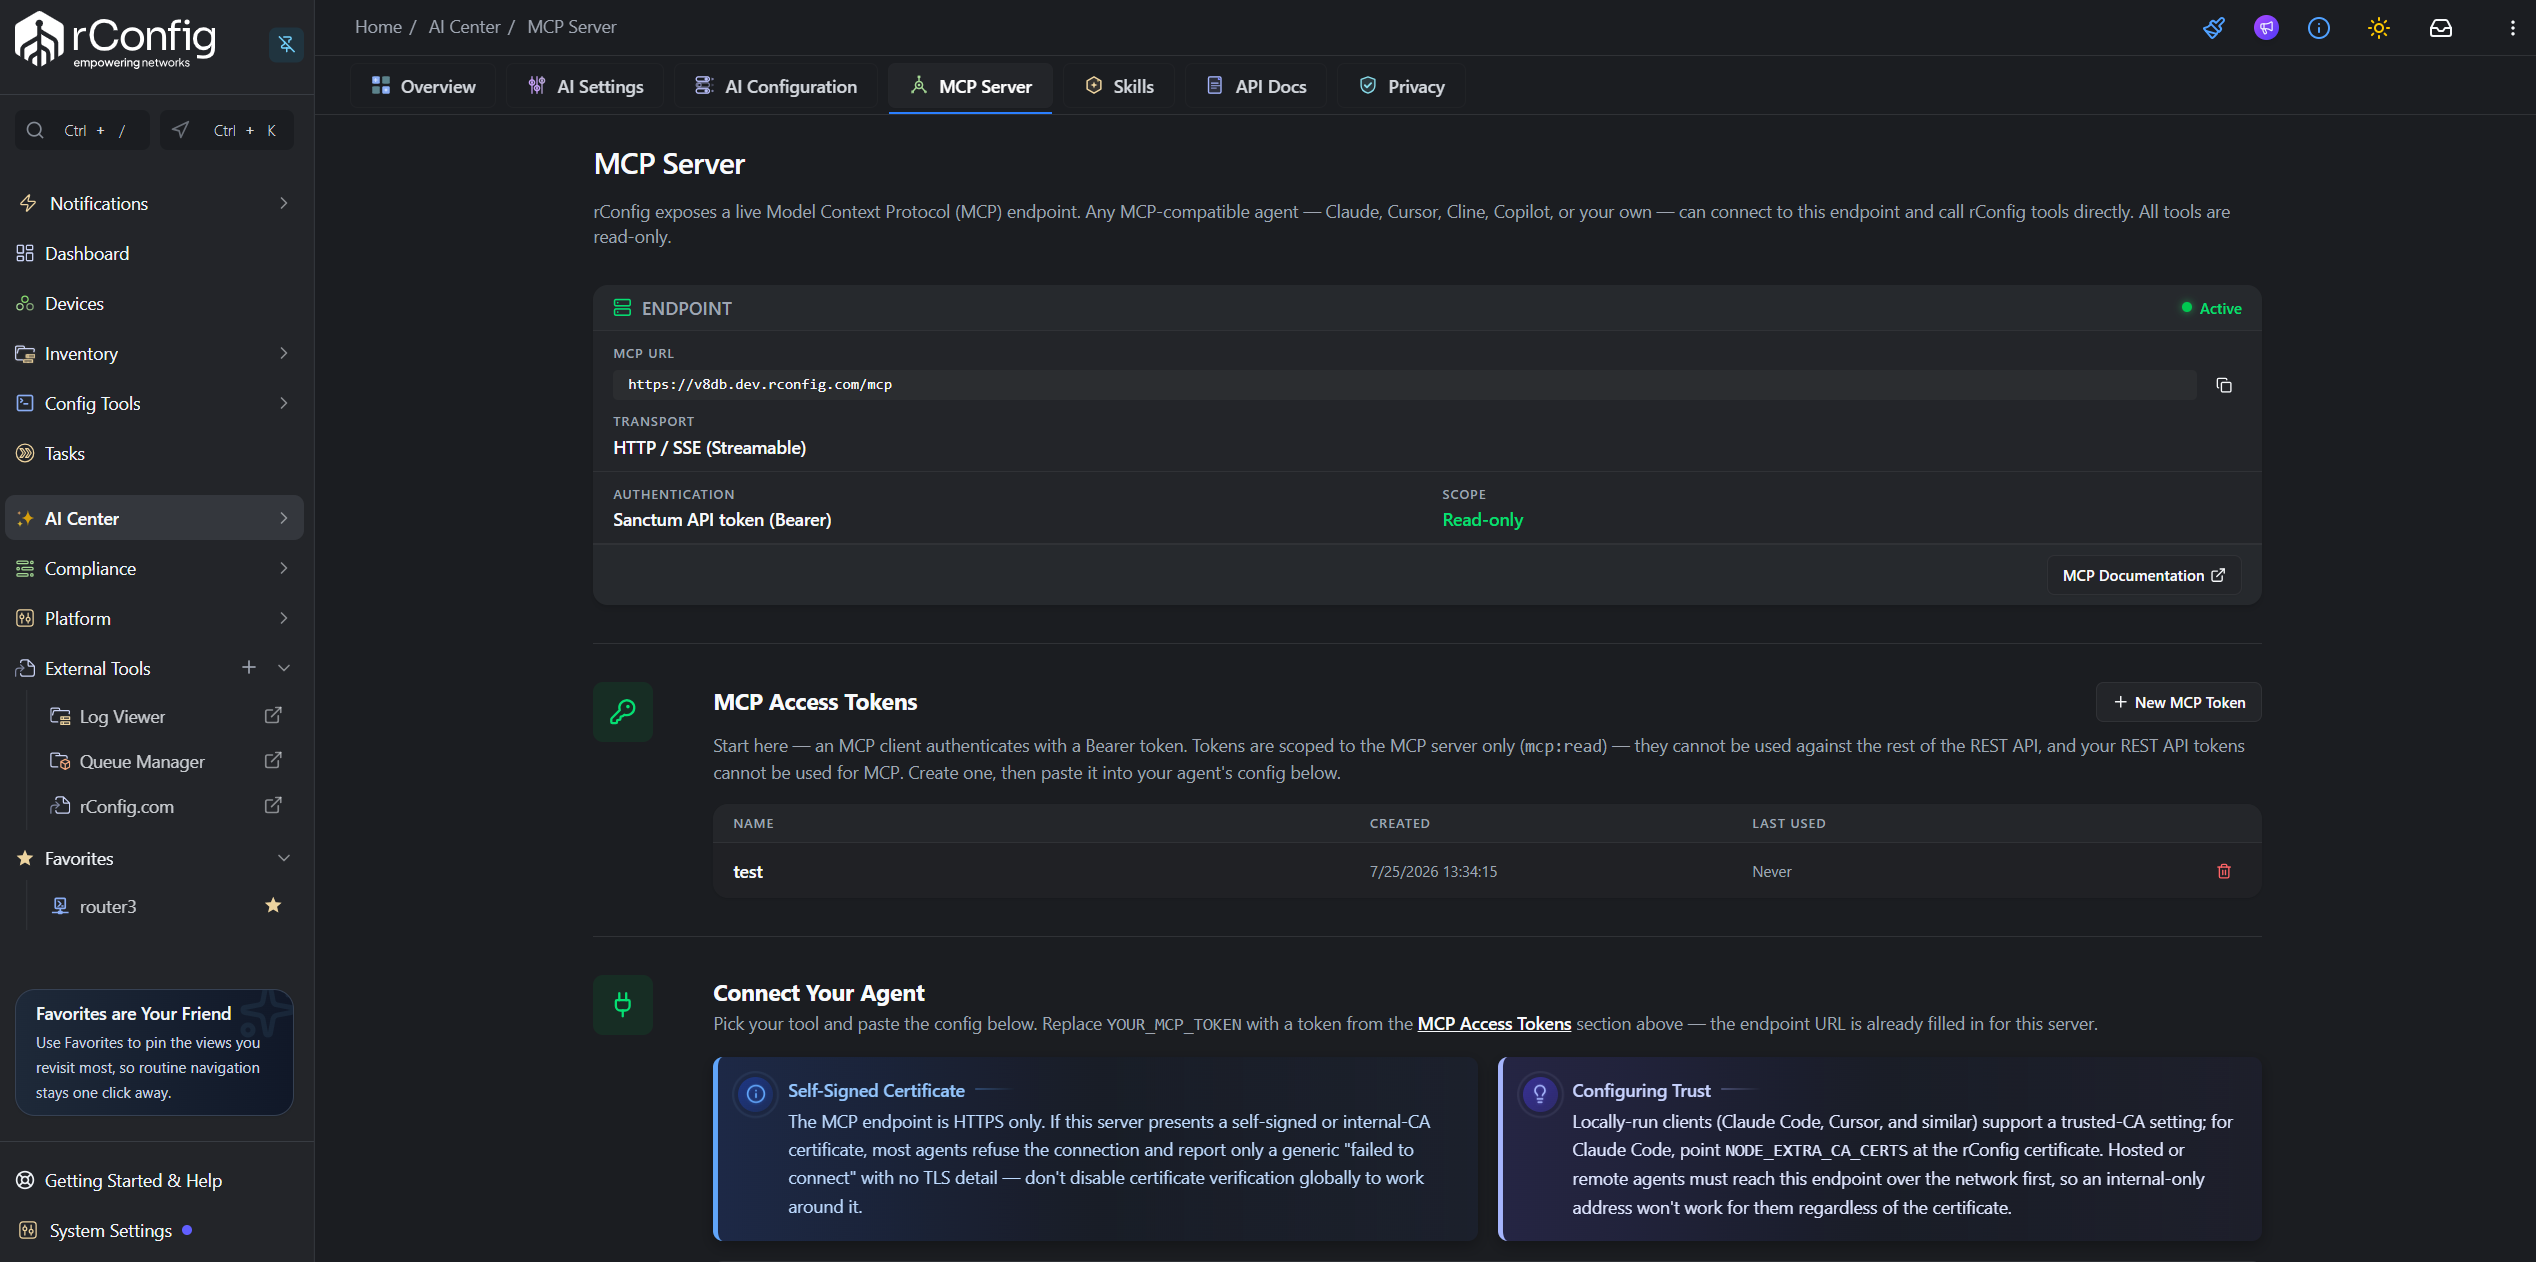
| Setting | Value |
|---|---|
| Transport | HTTP / SSE (Streamable) |
| Authentication | Sanctum API token (Bearer) |
| Scope | Read-only |
| Tool | Description |
|---|---|
get_devices | List devices in inventory |
get_device | Get details for a single device |
get_latest_config | Get a device’s most recent configuration |
get_config_history | Get a device’s configuration version history |
get_config_diff | Get the diff between two configuration versions |
search_configs | Search across stored configurations |
get_compliance_status | Get a device’s policy compliance status |
Step-by-step walkthrough
Section titled “Step-by-step walkthrough”1. Open the MCP Server tab
Section titled “1. Open the MCP Server tab”- Click AI Center in the left sidebar.
- Select the MCP Server tab.
The endpoint URL is shown at the top with a copy button. If you don’t have a token yet, a banner reads: “The MCP endpoint is live, but you don’t have an MCP access token yet…” with a Create MCP Token button.
2. Create an MCP access token
Section titled “2. Create an MCP access token”Click New MCP Token (or Create MCP Token from the banner). In the Create MCP Token dialog, give the token a name and click Generate Token.
3. Connect your agent
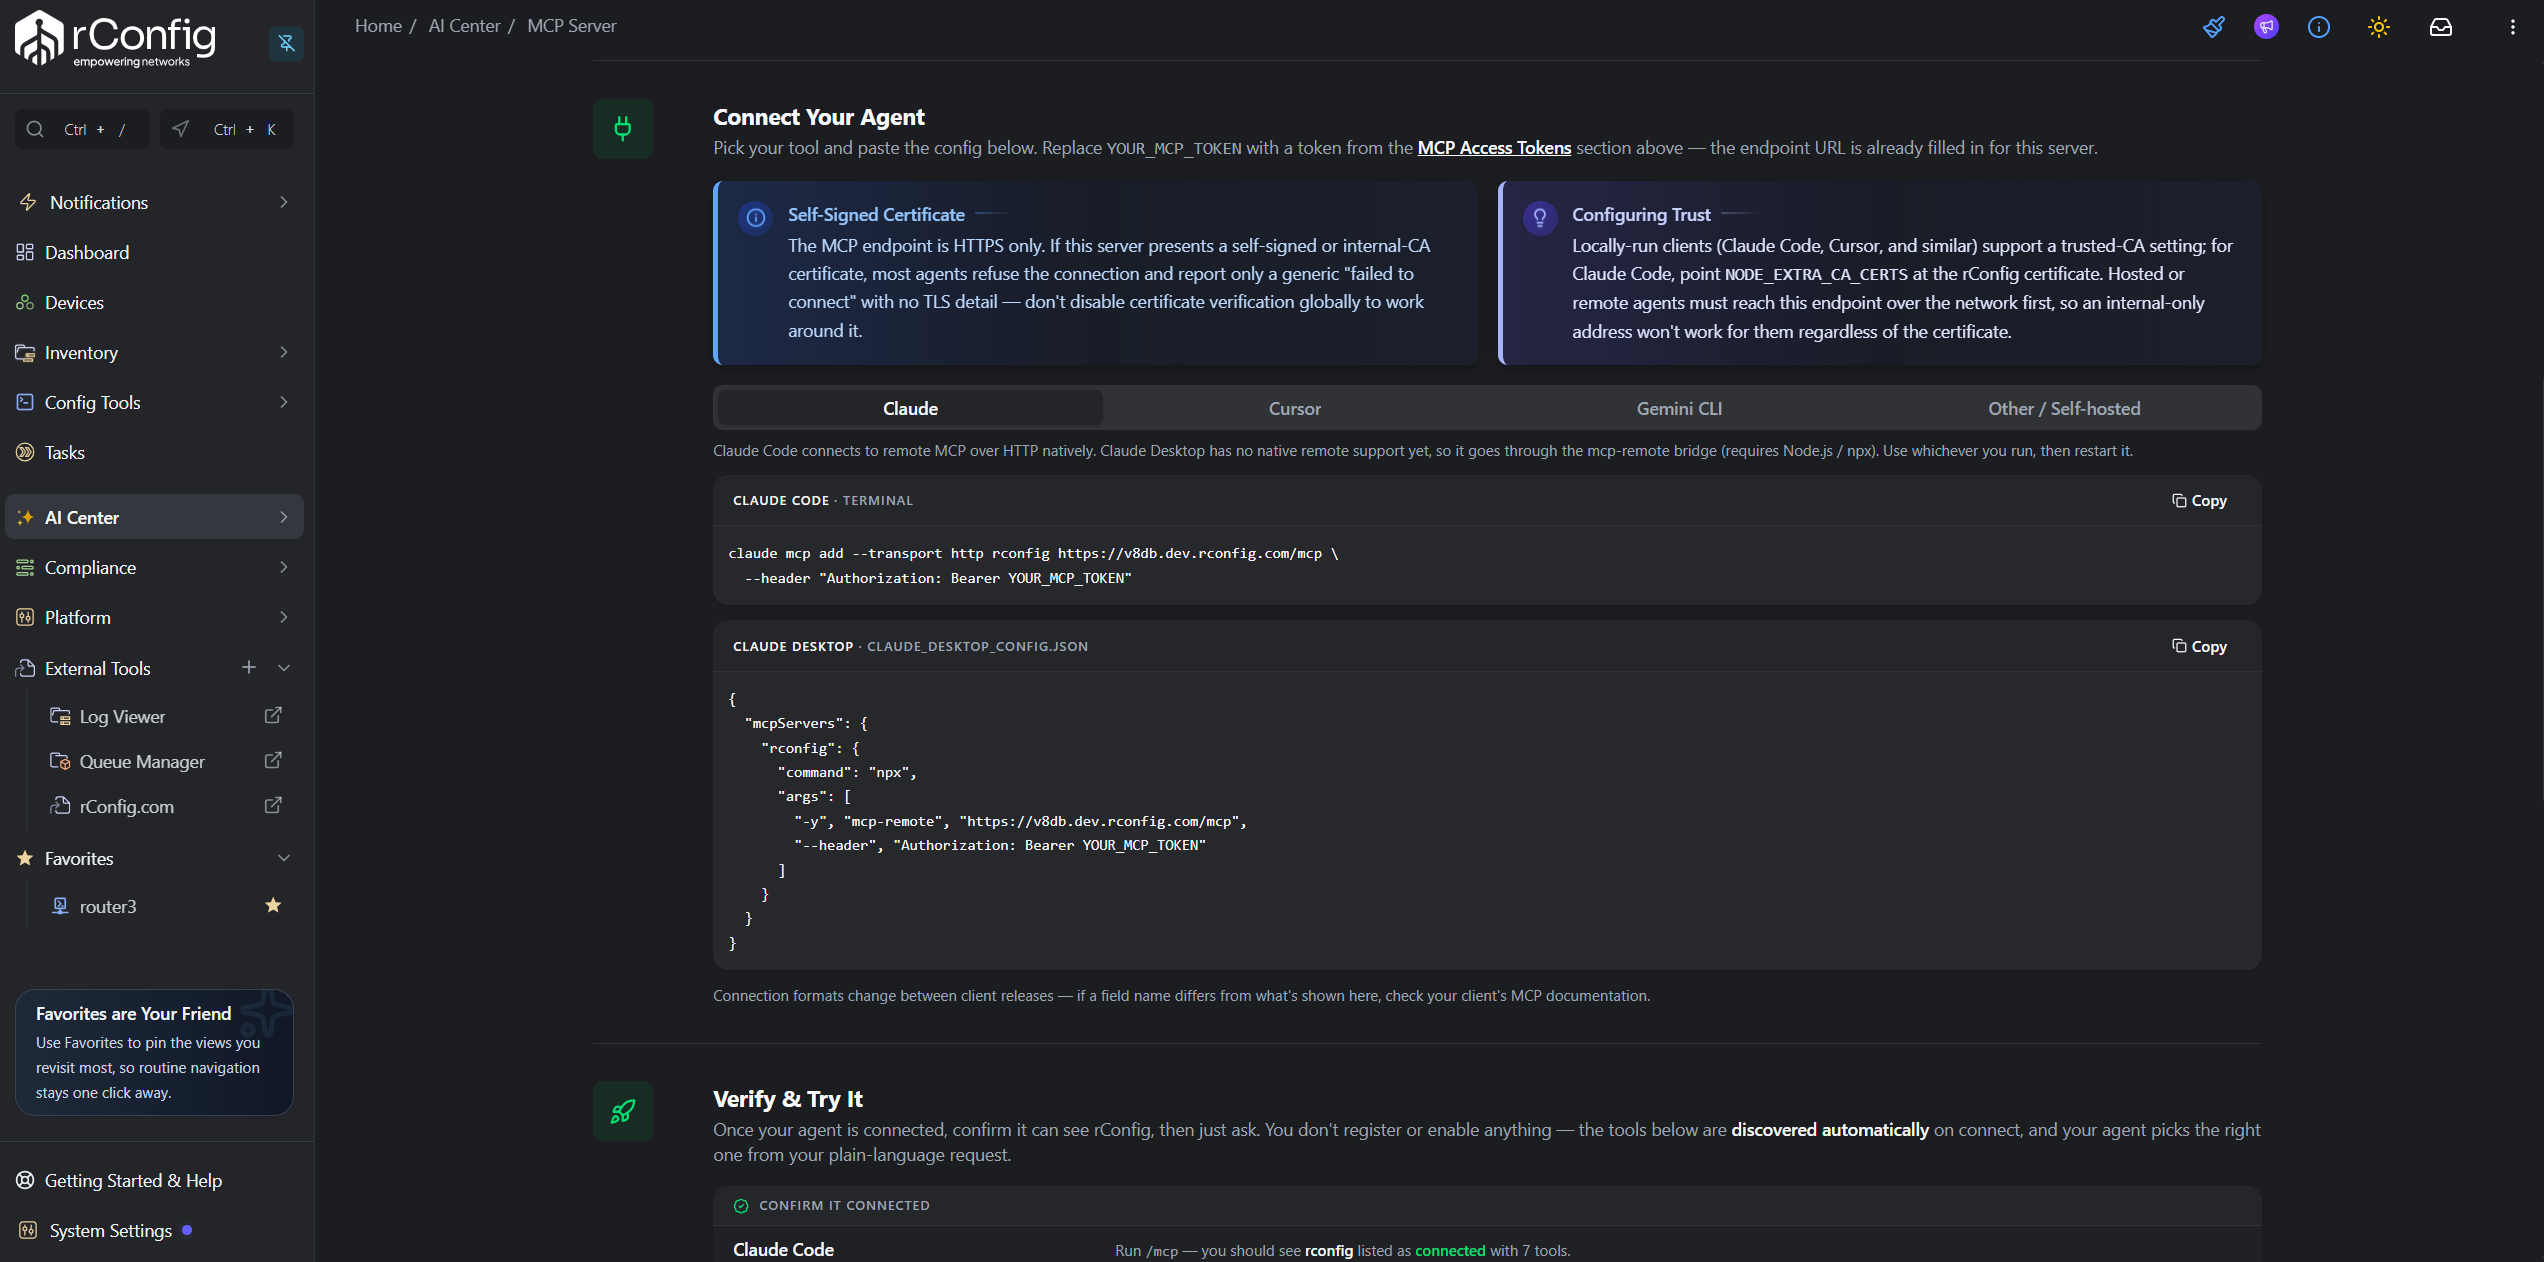
Section titled “3. Connect your agent”In the Connect Your Agent section, select the tab for your client and follow its snippet.
Claude Code connects to remote MCP over HTTP natively. Claude Desktop has no native remote MCP support yet, so it goes through the mcp-remote bridge (requires Node.js/npx).
Claude Code (terminal):
claude mcp add --transport http rconfig <endpoint> --header "Authorization: Bearer YOUR_MCP_TOKEN"Claude Desktop (claude_desktop_config.json):
{ "mcpServers": { "rconfig": { "command": "npx", "args": [ "-y", "mcp-remote", "<endpoint>", "--header", "Authorization: Bearer YOUR_MCP_TOKEN" ] } }}Replace <endpoint> with the URL shown at the top of the MCP Server tab, and YOUR_MCP_TOKEN with the token you generated.
Use the endpoint URL and Bearer token shown on the MCP Server tab with your client’s own MCP connection configuration. Configuration syntax varies by client and release. See the client-specific instructions and snippet shown in that tab in the app, and check your client’s own MCP documentation if a field name doesn’t match what’s shown there.
4. Verify the connection
Section titled “4. Verify the connection”Use the Verify & Try It section on the same page for example prompts mapped to each tool, to confirm your agent can reach rConfig before relying on it for real work.