

Collecting elements
Collecting elements
Section titled “Collecting elements”Once an element has been discovered, it behaves like any other rConfig device: it has its own config snapshots, history, diffs, and schedule. The only difference is how rConfig reaches it.
Routed through the gateway
Section titled “Routed through the gateway”An element has no management address of its own, so rConfig collects it in-band through its gateway:
- Look up the element’s gateway. A dual-homed element has more than one, and the primary is used first.
- Open a session to the gateway and log in with the gateway’s credentials.
- Send the element’s commands with its TID in the address field, for example
RTRV-EQPT:RNE-STL:ALL:100;. - The gateway routes each command to the element and returns its reply, which rConfig saves against the element’s device record.
Step 4 is where the platforms differ. A Ciena or Cisco gateway echoes the addressed TID in the response header, so rConfig can confirm the reply came from the element rather than from the gateway answering as itself. An Infinera DTN-X answers under its own system name even when relaying, so that check cannot be made there and is not applied. See the Infinera page.
You collect an element the same way you collect anything else: open it and click Download Now, add it to a task, or run the CLI against its device ID.
# Collect a device by ID (example device ID 6512).# An element is routed through its gateway automatically.php artisan rconfig:download-device 6512 -d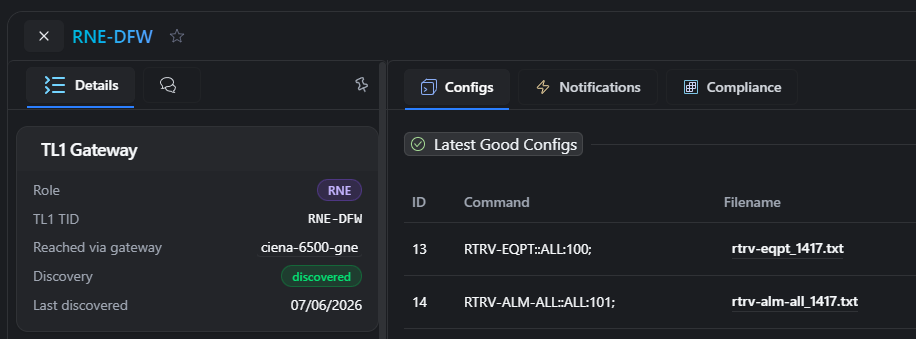 The TL1 Gateway panel on an element, linking back to its gateway
Dual-homed elements
Section titled “Dual-homed elements”An element reachable through more than one gateway is collected through its primary. If a session through that gateway cannot be established, rConfig tries the next one before reporting a failure, and records the failover in the device event log.
Which gateway is primary is simply the one that discovered the element first. If that path later drops out of the neighbour list, a surviving path is promoted automatically.
What you see
Section titled “What you see”The TL1 Gateway panel sits at the top of the device view:
- On a gateway: the list of elements behind it, each linking to its own device view. An element reachable through another gateway as well carries a dual-homed marker.
- On an element: its TID, its discovery state, and every gateway it can be reached through, with the primary marked.
Config snapshots, diffs, and history work on an element exactly as they do on a directly-connected device.
Connection limits
Section titled “Connection limits”Every element collection opens its own session to the gateway, so a gateway fronting a hundred elements sees a hundred logins per run. Left unchecked, a nightly task would attempt them as fast as the queue can run them, and a node that refuses connections past its own limit fails whichever collections lose that race.
rConfig caps how many sessions it opens to one gateway at a time. The limit is tl1MaxConnections on the gateway’s connection template, and it defaults to 20. Elements inherit their gateway’s limit, so you set it once on the gateway. See setup for where it goes.
A collection that finds no free slot is not a failure. Nothing was dialled, so the device is not marked unreachable and no failure notification is sent. It waits and retries, and gives up after an hour with a “gateway at connection capacity” message in the device event log. An element reachable through more than one gateway will use its other gateway rather than wait.
The TL1 Gateway panel on a gateway shows connections in use against the limit. Turn on Live to watch it during a run: on a busy gateway it sits at the limit and drains as collections finish.
Set the limit to what the node itself accepts. Too high and the node refuses connections; too low and a large gateway takes longer to work through its elements.
Scheduling
Section titled “Scheduling”Because each element is its own device, you schedule it independently. You no longer need to stagger large fleets across tasks to protect the gateway: the connection limit paces them for you.
Next step: Troubleshooting TL1 collection.